Fix: We Can’t Create a Recovery Drive on this PC
Some Windows users are seeing the “We can’t create a recovery drive on this PC” error when attempting to create a new recovery media on Windows. This issue is reported to occur on Windows 7, Windows 8 and Windows 10.
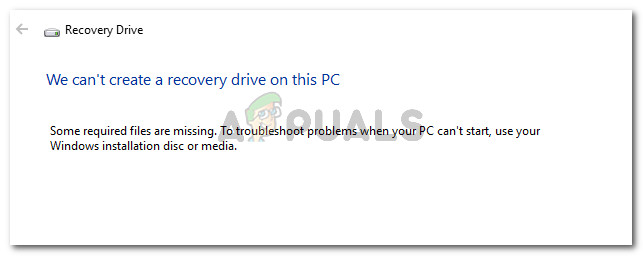
Some required files are missing.
What is causing the We can’t create a recovery drive on this PC error
We investigated this error message by looking at various user reports. Based on what we gathered, there are several common scenarios that will trigger this behavior. Here’s a list with potential culprits that might be responsible for the issue:
- The recovery partition information is lost – This is known to happen if the user has previously tried to clone the system on another drive.
- THe winre.wip file is missing from the computer – This file is responsible for holding the Windows recovery files. Without it, creating a recovery drive is no longer possible.
- Your current system construct doesn’t have a recovery environment – This is known to occur if the user has upgraded to Windows 10 from an older Windows version.
If you’re struggling to resolve this particular issue, this article will provide you with a list of verified troubleshooting guides. Below you have a collection of methods that other users in a similar situation have followed to resolve the error message permanently.
To make sure you don’t dive into unnecessary operations, follow the methods below in order – they are ordered by efficiency and severity.
Method 1: Recreating the recovery environment via CMD
Most users encountering this issue have managed to resolve the issue by using an elevated Command Prompt window to restore the recovery environment. Here’s a quick guide on how to do this:
- Press Windows key + R to open up a Run dialog box. Then, type “cmd” and press Ctrl + Shift + Enter to open up an elevated Command Prompt. If prompted by the UAC (User Account Control), choose Yes to grant admin privileges.|
Run dialog: cmd , then press Ctrl + Shift + Enter - In the elevated Command prompt type the following commands in order and press Enter after each one:
reagentc /disable

reagentc /setreimage /path \\?\GLOBALROOT\device\harddisk0\partition1\Recovery\WindowsRE

reagentc /enable
- Restart your machine and try to use the Recovery Disk Creator at the next startup.
If you’re still encountering the issue, move down to the next method below.
Method 2: Recovering the winre.wip file
Some users encountering the same issue have managed to resolve the issue after discovering that the winre.wim file was missing from their computer. This is one of the most common reasons why Windows users receive the We can’t create a recovery drive on this PC error.
It’s fairly uncommon for the winre.wim file to get lost, but it’s known to happen if the user deploys a deep cleanup scan with several 3rd party tools or after the user tries to clone the system on another drive.
If you’re suspecting that the winre.wim file might be missing, there are two different methods that you can follow in order to get it back in place. We will cover both approaches down below. Please follow whichever guide seems more convenable to your current situation and setup.
Option One: Fetching a copy of winre.wim from a different Windows system
For this method to work, you’ll need to have access to a different Windows system that has a healthy winre.wim file. Keep in mind that it needs to match the Windows version of the affected machine.
If this scenario is applicable to you, follow the steps below to retrieve the healthy winre.wim file:
- On the healthy Windows computer (not the machine that is displaying the error), press Windows key + R to open up a Run dialog box. Then, type “cmd” and press Ctrl + Shift + Enter to open up an elevated Command Prompt window.
Run dialog: cmd , then press Ctrl + Shift + Enter - In the elevated command prompt, type the following command to disable the Recovery environment and make the winre.wim file from available from the hidden recovery to C:\ windows \ system32 \ recovery.
reagentc /disableNote: REAgentC is a support tool that will set up a user-defined Windows recovery environment.
- Minimize the elevated Command Prompt and navigate to C:\ windows \ system32 \ recovery. Once you get there, copy the winre.wim file from that folder to a USB storage drive.
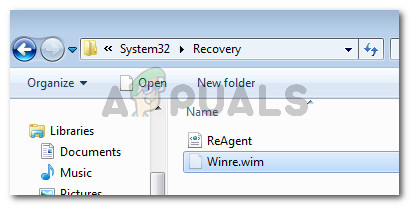
Fetching the winre.wim file - In the same elevated Command, type the following command to re-enable the Windows Recovery environment again:
reagentc /enable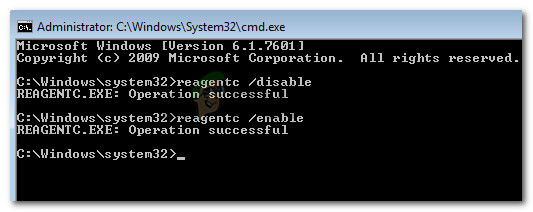
Re-enabling the Windows Recovery environment on healthy PC - Move to the affected machine and plug in the USB drive containing the winre.wim file. Then, copy it and paste it in C:\ system 32\ Recovery.
- With the winre.wim file restored, attempt to create a new recovery drive and see if the issue returns.
Option 2: Copying the winre.wim file from the installation media
Another approach that you can follow in order to retrieve the winre.wim file is to insert the installation media of your active OS and mount the install.wim. You will be able to copy the winre.wim file from there and then paste it inside the C:\ windows\ system32 \ recovery.
Note: This method is only confirmed to work with Windows 8.1.
Here’s a quick guide on how to do this:
- Insert or mount the Windows installation media.
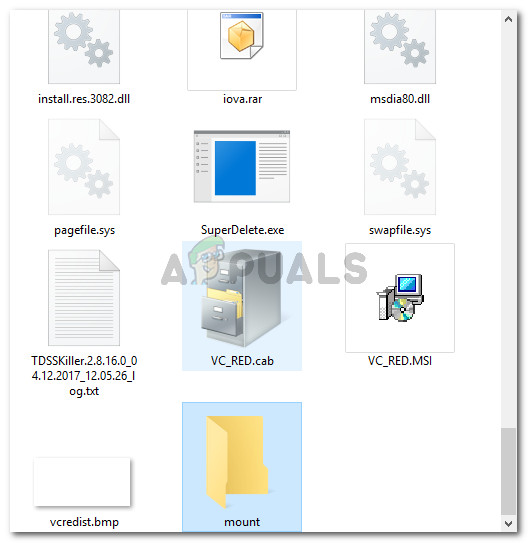
- Go to your OS drive (C:\) and create an empty directory called mount.
Creating an empty directory called mount - Press Windows key + R to open up a Run dialog box. Then, type “cmd” and press Ctrl + Shift + Enter to open up an elevated Command Prompt window. When prompted by the UAC (User Account Control), press Yes to grant administrative privileges.
Run dialog: cmd, then press Ctrl + Shift + Enter - In the elevated Command Prompt, type the following command to mount the install.wim file and make the winre.wim file visible inside the new directory that you previously created.
dism /Mount-wim /wimfile:D:\sources\install.wim /index:1 /mountdir:C:\mount /readonlyNote: Keep in mind that your installation media might be on a different drive. In this case, change the partition letter (D, in our case) accordingly.
- Using file explorer, navigate to C:\ mount \ windows \ system32 \ recovery and copy the Windre.wim file from there. Then, paste it in C:\ windows \ system32 \ recovery.
Pasting the winre.wim file in the recovery directory - Return to the elevated Command prompt and run the following command to unmount the install.wim. Once this is done, you can safely remove the installation media
dism /Unmount-Wim /Mountdir:C:\mount /discard
- Finally, run the following command in the same elevated Command prompt to enable the Recovery environment:
reagentc /enable
- Restart your machine and see if you are able to create a new recovery media.
If this method was not successful, move down to the next method below.
Method 3: Regain the lost recovery partition information
If you’re positive that your hard drive contains a recovery partition, there’s one procedure that several users have followed in order to regain the lost recovery information.
But keep in mind that if you have no recovery partition at all, this procedure will not work for you. Here’s what you have to do to recover the lost recovery partition information:
- Press Windows key + R to open up a Run dialog box. Then, type “powershell” and press Ctrl + Shift + Enter to open up an elevated Powershell window. When prompted by the UAC (User Account Control), click Yes at the prompt.
Run dialog: powershell Then press Ctrl + Shift + Enter - Inside the elevated prompt, type the following command to run the Disk Partition tool:
diskpart
- Type list volume and press Enter to see if you have any volume containing the word Recovery. If you see one, it’s very likely that you’re looking at your recovery partition. If so, take note of its volume number.

Identifying the Recovery environment - Next, type select volume X and press Enter. Then, type detail volume and press Enter again to see on which disk it’s located. Once you see it, take note of the disk number.
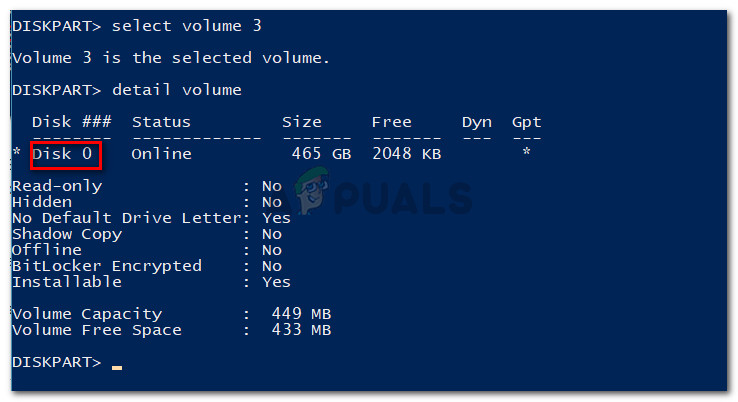
Discovering the Disk number of the recovery volume Note: X is a placeholder for the volume number of the Recovery drive.
- Use the following command to select the disk you previously discovered at step 4 and press Enter:
select disk X
Note: X is simply a placeholder for the disk number you previously fetched at step 4.
- Use the next command to list all partitions and inspect them. You should be able to spot a partition that matches the size of the recovery partition volume. It should have an * next to it. Take note of the partition number.
list partition
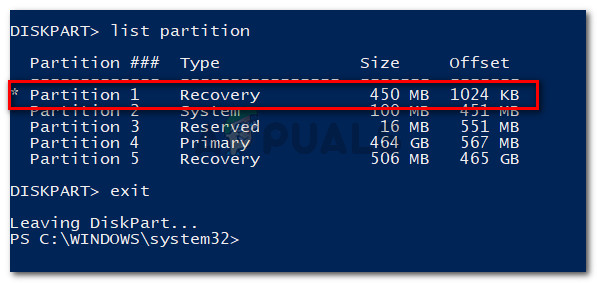
Identifying the Partition number of the Recovery environment - Close the disk partition tool by typing exit and pressing Enter.
- Once you manage to leave the DiskPart tool, enter the following command and make sure to replace the X and Y placeholders:
reagentc /setreimage /path \\?\GLOBALROOT\device\harddiskX\partitionY\Recovery\WindowsRE
Note: Replace the X with the disk number fetched at step 4 and Y with the partition number fetched at step 6.
- Finally, type the following command and press Enter to activate the recovery partition:
reagentc /enable
- Restart your machine and see if you’re able to create the recovery drive at the next startup.
If this method was not successful or you don’t have a recovery environment configured on your machine, move down to the next method below.
Method 4: Clone your computer and save it to a USB HDD
If you’ve come this far without a result, just know you can actually use a third party solution to create the 3rd party equivalent of a Windows-created recovery drive.
Several users encountering the same issue were able to create a 3rd party recovery drive by using Macrium Reflect (FREE) or a similar software.
If you decide to use Macrium Reflect, follow this guide (here) to create a backup of your computer – the equivalent of a recovery drive.
Method 5: Perform a clean install or repair install
If you’ve come this far without a result, it’s very likely that your current system configuration isn’t constructed to create a recovery media. This typically occurs if the user has previously upgraded to Windows 10 from an older Windows version.
If you’re in the same situation, the only fix (other than following Method 3) is to perform a clean install.
A clean install will re-initiate all Windows components including the Windows recovery environment. You can follow this guide (here) for steps on performing a clean install.


Great post!
Copying winre.wim file to C:windowssystem32recovery did the deed for me.
Thanks I really appreciate it..