How to Fix WDF_Violation BSOD Error On Windows?
The WDF_Violation Blue Screen Of Death (BSOD) error can easily be fixed by renaming Hpqkbfiltr.sys file, finding and uninstalling a corrupted driver, reinstalling the graphics driver, and restoring Windows to a previous state. These are some of the methods that have been proved by the affected users. If none worked, resetting Windows without losing data would be the last solution.

This BSOD error usually occurs for users who have an HP laptop or a computer. The main reason for this BSOD to appear on the screen is corrupted Hpqkbfiltr.sys. It is a driver file associated with the HP Quick Launch Buttons that configures custom keys located on the keyboard separately to access email, websites, and other services easily.
Besides, any driver installed on Windows that gets corrupted can cause a WDF_Violation error. You need to diagnose your system properly to find a corrupted driver by following the listed methods. However, if you fail, you can still fix this error.
This is confirmed that the hardware issue cannot cause this error as WDF or Windows Driver Framework ensures that Windows has encountered an error in the framework-based driver. So you don’t need to worry about the hardware.
1. Rename Hpqkbfiltr.sys (for HP computers or laptops users)
Hpqkbfiltr.sys is an HP keyboard filter driver for HP Quick Launch Buttons, allowing you to configure custom keyboard keys. If you have an HP laptop or computer, there is a high chance that Hpqkbfiltr.sys file is causing this issue. If that’s the case, follow the steps to rename Hpqkbfiltr.sys file.
Hpqkbfiltr.sys is not a vital component for Windows to run, so you will not encounter any issues after renaming it. Follow the steps
- Turn off your computer completely.
- Press the power button to turn it on.
- Again press the power button when you see a Windows logo to turn off the computer.
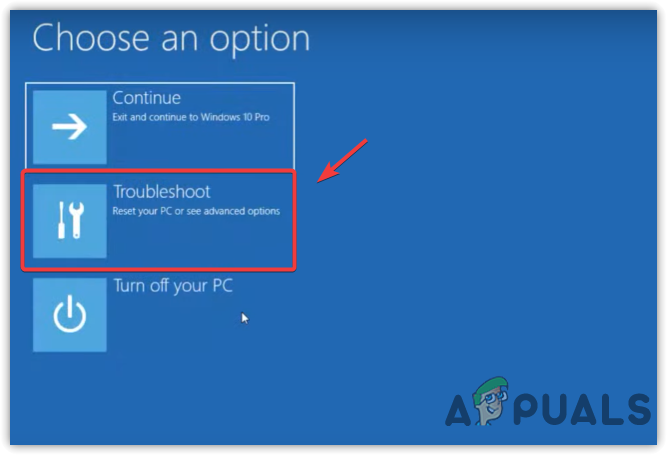
- Repeat this process at least three times to get the Windows Recovery Environment.
- Then, select Troubleshoot > Advanced Options.
Navigating To Windows Recovery Environment Advanced Options - Click Command Prompt and wait for your computer to restart.
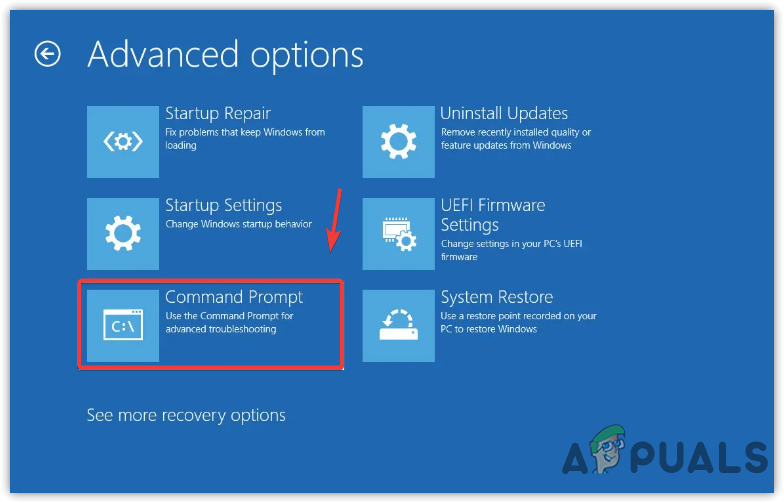
Opening Windows Recovery Environment Command Prompt - Sign in with your account to open the command prompt.
- Once the command prompt is opened, type the disk letter C: or D: or else and hit Enter
- Then, type dir and hit Enter.
- If you see a Windows folder, then it is your system disk. If the Windows folder is not there, your system disk is not that; you need to type different drive letters such as E: or F: to find the system disk. Once you find the system disk, enter the following command to navigate directly into the drivers folder.
cd Windows/system32/drivers
- Once you are in the driver folder, enter the following command to rename the Hpqkbfiltr.sys.
ren HpqKbFiltr.sys HpqKbFiltr.old
- Once done, enter exit, and hit Enter.
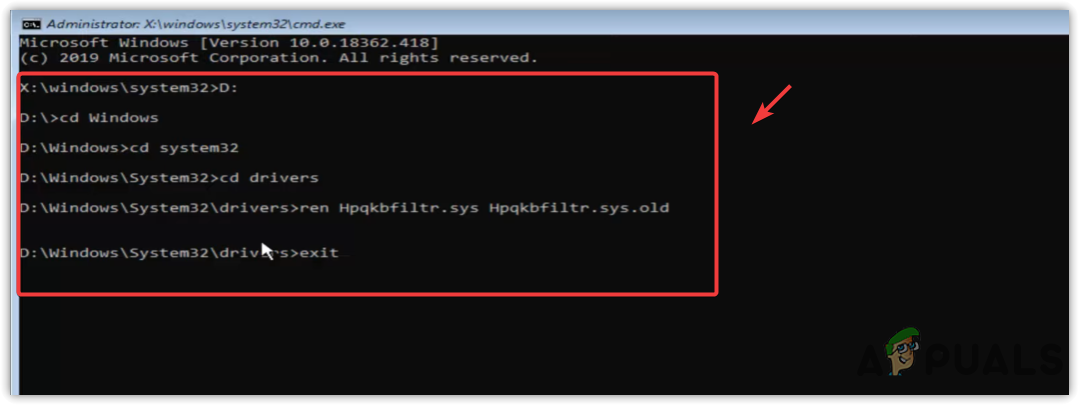
Renaming HP Keyboard Filter Driver - Click Continue and wait for your computer to restart.
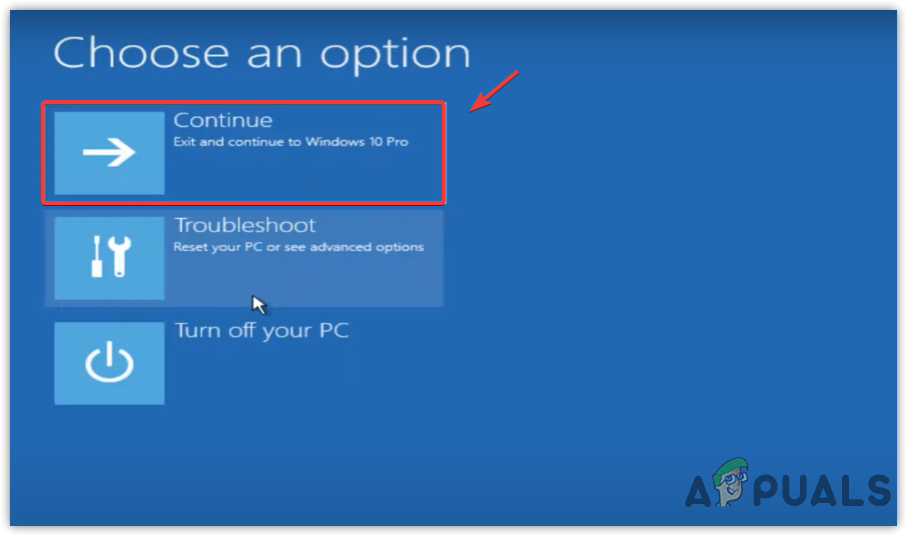
Continue To Restart Your Computer - Once done, the issue should be fixed.
2. Analyze the memory dump file
If you do not have an HP computer or laptop, the issue might be due to one of your device drivers. You need to find out which driver is causing this WDF_Violation error. There are two ways you can use to find a corrupt driver either remove all the device drivers one by one or analyze the memory dump file and remove a corrupt one.
Removing all the device drivers to fix a small BSOD error might not be a good idea, as we can analyze the dump file using Windows Software Development Kit. If you are encountering this issue while playing a game or doing some GPU-intensive tasks, then the issue could be due to a corrupt graphics driver. However, if you are receiving this error while using Windows normally, then it could be a Graphics driver, but not sure. Hence, in both cases, analyzing the dump file will be a good way to start with. Follow the instructions to analyze a mini dump file.
- Press the Windows + R keys simultaneously to open the Run Window.
- Type sysdm.cpl in the search box and click OK to open the System Properties Window.
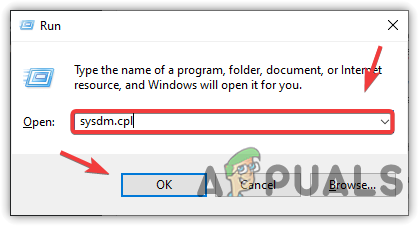
Opening System Properties Window - Then, go to Advanced from the top.
- Click Settings under System And Recovery.
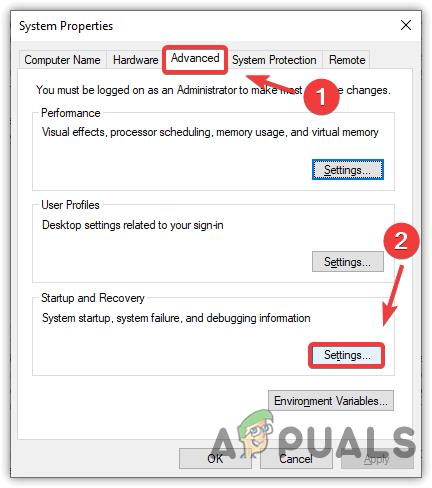
Opening System Failure And Debugging Settings - Now make sure the Write An Event To The System Log and Automatically Restart options are checked.
- Under the Write Debugging Information, leave the default option Automatic Memory Dump. This will create a dump file that will contain the cause and the basic information about the WDF_Violation.
- In the end, tick Overwrite Any Existing File, which will overwrite the dump file if a new BSOD error occurs.
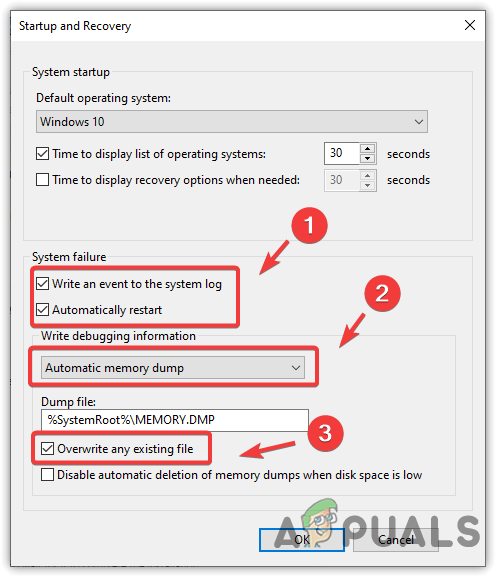
Enabling System To Create Memory Dump File When System Failure Occurs - Once all the settings are done, click OK to save the changes
- After that, use your computer and do some tasks that were leading you to this WDF_Violation BSOD
- Once the error appears, wait for the system to restart.
- But if there is already a dump file in the following directory, you don’t need to wait for a BSOD error; continue with the following instructions.
C:\Windows\MEMORY.DMP
- Download Windows Software Development Kit
- Once done, open the installer and follow the instructions until you reach the Select The Features Your Want To Download Screen.
- Here unselect all the tools except the Debugging Tools For Windows
- Click the Download button and wait for it to complete the installation

Downloading Debugging Tools For Windows - Once done, click Start Menu and type WinDbg (X64)
Note: if you have a 32-bit or ARM64 or ARM architecture, then replace X64 with your architecture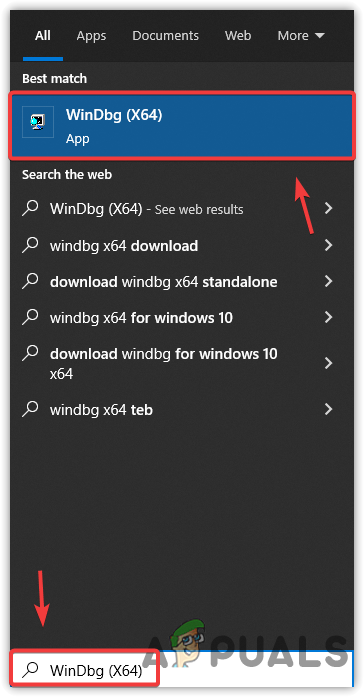
Launching Windows Debug Software - Open the WinDbg, press Ctrl + D, or click File, and then select Open Crash Dump.
- Navigate to the C:\Windows, which is the default directory of the dump file.
- Select the Memory Dump file and click Open.
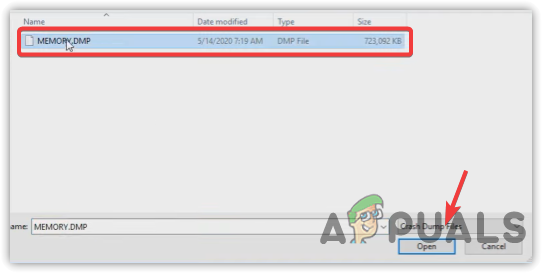
Opening Memory Dump File - Click on Analyze -v to see more information about BSOD.
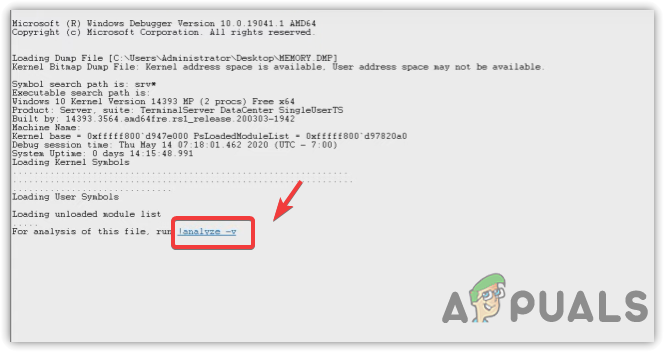
Analyzing Memory Dump File - Once the details are finished loading, copy the driver name written next to the Image Name.
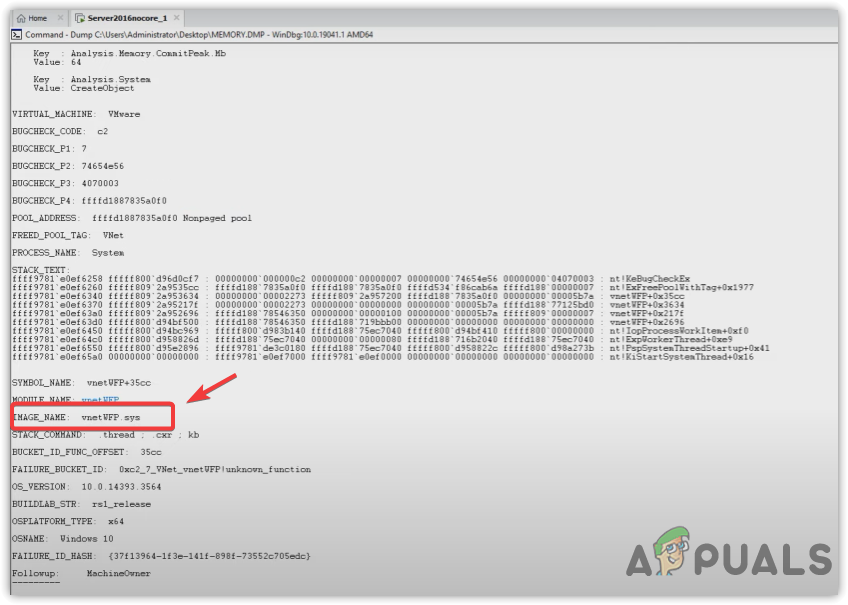
Copying Image Name - Paste it on google to see where it belongs. If it belongs to the network, keyboard, or Graphics card, reinstalling the driver will fix this BSOD issue.
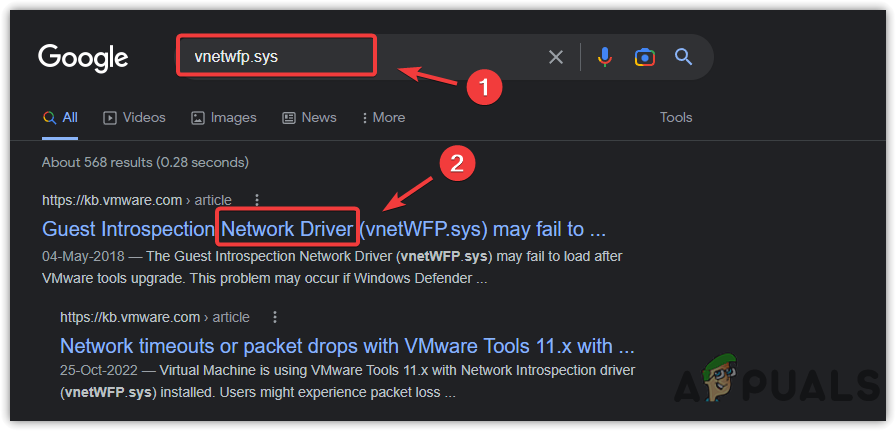
Searching Driver With Its Name
2.1 Uninstall the Corrupt Driver
- If you managed to find a corrupt driver, right-click the Start Menu and click Device Manager
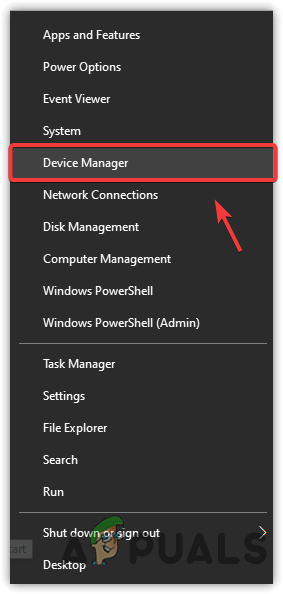
Launching Device Manager From Start Menu - Once the device manager is opened, right-click the corrupt driver and then click Uninstall Device.
- Click Uninstall when a confirmation Window popup.
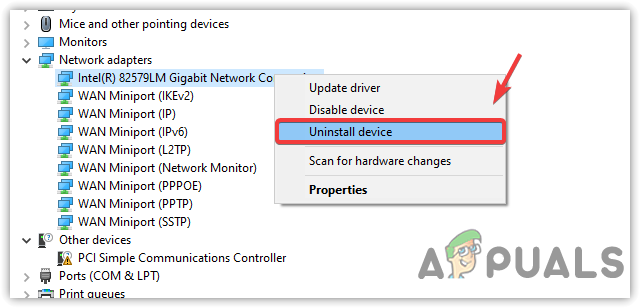
Uninstalling Network Driver - Once done, restart your computer and proceed to install a new driver.
2.2 Install A Driver
- To install a driver, go to your manufacturer’s website or if you are a laptop user, then go to your laptop manufacturer’s website and download a driver from there.
- If you use a Realtek driver, then go to the Realtek website and download a driver.
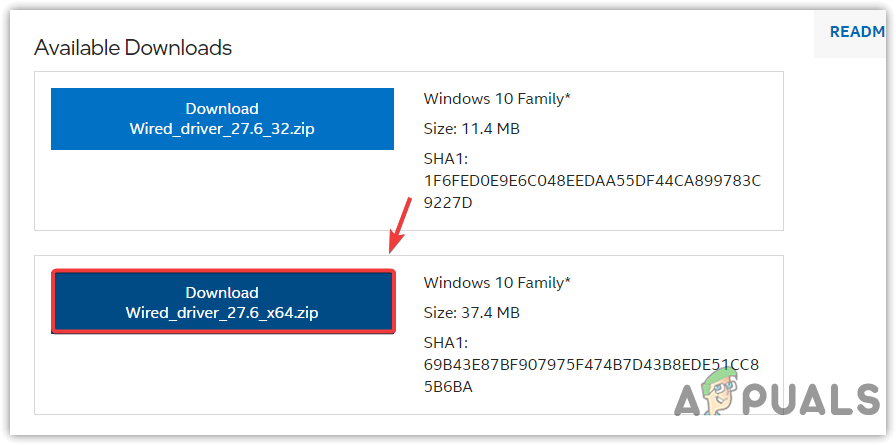
Downloading Latest Network Driver - Once the driver is downloaded, double-click the installer to install the driver by following the on-screen instructions.
- Once done, restart your computer, and the issue should be resolved if it is due to the corrupt driver.
3. Reinstall Graphics Driver Using DDU
If the issue occurs whenever you play games, or while doing some tasks that require GPU power, it might be a driver issue, which will fix after reinstalling the driver with the registry files.
For uninstalling the drivers entirely from the computer, there is an application called Display Driver Uninstaller, which removes all the traces of the driver from the computer. Follow the instructions to remove the Graphics driver completely.
- Download Display Driver Uninstaller.
- After that, right-click the DDU zip folder and select Extract to DDU.
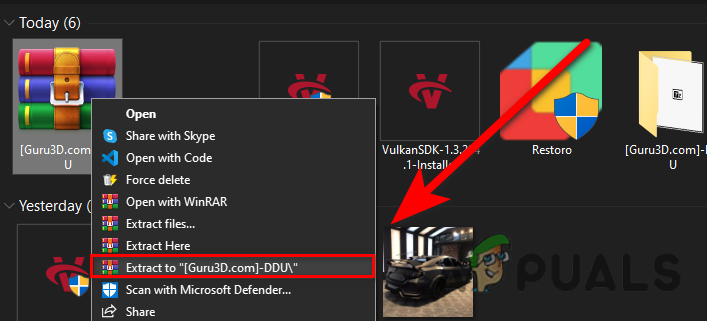
Extracting Display Driver Uninstaller Zip Folder - Once done, open the extracted folder and double-click the Display Driver Uninstaller.
- Click Extract when a short Window appears.
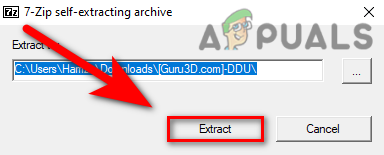
Extracting Display Driver Uninstaller Application - Then, open the extracted folder and run the Display Driver Uninstaller.
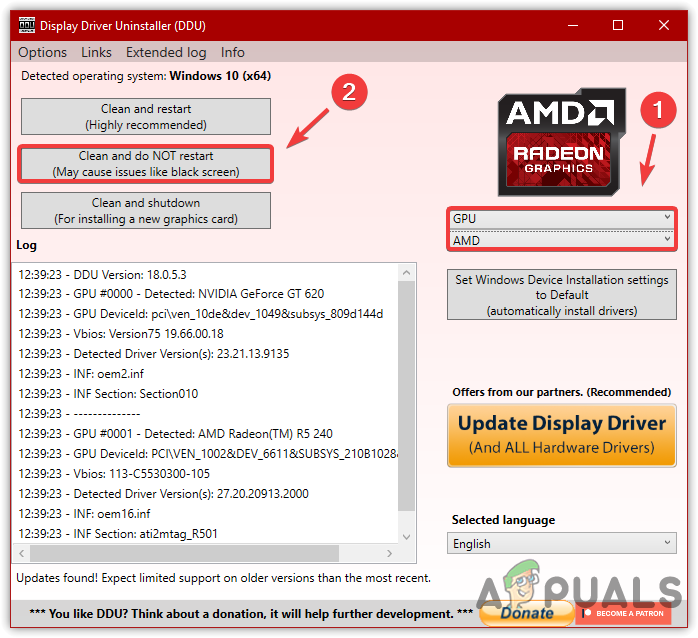
- After that, select the GPU from the Device menu and then select your GPU vendor from the Device Type on the right pane.
- Then, click Clean And Do Not Restart.
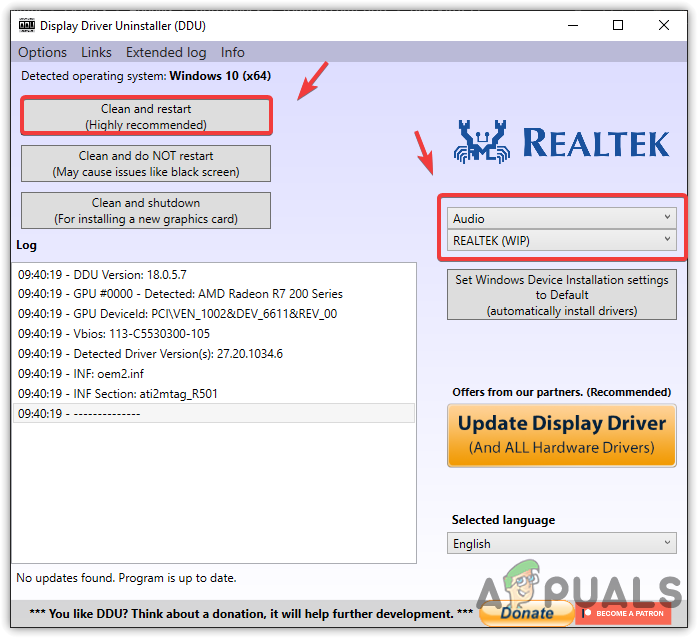
Removing Graphics Driver With DDU - Once you remove the Graphics Driver, try removing the audio driver, as it might be a culprit.
- To remove the audio drivers, select Audio from the Devices on the right.
- Then, select the respective audio vendor from the Device type.
- Once done, click Clean and restart.
Removing Audio Driver - After restarting the computer, open your browser and go to your Graphics Card manufacturer’s website.
- Download the latest Graphics driver and install it on your computer.
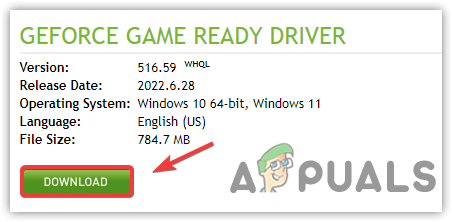
Downloading Latest Graphics Driver From Official Website - After that, download audio drivers from the manufacturer’s or Realtek’s website.
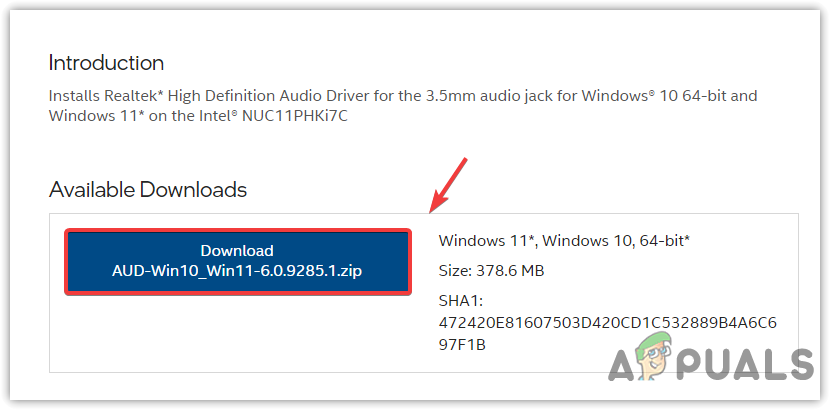
Downloading Audio Driver - Once the downloading is finished, install the audio driver by double-clicking the driver and following the instructions.
- Once done, restart your computer and check if it fixes the WDF_Violation error.
4. Uninstall the Recent Windows Update
As per the reports from several affected users, the issue started after installing the Windows update. If you recently updated your Windows, it is possible that the Windows update installed a corrupt driver causing this issue.
When you uninstall the Windows update, all the drivers and changes to the system immediately get back to where it was, which can fix this issue as it often occurs due to corrupt drivers. Follow the steps to uninstall the recent Windows update.
- Turn off and then turn on your computer.
- Wait for a Windows logo to appear.
- Once the Windows logo appears, press the power button to turn off the computer.
- Repeat this process until you see Windows Recovery Environment.
- Select Troubleshoot > Advanced options > Uninstall Updates.
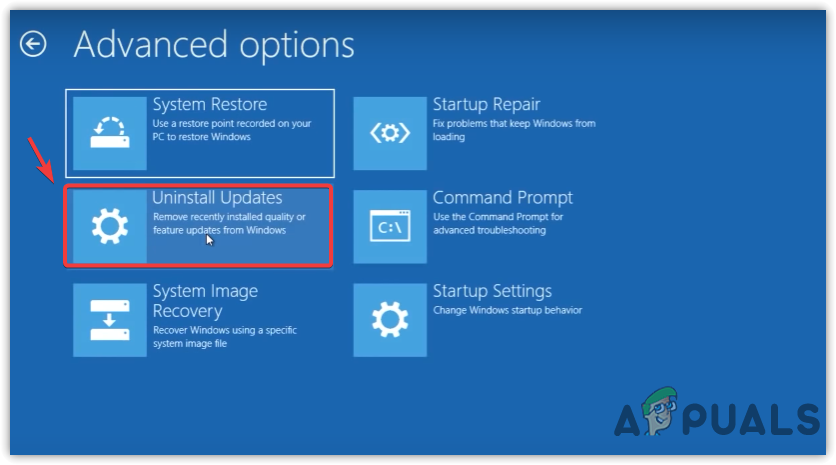
Proceeding To Uninstall Windows Updates - After that, select Uninstall Latest Feature Update.
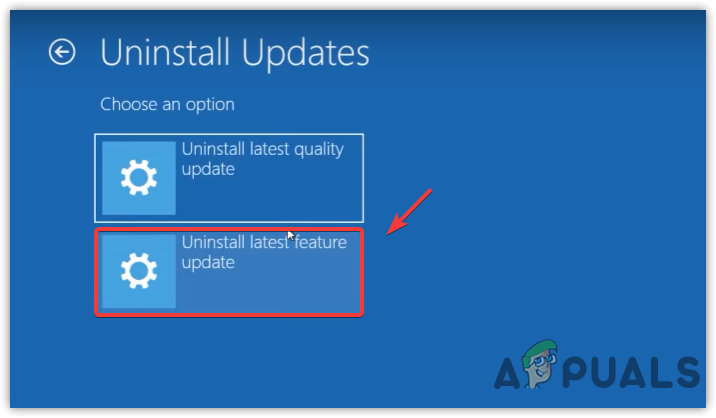
Selecting the Latest Feature Update Option - Once done, sign in with your account, then click Uninstall Feature Update.
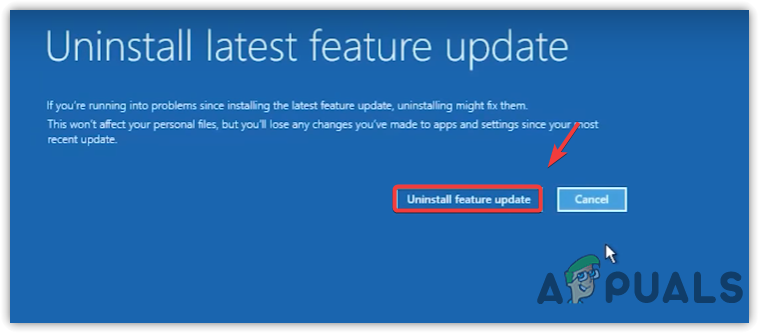
Uninstalling the Latest Feature Update - This will restore your Windows to its previous state.
- Wait for the computer to restart and check if the issue is fixed.
5. Use System Restore or Reset Your Computer
System restore is a feature that takes a snapshot of the registry files, drivers, and other Windows files. If you created a restore point before installing the drivers or a Windows update, then utilizing a restore point to get Windows back to its previous state can also be a good solution.
However, if you don’t have a restore point, you can try resetting your computer. Since it is a driver issue, both methods can help fix this issue. If you choose to reset your computer, refer to this article about How to Reset your computer but if you have a restore point, follow the steps mentioned below:
- Switch on your computer and press the power button.
- When you see the Windows logo turn off your computer.
- Repeat this step at least three times to get the Windows Recovery Environment.
- Then, select Troubleshoot > Advanced options.
- Then, select System Restore.

Opening System Restore Settings From Windows Recovery Environment - After that, sign in with your account and click Next when a system restore Window appears.
- In the next step, select a restore point and click Next.
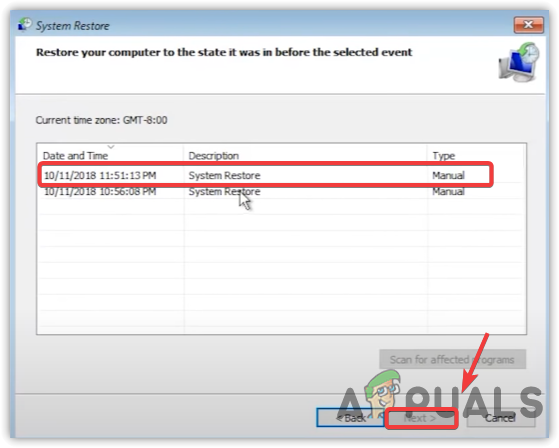
Selecting Latest Restore Point - Click Finish and then click Yes for confirmation.
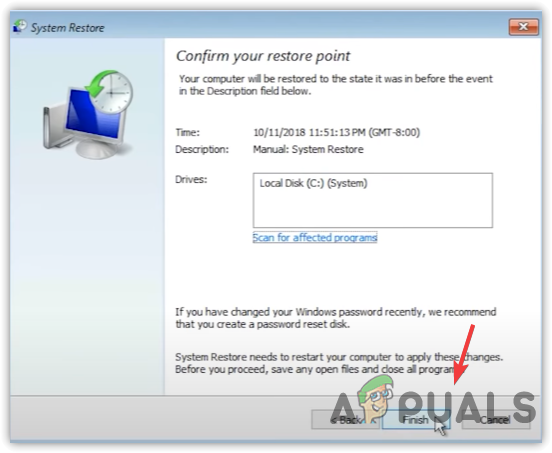
Restoring Windows Using System Restore - Wait for the system to restore the files.
- Once done, restart your computer, and it should fix your issue.