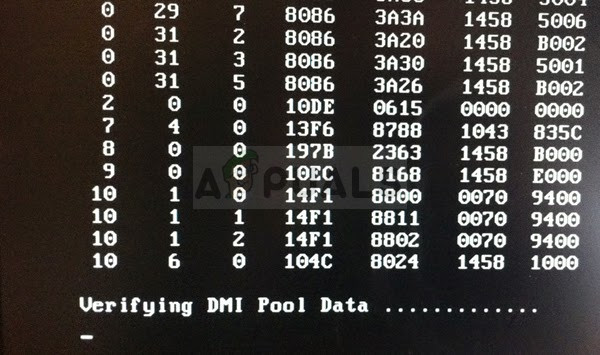
Fix: Verifying DMI Pool Data Error
Being stuck with Verifying DMI Pool Data Error message at the bottom of the booting screen, waiting for it to disappear is an awful experience and this message can get stuck anywhere from several seconds to almost forever and that is why you should consider approaching the solution of this problem easily and without hurry.
The problem can be easy to solve if you remain patient and don’t give up during the somewhat long process of troubleshooting. Don’t give up and hopefully, you will be able to get rid of this annoying error message during the boot.
Solution 1: Check for Connected Devices
If you have shut down your computer without taking out a CD or DVD from the reader or if you have left a USB device connected to your computer, a bug in the Windows operating system may cause it to try and boot from the device you have left, no matter what is actually located on it, hence the warning message.
Check to see if there are any DVD or CD files in the reader and disconnect all external storage devices which don’t actually have the Windows 10 OS on them. Check to see if the Verifying DMI Pool Data Error is gone.
Solution 2: Clear the CMOS Battery
Clearing the CMOS battery will effectively cause two things: the BIOS settings which relate to the way your computer boots will be reset and you will start from the beginning when it comes to the boot, which is a thing which can solve this problem on its own. Furthermore, if there is some physical causes such as dust or dirt accumulating, you will solve that as well.
- Open the computer case and find the battery on the computer motherboard. If you are unable to locate your CMOS battery, refer to your motherboard or computer documentation. You can also browse the Internet or contact your computer manufacturer for additional assistance in locating it.
Note: With some computers, you may need to disconnect cables, remove drives, or remove other parts of the PC to get full access to the CMOS battery.
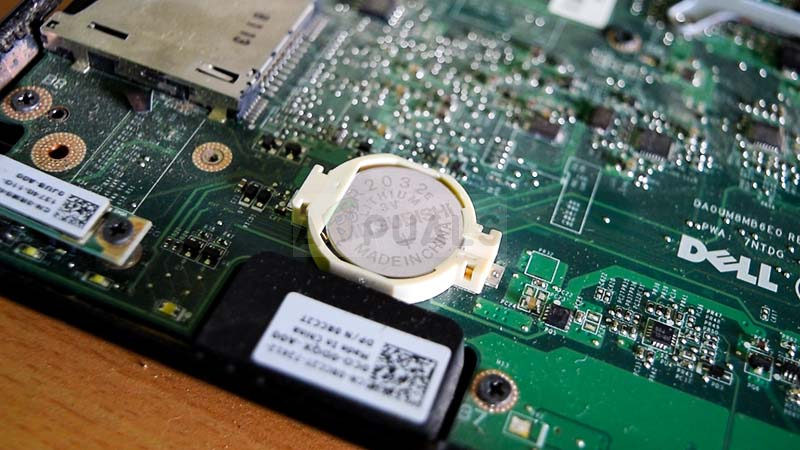
- If your computer is using a coin cell battery, removing the battery is relatively simple. Use your fingers to grab on the edge of the battery and pull it up and out of the socket holding it in place. Some motherboards have a clip holding the battery down and you may need to move it up to pull the battery out.
- Let it stay removed for 10 minutes, clean it, put it back in, and try to boot into BIOS by following the steps in the solution above. Try to do the same and check to see if Windows now boots normally.
Solution 3: Try to Fix Your Boot
By using a recovery media which is a DVD or USB with the Windows system installed on it along with some helpful tools, you can solve the problem quite easily by using certain commands in Command Prompt. A greater issue would be to find such a DVD. With older versions of Windows, it has to be the DVD from which you have installed your system.
Still, if you are able to boot to your computer normally, you can skip over to the very part where we open the Command Prompt, which you could do simply by searching for it, right-clicking on it in the Start menu, and choosing the Run as administrator option.
However, with Windows 10 you can create your own recovery media and use it to fix your computer in no time.
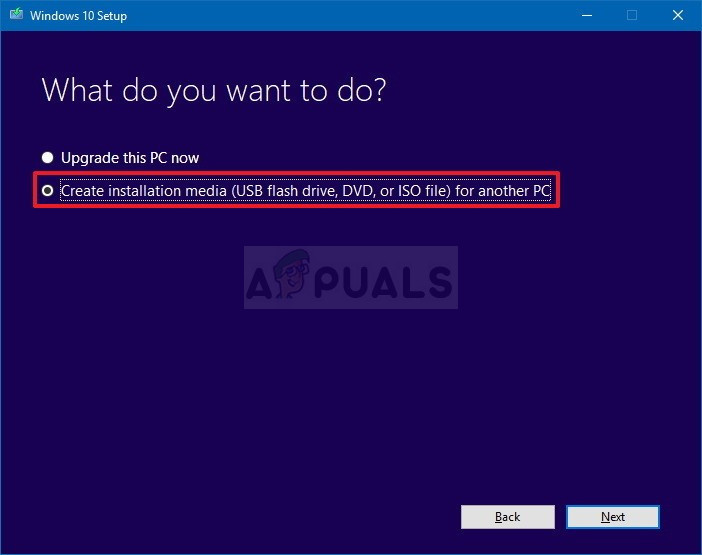
- Download the Media Creation Tool software from Microsoft’s website. Open the downloaded file you just downloaded and accept the terms and conditions.
- Select the Create installation media (USB flash drive, DVD, or ISO file) for another PC option from the initial screen.
- The language, architecture, and other settings of the bootable drive will be chosen based on your computer’s settings, but you should uncheck the Use the recommended options for this PC in order to select the correct settings for the PC which has the password attached to it (if you are creating this on a different PC, and you probably are).
- Click Next and click on the USB drive or DVD option when prompted to choose between USB or DVD, depending on which device you want to use to store this image on.

- Click Next and choose the USB or DVD drive from the list which will show the storage media connected to your computer.
- Click Next and the Media Creation Tool will proceed to download the files necessary to install create the installation device.
Now that you probably have your recovery media, we can start actually solving the booting issue by opening the Command Prompt from within the recovery drive which you should boot from.
- Insert the installation drive you own or which you have just created and boot your computer. The following steps are different from one operating system to another so follow them accordingly:
- WINDOWS XP, VISTA, 7: Windows Setup should open prompting you to enter the preferred language and time and date settings. Enter them correctly and choose the Repair your computer option at the bottom of the window. Keep the initial radio button selected when prompted with Use recovery tools or Restore your computer and click on the Next option. Choose Startup Repair (the first option) when prompted with the Choose a recovery tool selection.
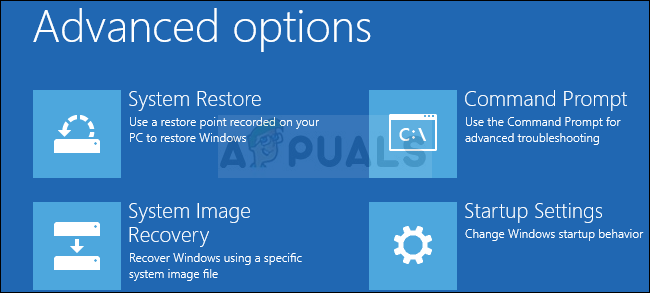
- WINDOWS 8, 8.1, 10: You will see a Choose your keyboard layout window so choose the one you want to use. The Choose an option screen will appear so navigate to Troubleshoot >> Advanced Options >> Command Prompt
- Command Prompt should now open with administrator privileges. Type in the command displayed below and make sure you hit Enter afterwards.
BOOTREC.EXE /FIXBOOT
- Close Command Prompt afterwards and choose the Restart option. Check to see if Verifying DMI Pool Data Error is gone.


