How to Fix Upgrade Error 0xC1900401 ‘Build is not available yet’
Latest Windows 10 is launched with the enhanced gaming features that have been initiating a new era of PC gaming with its stimulating experience. Windows 10 Build 15019 brings thrilling of gaming features like new Games section in Settings, awaited Game Mode, Windows Game bar with improved full-screen support, built-in Beam streaming, and much more.
These awesome gaming features made the youngsters crazy about the Windows 10, and they want an immediate upgrade in their computer operating system. Although installation process of Windows 10 is quite easy, users have been facing some glitches while having Windows upgrade. One of such Windows Update issues is PC Build 15019.
Sometimes, PC builds 15019 unable to fix some annoying bugs from older builds. Its download progress indicator is also broken. Usually, it appears like you got stuck at 1% or other percentages, although the installation process still works in the background. If you have encountered this bug, be patient and try to ignore the percentage indicator.
Within few minutes, PC build 15019 will get downloaded, and you can install it without any hassle. Even after updating PC build 15019, users have been noticing nonstop exceptions in Spectrum.exe that causes high CPU usage, Edge crashes, and audio issues.
Microsoft comes with the description of this bug and stated that this PC built can create some issues after installation that can affect audio, CPU, and edge crash. Users also experienced the same kind of bugs just after installation that features several symptoms like an audio glitch, high disk usages in CPU, and edge crashes while opening setting in the app.

There are some troubleshooting methods that can be used to bypass this bug are listed below:
Method 1: Use Command Prompt to Fix PC Build 15019 Windows Update issues
This is one of the best methods to fix audio issues, high CPU usage and Edge crashes in Windows 10 PC build 15019. You need to go through the following steps in this method:
- Go to search menu, type cmd, and launch Command Prompt
- Copy and paste the following:
Rmdir /s %ProgramData%\Microsoft\Spectrum\PersistedSpatialAnchorsShutdown - Then choose Y to confirm removal, if no file is found move to Method 2.
- Type Exit and restart your computer

Method 2: Delete Persisted Spatial Anchors Folder
- Launch File Explorer
- Navigate to the following path: C:\ProgramData\Microsoft\Spectrum
- Select the “PersistedSpatialAnchors” folder, and click on Delete
- Restart the computer
- You may have encountered with a message saying “Files are in use” when you have tried to delete the folder, simply restart your computer and try again.
If both of the methods mentioned above doesn’t work for you, then try one more.
Method 3: Stop the Window Updates
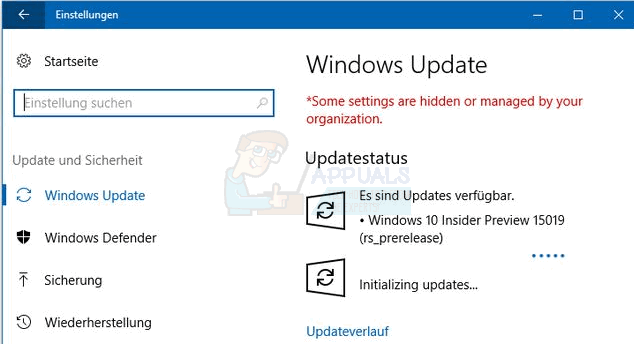
Another method to tackle issues where Windows Update reflects “initializing,” and doesn’t appear performing is to stop the Window Updates.
- Click Start
- Type cmd -> right click cmd and choose run as administrator
- In the command prompt window, type net stop wuauserv
- Reboot PC.
- Repeat steps 1-3, and then type net start wuauserv
- Test Now.
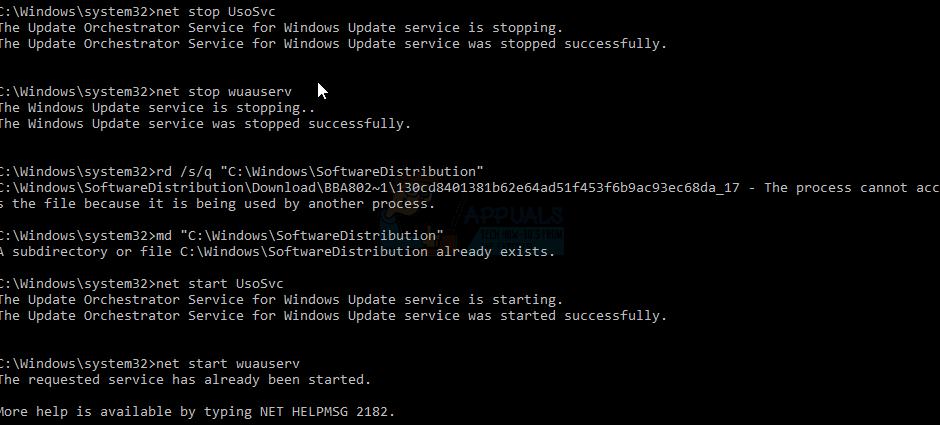
If the Method above doesn’t work, then follow step 1-2 to open command prompt as administrator and then do the following commands in the sequence below:
net stop UsoSvc
net stop wuauserv
rd /s/q “C:\Windows\SoftwareDistribution”
md “C:\Windows\SoftwareDistribution”
net start UsoSvc
net start wuauserv
