Fix: Update KB4041994 Fails With Error Code 0x80070643
KB4041994 is an update for computers running on the 64-bit variant of Windows 10 version 1709. Like all other Windows updates that are rolled out, Windows Update automatically attempts to download and install this update on all computers for which it has been rolled out. Many Windows users, however, have complained of seeing the following error message when Windows Update tries to download and install update KB4041994 on their computer:
“There were problems installing some updates, but we’ll try again later. If you keep seeing this and want to search the web or contact support for information, this may help: Update for Windows 10 Version 1709 for x64-based Systems (KB4041994) – Error 0x80070643”
Update KB4041994 can fail to install with error code 0x80070643 for one of a number of different reasons – ranging from some kind of an issue with Windows Update or a conflict with an application already installed on the computer to the update simply being incompatible with the computer Windows Update is trying to install it on and it having been wrongly sent out to that computer in the first place. If you’re having trouble downloading and installing update KB4041994 on your computer, the first thing you need to know is the fact that this is not at all a critical system update and failure to install it will not result in any hindrance in system performance or functionality.
In actuality, update KB4041994 is merely an HEVC media extension installer for computers running on a 64-bit iteration of Windows 10 version 1709. As insignificant an update as it might be, however, not being able to download and install update KB4041994 can definitely prove to be an issue. That being the case, the following are the absolute most effective solutions you can use to try and resolve this problem (or at least get it to subside):
Solution 1: Reset Windows Update
The first, and the simplest, possible cause of this problem is some kind of an issue with Windows Update itself. Since Windows Update is the courier that delivers updates to your computers and takes care of installing them, an issue with the utility can result in updates not being installed. Almost all of the problems that Windows Update can be afflicted by, however, can be resolved by simply resetting it. To reset Windows Update on Windows 10, you need to:
- Click here to download a .BAT file that will automatically reset Windows Update and all of its components for you.
- Save the .BAT file to an easily accessible and memorable location on your computer, and navigate to this location once the file has been downloaded.
- If the file is blocked (and there is a pretty good chance it will be), right-click on it, click on Properties in the context menu, check the checkbox next to the Unblock option in the Security section, click on Apply and then on OK. If an Access Denied dialog box pops up, click on Continue and then either click on Yes (if you are logged into an Administrator account) or type in the password for an Administrator account (if you are logged into a Standard User account).
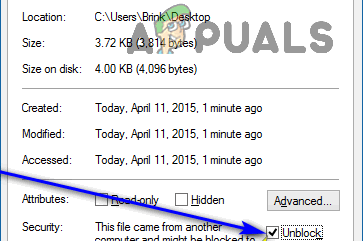
Check the Unblock option 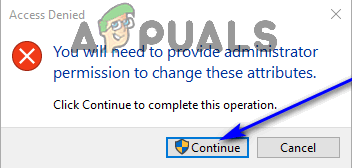
Click on Continue - Right-click on the .BAT file, and click on Run as administrator in the resulting context menu.
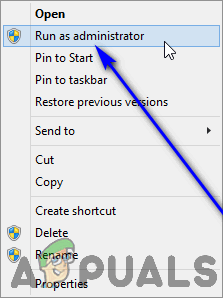
Click on Run as Administrator - If you are asked to confirm the action by UAC, click on Yes in the dialog box that appears.
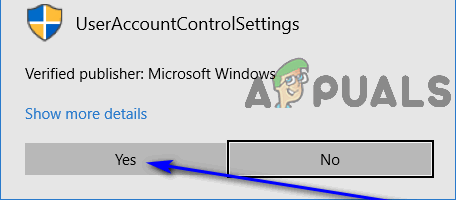
Click on Yes 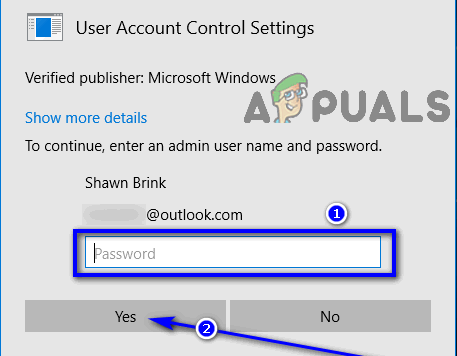
Type in the password for your account and click on Yes - As soon as the .BAT file has executed all of the commands it contains and ran to completion, Windows Update on your computer and all of its components will have been reset. At this point, restart your computer.
When your computer boots up, check to see whether trying to install update KB4041994 still results in failure and returns error code 0x80070643.
Solution 2: Uninstall HEVC from your computer and then install the update
Error code 0x80070643 in the context of installing update KB4041994 can also be caused by a conflict with another application installed on the affected computer. Seeing as update KB4041994 is an installer for an HEVC media extension, any conflicts with other applications on affected computers can only be with other HEVC applications installed on them. If you have some kind of an HEVC app installed on your computer and are seeing this error message, simply uninstalling the app might just be what needs to be done in order for you to be able to install update KB4041994 successfully. To uninstall HEVC from your Windows 10 computer, you need to:
- Open the Start Menu.
- Click on Settings.
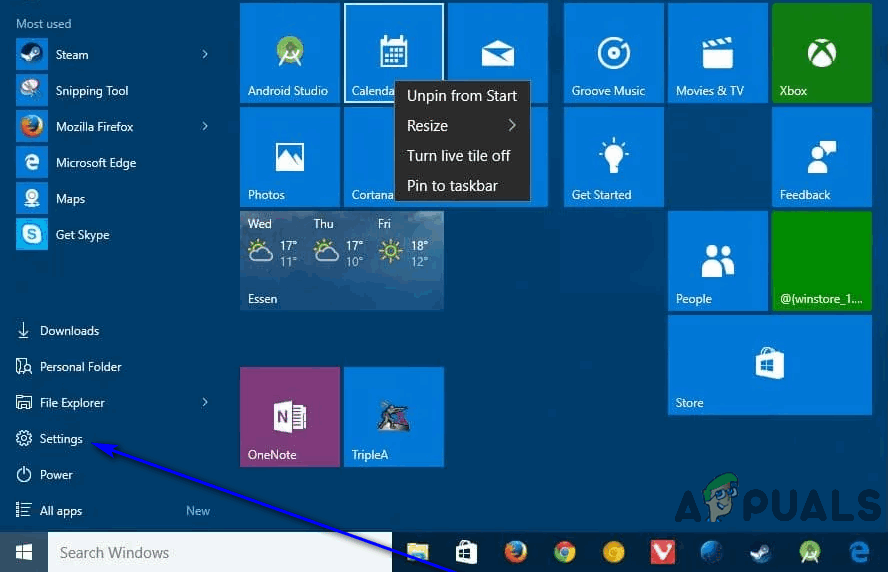
Click on Settings - In the Settings window that opens up, click on Apps.
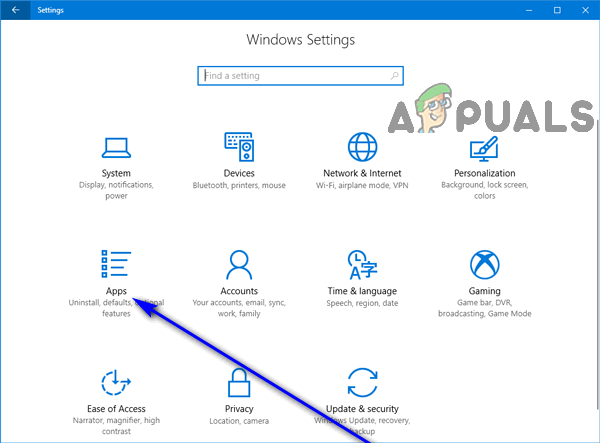
Click on Apps - Wait for Windows to populate a list of all the apps that are currently installed on your computer. When you see this list in its entirety, go through it and locate HEVC.
- When you locate the HEVC app installed on your computer, click on it to select it.
- Click on Uninstall.
- Confirm the action if required to do so and go through the uninstallation process until the app has been removed from your computer.
Once done, go back into Windows Update and (unless it starts doing so of its own accord), get it to Check for updates. Windows Update will begin downloading and installing any and all updates available for your computer, including update KB4041994, the installation of which should now go off without a hitch.
Solution 3: Hide Update KB4041994 from Windows Update
If neither of the solutions listed and described above have worked for you, your only remaining option might just be to hide the update from Windows Update, after which the utility will no longer try to download and install update KB4041994 whenever it checks Microsoft’s servers for updates for your computer. While it is true that not being able to successfully install update KB4041994 won’t have any adverse effects on your computer or its performance, it being there in Windows Update will just turn out to be a nuisance in the long run and it might interfere with the installation of other, comparatively more important, updates for your computer. Taking all of that into consideration, hiding update KB4041994 from Windows Update is a pretty neat course of action. If you would like to hide update KB4041994 from Windows Update, you need to:
- Go here and download the wushowhide.diagcab file from Microsoft’s servers. This file is Microsoft’s Show or hide updates troubleshooter for Windows.
- Save the wushowhide.diagcab file to an easily accessible and memorable location on your computer.
- Navigate to where you saved the wushowhide.diagcab file once it has been downloaded, locate it and double-click on it to launch it.
- Click on Advanced in the window that pops up.
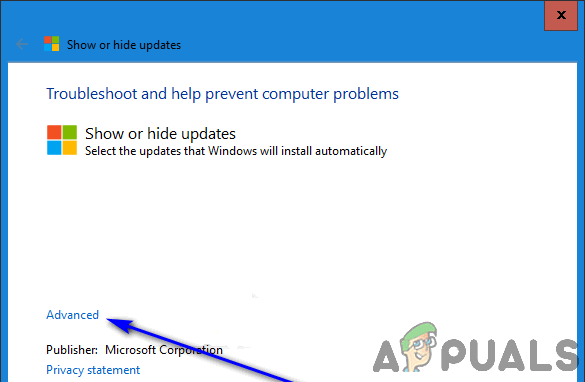
Click on Advanced - Check the checkbox next to the Apply repairs automatically option, enabling it.
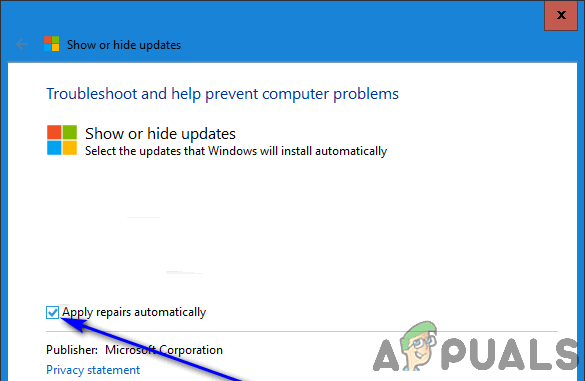
Check the checkbox for the Apply repairs automatically option - Click on Next.
- Once the troubleshooter has done its thing, click on Hide updates.
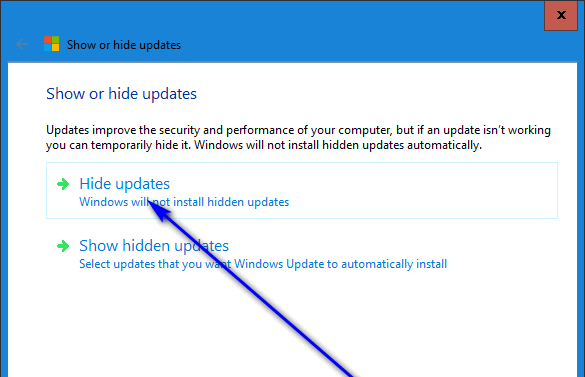
Click on Hide Updates - Locate Update for Windows 10 Version 1709 for x64-based Systems (KB4041994) in the list of updates the troubleshooter finds are available for your computer, and check the checkbox located directly beside it.
- Click on Next.
- The selected update (update KB4041994, in this case) will have been successfully hidden from Windows Update at this point. Click on Close to get out of the troubleshooter.
Once done, you will no longer have to worry about this insignificant update or being met with an error message containing error code 0x80070643 every time Windows Update begins automatically downloading and installing updates for your computer simply because this annoying little update refused to install.


