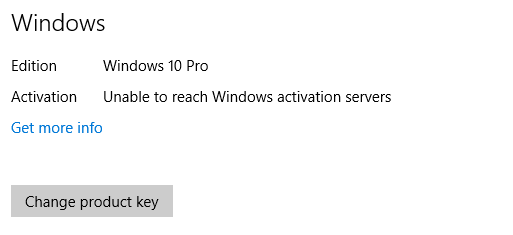
Fix: Unable to reach Windows activation servers Windows 10
Typically, the error “Unable to reach Windows activation servers” is signaling that the activation servers are currently unable to check your device against the record of digital license allocation. Most of the time, this is automatically resolved in a matter of hours or days. However, starting with the Creators Update, some systems that we’re digitally entitled from Windows 7 or Windows 8 would not activate indefinitely and display this error message.
You might also encounter this issue on Windows 10 if you had your motherboard replaced after you activated Windows on your PC successfully. This typically happens after applying the Windows 10 Anniversary Update (version 1607). This occurs because the Anniversary Update does not include a motherboard replacement improvement fix that was later included with the Creators Update. Here are some other reasons why your Windows 10 might be failing to activate:
- Unstable Internet connection.
- Activation servers are currently busy.
- Antivirus suite or Firewall is blocking product activation.
- PC is behind a proxy server or VPN network.
- PC was previously upgraded to Windows 10 from a pirated version of Windows 7, 8.1 – Microsoft released a fix for this particular issue.
If you’re currently struggling with this issue, troubleshoot your problem using the methods below. Please keep in mind that all the fixes present in this article assume that you bought a legitimate copy of Windows 10 or you we’re digitally entitled from Windows 7 or Windows 8. If you’re absolutely certain that you meet the criteria, start with the Prerequisites section and work your way down until you find a fix that resolves your problem.
Prerequisites
Because the activation process can be affected by a lot of different factors, it’s important to eliminate some potential culprits right from the get-go. First things first, make sure you’re on a trusted network – if you’re currently on a free Wi-Fi network, look for a wired option and see whether the activation servers are reached.
Furthermore, if you have previously set up a Proxy server or VPN network, disable them and see if the issue is automatically resolved after some time. Even if this is the cause of the issue, disabling the VPN network/proxy server will not resolve the issue instantly. Try keeping the privacy solution disabled and see whether Windows manages to activate itself.
If you determined that your internet connection or VPN/Proxy server is not causing the issue, give it a few days to make sure that Microsoft’s activation servers are not currently busy. If you still encounter the same issue, you can start following the methods below.
Method 1: Install the Creator’s Update
Let’s begin by exploring the following scenario – You made some hardware changes to your PC after successfully activating Windows 10. If you were already on Windows 10 Anniversary Update (or you updated after replacing your motherboard), there’s a high chance that you see the “Unable to reach Windows activation servers” error indefinitely.
Note: If you already have the Creator’s Update, skip this method and move down to Method 2.
If you don’t have the Creator’s Update, the solution is extremely simple – Update to the latest Windows version available in order to get the motherboard replacement fix included along with the Creator’s Update in March 2017. Here’s a quick guide to doing so:
- Press Windows key + R to open a Run Window. Type “control update” and hit Enter to open Windows Update.
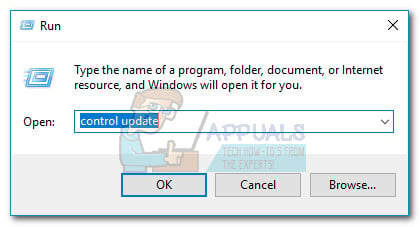
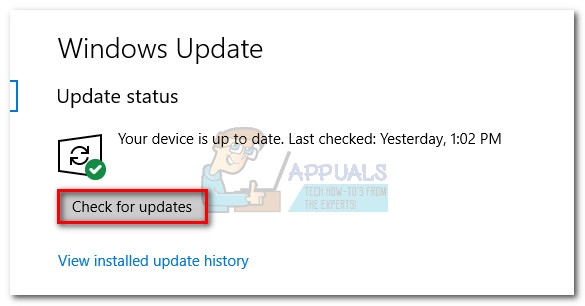
- In Windows Update, click on Check for Updates. Wait for the utility to scan your system and restart your system when prompted.
 Note: You can also apply the Creator’s Update by visiting this Download Windows 10 page (here). Once there, simply hit the Update now button.
 - Return to the Activation window and see if the issue is removed.
If applying the Creator’s Update didn’t resolve the issue, follow the method below.
Method 2: Using a generic product key for your Windows version
In the event that Method 1 was unsuccessful or not applicable, we can also solve this issue by entering the default product key matching your edition of Windows. Of course, this will not activate your PC indefinitely, but it will prompt your PC to re-activate based on the already-associated license. Here’s a quick guide on how to do this:
- Make sure you have a stable internet connection.
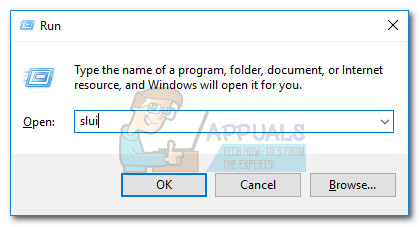
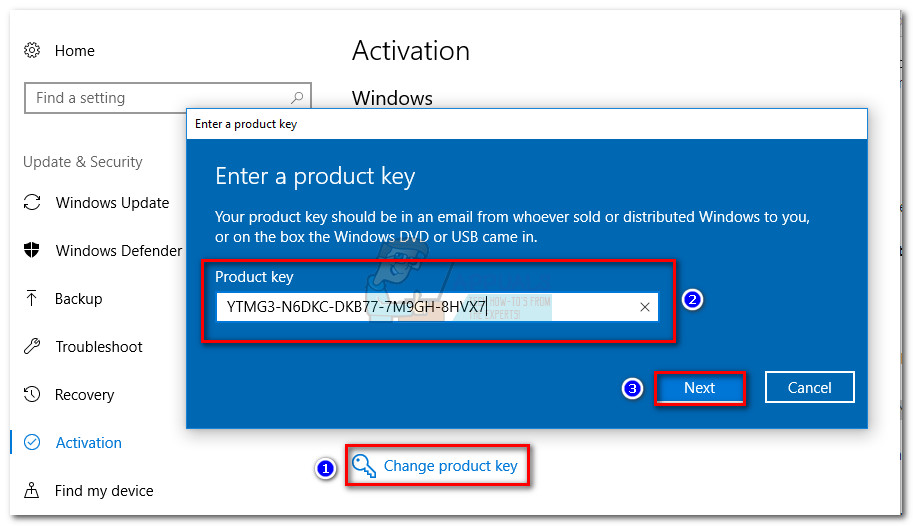
- Press Windows key + R to open a Run Window. Type “slui” and hit Enter to open the Windows Activation Client.
- Click on Change Product key, then enter the appropriate generic key for your Windows edition:
Windows 10 Home Edition: YTMG3 – N6DKC – DKB77 – 7M9GH – 8HVX7
Windows 10 Home Edition Single Language: BT79Q – G7N6G – PGBYW – 4YWX6 – 6F4BT
Windows 10 Pro Edition: VK7JG – NPHTM – C97JM – 9MPGT – 3V66T
Windows 10 Home N Edition: 4CPRK – NM3K3 – X6XXQ – RXX86 – WXCHW
Windows 10 Pro N Edition: 2B87N – 8KFHP – DKV6R – Y2C8J – PKCKT - Hit Next and wait for the activation window to close, then reboot your computer.
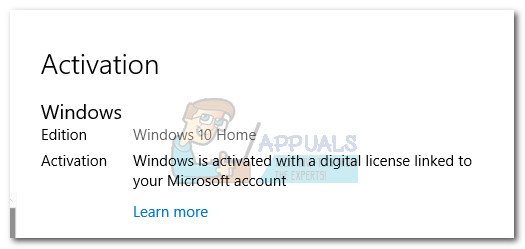
- Return to the Activation screen and see whether the error message has disappeared. If the error message has been replaced with “Windows is activated with a digital license linked to your Microsoft account”, you’ve successfully resolved the issue.
 Note: If you see the same error message, follow through with the steps below.
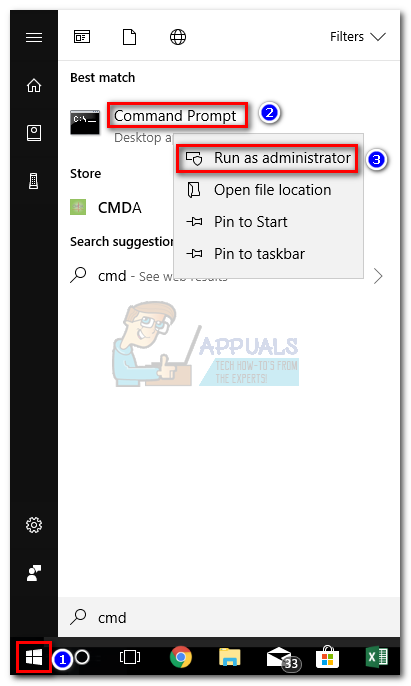
 - Open an elevated Command Prompt. To do this, click the Windows Start icon (bottom-left corner) and type “cmd”. Then, right-click on Command Prompt and choose Run as administrator.
 Note: You might be prompted to insert your security password at this point (if you have one).
 - Inside Command Prompt, type slmgr -ipk followed by your product key. This allows you to replace the generic product key with a user-specified one. The result should look like this:
slmgr -ipk xxxxx – xxxxx – xxxxx – xxxxx – xxxxx (the x placeholder represents your product key)
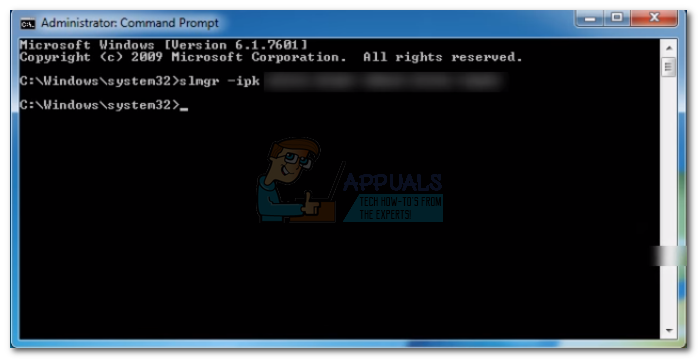 Note: The complete product key should contain a collection of 25 alphanumeric characters. Before you hit Enter, make sure that your license is still valid and use dashes every 5 characters to split the key into five distinct sections.
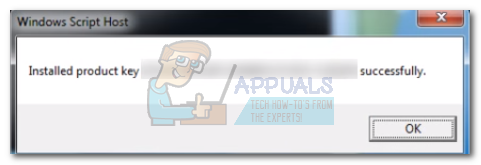
 - Double-check the key and hit Enter to submit. If the installation is successful, you see a Windows Host Script popup after several seconds.
- Exit Command Prompt and restart your computer. Keep in mind that the activation will not happen instantly. Once you have performed the steps above, give it a few hours before forcing the activation with the other methods below.
Method 3: Activate Windows via Chat Support
If Method 2 didn’t enable you to resolve the “Unable to reach Windows activation servers” error, let’s try activating your Windows version through Chat Support. Luckily, Windows 10 includes a new convenient chat option that can be used for product activation.
Note: You’ll need your Windows product key in order to use this method.
Follow the steps provided below to activate Windows though Chat support:
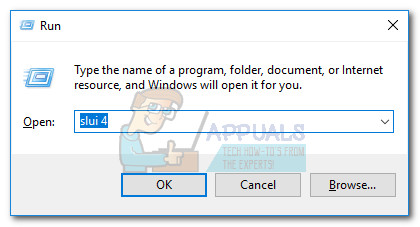
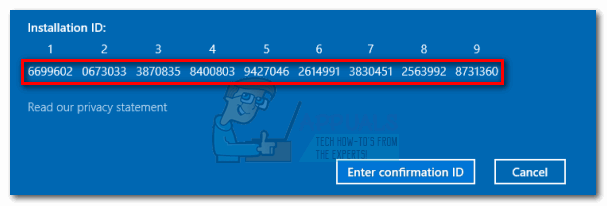
- Press Windows key + R to open a Run Window. Type “slui 4” and hit Enter to open the Installation ID screen.
- Select your country or region an click Next.
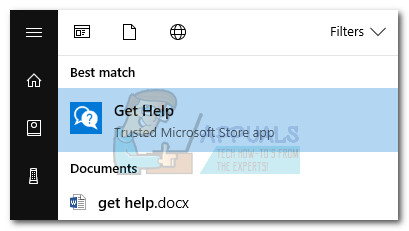
- When prompted to call the number listed on the screen, minimize the Installation ID window. Then, hit the Start button, search for “get help” and open the Get Help app.
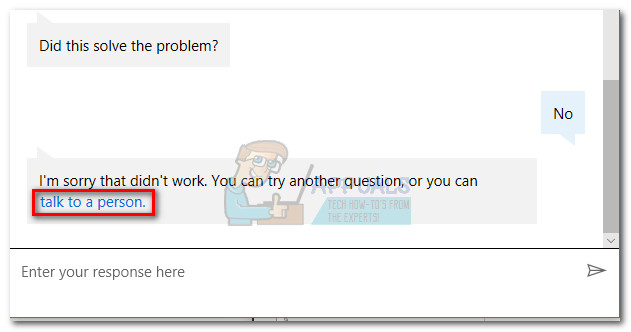
- The Virtual agent will try to suggest some troubleshooting steps, but we don’t want that. Type test and then choose No at every prompt until you get the option to Talk to a person.
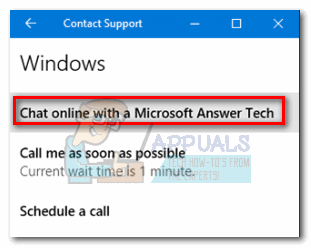
- Go to Services & Apps > Windows > Setting up and choose Chat online with a Microsoft Answer Tech. Depending on how many are waiting, it might take a while until you are greeted by the call agent.
- Once the Microsoft Answer Tech arrives, explain that you want your Windows 10 license to be reactivated. You might be asked to provide a valid Windows license key. You’ll then be asked to provide the Installation ID that you generated earlier – maximize the Installation ID window and copy it into the Contact Support window.
- The Microsoft Answer Tech will provide you with the Confirmation ID. Once you have it, return to the Installation ID window, click on Enter confirmation ID and enter it again.
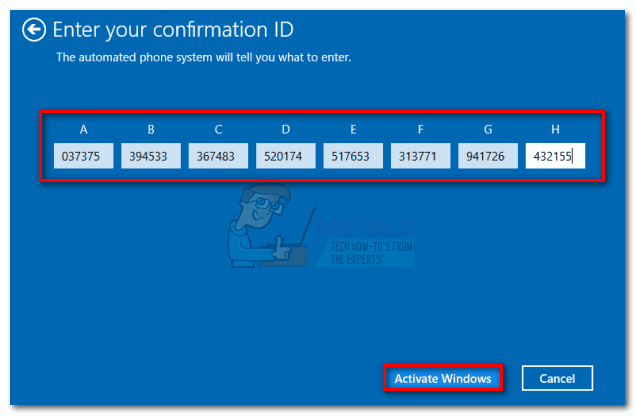
- Hit Activate Windows and wait for the license to be reactivated.
Search Command Line, Run as Administrator (otherwise will not work) C:WINDOWSsystem32>slmgr -ipk Enter 25 Product ID with Space eg aaaaa-aaaaa-aaaaa-aaaaa-aaaaa (this will not work obviously) Enter then run C:WINDOWSsystem32>slmgr -ato Enter This will enter your code and manually override the activation process.