Fix: Unable to initialize OpenGL window
Open Graphics Library is a cross-platform application programming interface (API) which is used in rendering 3D and 2D vector graphics. The API is usually used for interaction with a graphical processing unit (GPU) which in turn helps achieve hardware-accelerated rendering.

Many heavy games rely on this API for their graphics operation and use them in the gameplay. Recently, many users experienced a problem where they were unable to play the game because an error occurs which states “Unable to initialize OpenGL window”. This error is mostly associated with graphics drivers or with the game’s resolution settings. We will go through all the workarounds one by one. Check them out.
Solution 1: Changing ‘TKGRAPHICSSETTINGS.MXML’
Each game has a dedicated file which is used for loading settings whenever it is launched. These settings include the resolution, shadow details, texture details etc. We will open this file in notepad, make some changes according to your system and try launching the game.
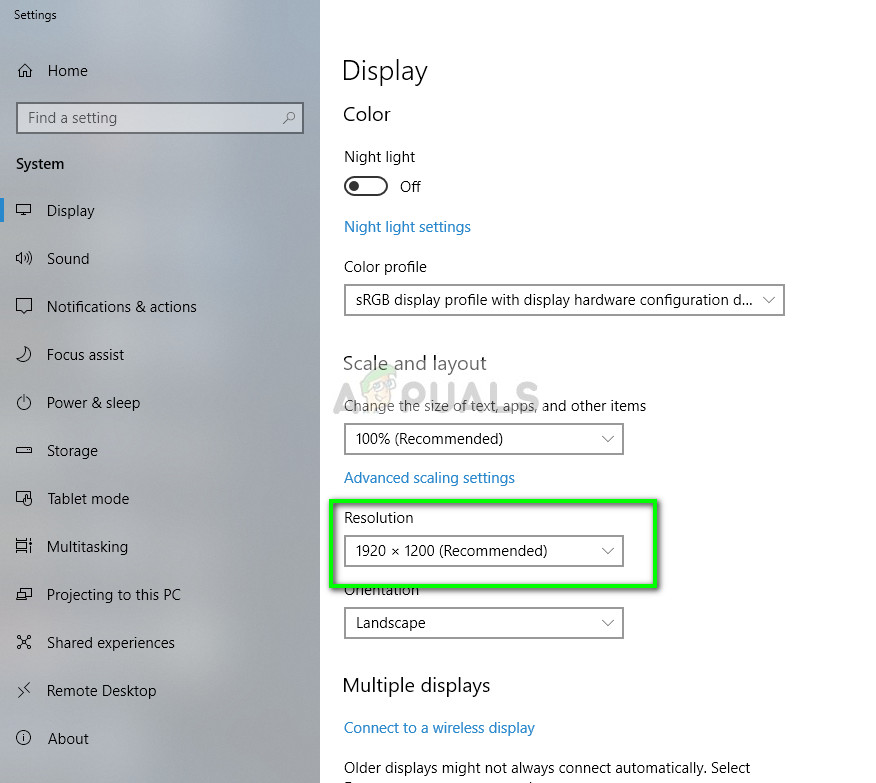
- Right-click anywhere on your Desktop and select Display settings.

- Check the resolution which your computer is currently using. Here it is ‘1920 x 1200’. Note this down as we will need it further in the solution.

- Press Windows + E to launch the File Explorer. Navigate to the following directory:
D:\Steam\steamapps\common\NoMansSky\Binaries\SETTINGS

Do note that your directory will be different. Here Steam is installed in Local Disk D. Your Steam might be installed on another hard drive. Make sure you change the navigation address according to your system.
- Right-click on the file ‘MXML’ and select “Edit with Notepad++”. This is if you have that editor installed. Otherwise, you can select Open with > Notepad.

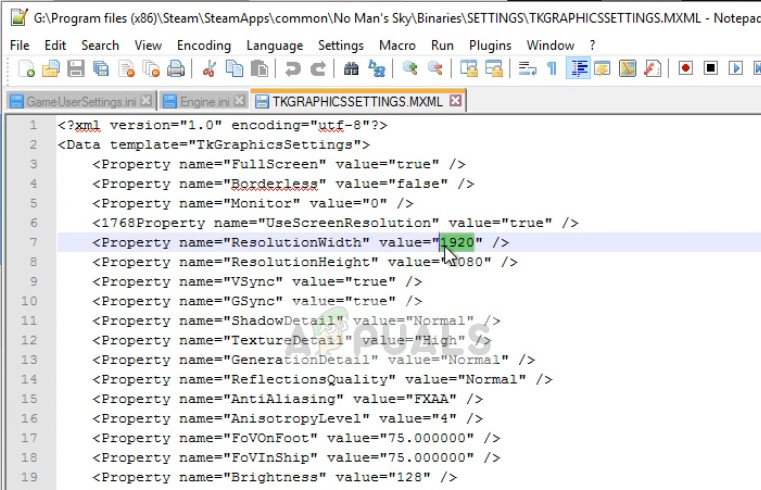
- Now once you have opened the configuration file, search for the tag ‘ResolutionWidth’ and ‘ResolutionHeight’. Check if the current resolution is set. If the values don’t match, you should change the value to what you saw earlier on.
For example, if your resolution is 1920 x 1200, the ‘ResolutionWidth’ should be ‘1920’ and the ‘ResolutionHeight’ should be ‘1200’. As you can see in the example below, the resolution set was incorrect.

- Save changes to the file and exit. Restart your computer properly, launch Steam and try playing the game.
If you still encounter an error when trying to launch the game, you can try changing the attribute ‘Fullscreen’. Change the attribute to “false”. Save changes and try launching the game.
Solution 2: Installing latest client for PS4
If you experience this error on PS Now on your PC, it is probably because the client is outdated and a new one is out. Every now and then, developers release a new version to counter some bugs or add new features to the platform. If you have an outdated client, this may introduce discrepancies.
- Download the latest PS Now client from the official website.
- Now do not uninstall the older version. Install this new version on top of the existing version.
- Once done with the installation, restart your computer completely and check if the problem at hand got solved.
Solution 3: Changing user/ logging in again
There is also a known workaround where simply relogging into Steam fixes the issue. The reason behind this is not well known but it makes sense to deduce that the currently logged in user may have some problems with the display configurations stored. Relogging might fix this issue.
- Launch your Steam client using Steam.exe
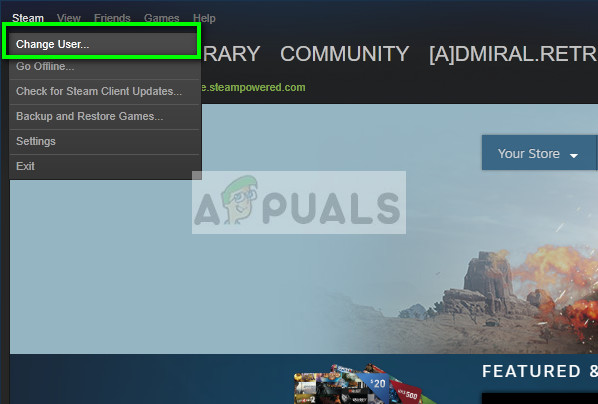
- Log out of Steam by clicking on the option of “Change User” present if you click your account title on the top right corner of the Steam client.

- After clicking the option, you will be given a login screen where you have to enter your credentials. After inputting your credentials, check the box which says Remember my password. Click the button Login.

- Once logged in, launch the game you were trying to play and check if OpenGL error still persists.
Solution 4: Updating Graphics Drivers
If you have corrupt or outdated drivers, it may be the reason why your game fails to launch or the OpenGL message pops up. Now there are two ways through which you can update the drivers: either manually or automatically. In manually, you have to personally download the driver after searching for it at the manufacturer’s website.
Before updating drivers, we will check if installing the default drivers solve the problem for us.
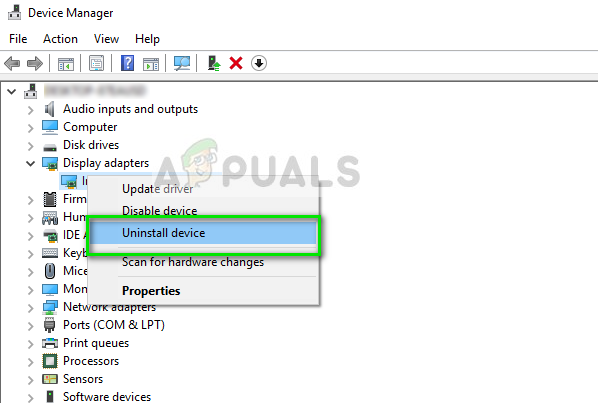
- Boot into Safe mode. Type “devmgmt.msc” in the dialogue box and press Enter. Here navigate to Display Adapters, right-click on your adapter and select Uninstall Device.

- Boot your computer into normal mode, press Windows + R, type “devmgmt.msc” in the dialogue box and press Enter. Most probably the default drivers will be installed. If not, right-click on any empty space and select “Scan for hardware changes”. Now check if the game works without any problems. If it does without any problems, good for you. If it doesn’t, carry on.
- Now there are two options. Either you can search online for the latest driver available for your hardware from the manufacturer’s website such as NVIDIA etc. (and install manually) or you can let Windows install the latest version itself (search for updates automatically).
- We will take a look at installing automatically. Right-click on your hardware and select “Update driver”. Select the first option “Search automatically for updated driver software”. Choose the second option if you are updating manually and select “Browse for driver” and navigate to the location where you downloaded.

- Restart your computer after installing the drivers, launch the game and check if you can successfully launch the game without the error message.


