Fix: Unable to Save Display Settings
The error “Unable to save display settings” usually occur when your computer is unable to save your display configurations. By display configurations, we mean the settings through which you connect more than one display into your PC or a laptop.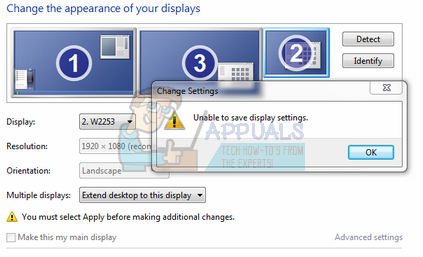
This error is very common and has relatively straightforward workarounds as well. The output of any display is the job of the graphics adapter installed on your computer. Each graphics adapter vary according to their specifications so you should have an idea on about how many screens can you connect to the computer for an extended display etc. Go through the basic troubleshooting steps before you follow the rest of the workarounds listed.
- Restart your computer.
- Make sure all wires are properly plugged in.
- Make sure that all the monitors have the desired power input they require.
Solution 1: Power Cycling the Entire Setup
Believe it or not, the simplest workaround which works for a lot of users is power cycling your computer and the entire setup. Power cycling is an act of turning off a device completely off and then on again. Reasons for power cycling include having an electronic device reinitialize its set of configurations parameters or recover from an unresponsive state or mode. It is also used to reset all the network configurations as they are all lost when you turn the device completely turned off.

You should turn off your computer and take out the main power supply for the computer and all the monitors. Wait a few minutes before you power the setup back on. Also, try plugging out all the connectors between your computer and the monitors you are trying to connect. Sometimes the monitors can get out of sync and without a hard reboot, they won’t connect to the computer.
Solution 2: Using NVIDIA Control Panel
If you are using an NVIDIA graphics card, you should use the NVIDIA control panel to manage and connect all of your displays. Like many other graphics hardware, NVIDIA also has the option to set up multiple displays directly from its control panel. It seems that some users can only add more monitors to their setup through the NVIDIA control panel as it directly controls the graphics hardware as compared to the operating system.
- Right-click any free space on your desktop and select “NVIDIA control panel”.
- Once in the control panel, click on “Display” category using the left navigation pane and click on “Set up multiples displays”.

- Now you can configure which displays do you want to use and which screen to primary set up as your main display. Consider doing a reboot if changing the settings from here doesn’t fix the problem.
Solution 3: Changing Display Resolution
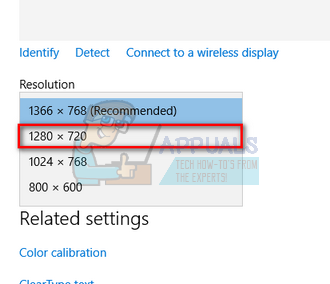
Since you are connecting multiple displays to your computer, there is always a conflict by the graphics hardware on which resolution to output. Whenever you try to clone or extend the display, the default value for the resolution output is the one which is already set on your primary display. If you have a primary monitor which has 1024×768 resolution and the other monitor which you are trying to connect has 800×600, you will definitely get this error. If you are connecting more than 1 monitor, your resolution should be set to the lowest one.
For example, if I have 3 monitors of resolutions (1024×720, 1336×768, and 800×600), you should your resolution as 800×600 for your setup to work successfully.
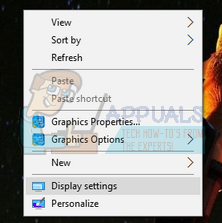
- Right-click on any empty space on your desktop and select “Display settings”.
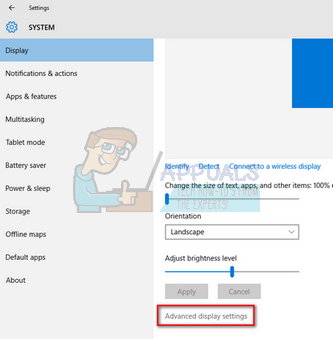
- Browse to the end of the settings page and select “Advanced display settings”.
- Change the resolution according to the explanation given above at the start of the solution.
- Save changes and exit. Restart your computer and check if the problem at hand got solved.
Solution 4: Checking Hibernating Mode
Each monitor has a feature of ‘hibernating’ or ‘sleeping’ to save energy when they are not in use. This is done to conserve power and maintain the health of the monitor as you are not using it all the time. Monitors tend to go directly into the hibernating mode and sometimes, the main system cannot start them (detect it). You should consider pressing the on/off button on your monitor to force back into the active mode for a couple of seconds during which the computer will detect it and use it for the extended display or clone.
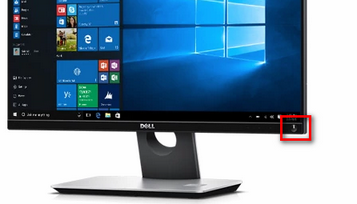
The bottom will most probably be present on any of the bottom edges of the screen. Just click it once to power off your monitor and click it again for it to go into an active state. Make sure that you have the display settings open on your computer so you can detect the monitor asap when it goes into the active mode for a couple of seconds.
Solution 5: Plugging DVI Adapter to Another Slot
The explanation behind this solution is very simple. Most graphics cards can only produce two DVI clocks, and the HDMI port shares with one of the DVI ports. It is possible that you are plugging into the two ports which are sharing that same signal. In some other configurations, graphics cards have 2 channels shared between 3DVI/HDMI ports + 1 channel per DisplayPort. If the card uses the same channel for the HDMI and DVI ports you are using, then you will definitely get the error.
This workaround is targeted to the problem where you are able to clone the monitors perfectly (as the DVI adapters will be receiving the same cycle), but you are not able to use the extended display function. Try plugging it into another DVI Port and check if the problem at hand gets solved.
Note: Another small workaround for you try is if you are using 3 monitors for display purposes, try using a USB adapter for the third one. There were cases where people were able to use the extended display function using normal DVI ports for two displays, for the third one, they had to use the USB adapter.
Solution 6: Using Duplicate Screen and THEN Use Extended Display
There were also cases which reported that using the duplicate screen before and the extended display after solved the problem for them. The reason behind this phenomenon is not known but from what it seems, you are first accepting the changes made when you set up the duplicate screen and after the configuration is saved, you change the display function to the extended version. This way you will force your graphics card to show you an extended display of your setup.
- Connect all your monitors and select “Duplicate desktop on..”.
- A prompt might come up asking you to confirm your changes. Click on “Yes”.
- After the changes are made, go back to the same monitor and click on “Extend display”.
- Save changes when prompted and check if the monitor is displaying everything correctly.
Solution 7: Updating Graphic Drivers
If all the above solutions didn’t do the trick for you, it is possible that your display drivers are either outdated or are corrupted. As we all know, Windows keeps updating itself and with that, the graphics adapters also respond to the updates by implementing some updates of their own. It can also be the case that the new drivers are not stable; hence we will first force your computer to install the default drivers. If installing the default drivers don’t work, we will install the latest drivers after downloading them from the manufacturer’s website.
We will start your computer in Safe Mode and delete the currently installed drivers for your display card. Upon the restart, the default display drivers would automatically be installed upon the detection of your display hardware.
- Follow the instructions on our article on how to boot your computer in safe mode.
- Once booted in the safe mode, right click on Windows key and select Device Manager from the list of options available.

Another way to launch the device manager is by pressing Windows + R to launch the Run application and typing “devmgmt.msc”.
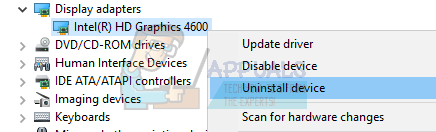
- Once in the device manager, expand the Display adapters section and right click on your display hardware. Select the option of Uninstall device. Windows will pop a dialogue box to confirm your actions, press Ok and proceed.
- Now restart your device.
Upon the restart, the default drivers will automatically be installed against the graphics hardware.
However, If installing the default drivers doesn’t solve the problem in question, you can try downloading and installing the drivers manually from your Manufacturer’s website. Manufacturers have all the drivers listed according to date and you can try installing them manually. Follow the instructions below to install the drivers manually.
- Open your Device manager as explained above in the solution and right click on your driver and select “Update Driver”.

- Now a new window will pop up asking you to whether update the driver manually or automatically. Select “Browse my computer for driver software”.

- Now browse through the folders to where you downloaded the drivers. Select it and Windows will install the required drivers. Restart your computer and check if the problem got solved.

Solution 8: Running Hardware and Device Troubleshooter
Hardware Troubleshooter is a utility present in the Windows operating system. It detects problems with your existing hardware and tries to resolve it after following a series of steps. We can try running the hardware troubleshooter and checking if this does the trick.
- Right-click on the Windows icon present at the bottom left side of the screen or Press Windows + X button and select Control panel. If this doesn’t work, press Windows + S and in the dialogue box, type “control panel” and hit enter.
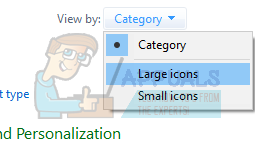
- Now on the top right side of the screen, click on View By and select Large Icons from the list of options available.
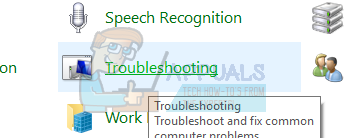
- Now select the option of Troubleshooting from the control panel.
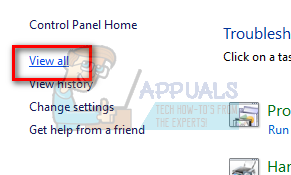
- Now on the left side of the window, select “View all” option to list all the troubleshooting packs available on your computer.
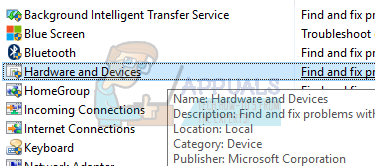
- Now select “Hardware and Devices” from the list of options available and click it.
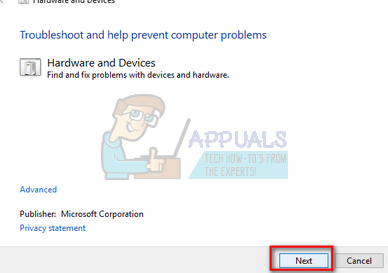
- Now select Next to the new window that pops up in front of you.
- Now Windows will start searching for hardware problems and fix them if it finds any. This process can take some time as all of your hardware is being checked. Be patient and let the process complete successfully.
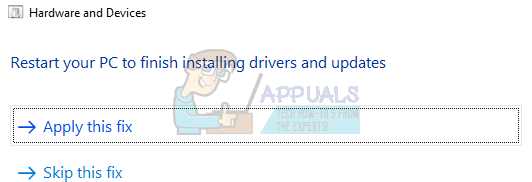
- Windows might prompt you to restart your PC in order to fix problems. Don’t delay the request, save your work and press “Apply this Fix”.
Solution 9: Using DisplayPort Connection or an Active DisplayPort Adapter
This solution is primarily targeted at people using more than one display monitors. If you are using a DVI + DVI + HDMI connection, you might not be able to use the third monitor on your setup. However, if you replace the HDMI connection with a DisplayPort one, the problem seems to get solved. To sum up we replace the above configuration with DVI + DVI + DP (DP = DisplayPort).
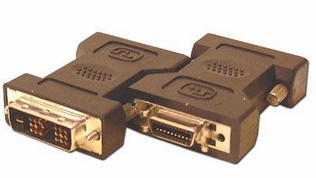
In some other cases, you might have to buy an active DisplayPort -> DVI adapter. An active DisplayPort adapter converts both single-mode and dual-mode output, so your connected video source doesn’t have to support DP++. The adapter performs the conversion from DisplayPort to VGA, DVI or HDMI instead of the source device. Active adapters are ideal for use with graphics cards, such as AMD Eyefinity, that do not output dual-mode signals.
Coming back to the workaround, you can connect using the following configuration:
HDMI (graphics card) -> DVI (Display)
DVI (graphics card) -> DVI (Display)
DP (graphics card) -> DVI (Display)
Of course, your configuration might be different from the one listed above but nonetheless consider getting an adapter to connect to the third display on your setup.
Note: Throughout the article, we have tried in giving examples for all configurations of different graphics hardware present. But there are some instances where we used some specific one for demonstration or explaining purposes. You should relate to your own graphics hardware with what is conveyed in each solution.