Fix: Unable to Connect to Nvidia
NVIDIA’s GeForce Experience is a companion application that is used to provide automatic driver updates and game optimization for GTX graphic card users. Although this is a very helpful application that makes the task of keeping drivers up to date, it can cause a lot of troubles as well. Sometimes, you might encounter the Unable to connect to NVIDIA or Unable to update drivers’ messages while GeForce is attempting to download the latest drivers. This can happen at any time and for any length of time. Although it doesn’t make your system unusable but it can make some games unplayable especially if you can’t update drivers for a long period of time.

The exact reason for this problem is unknown. Most of the time it’s an issue from their server side which usually gets fixed within a few hours or days. Sometimes the issue might be a bug in their present application which gets fixed in the next updates of the application. Your issue will most likely get solved by manually downloading and updating the drivers.
Tip
Sometimes the problem is in the NVIDIA servers or on the NVIDIA’s side. The best thing that you can do in this situation is to just wait until the problem is fixed. Wait a few hours or a day and then try to reconnect.
Method 1: Deleting NSManagedTasks.xml
This solution works for the majority of the users. All you have to do is delete the file named NSManagedTasks.xml and then either reboot or start the NVIDIA service.
Follow the instructions given below to implement this solution
- Hold Windows key and press R
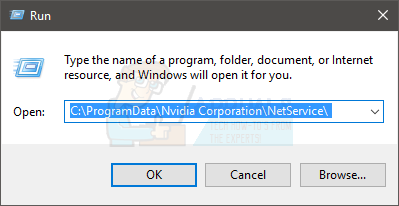
- Type C:\ProgramData\Nvidia Corporation\NetService\ and press Enter

- Click View in the File Explorer and check the option Hidden Items

- Locate the file named NSManagedTasks.xml

- Right click NSManagedTasks.xml and select Delete
- Press ALT, CTRL and DELETE keys simultaneously (ALT + CTRL + DELETE)
- Select Task Manager
- Make sure you are in the Details
- Locate NVNetworkService.exe from the process list
- Select NVNetworkService.exe and click End task
- Hold Windows key and press R
- Type services.msc and press Enter
- Locate and double click Nvidia Network Service
- Start the service by clicking the Start button
Now start and update your GeForce. You should be good to go.
Method 2: Changing Hosts File
Another solution for this is to change the value of the localhost in your hosts file. The steps for this are given below
- Hold Windows key and press R
- Type C:\Windows\System32\drivers\etc and press Enter
- Locate, right click the hosts file and select Open with
- Select Notepad from the available options and click ok
- Locate and check if the localhost has the value 0.0.0.0. If it is something like this “localhost = 0.0.0.0” then change it to “localhost = 127.0.0.1”
- Hold CTRL key and press S to save the file
- Close the file
If you can’t make the changes in the file then do the following. Basically, you will be copying the hosts file to the Desktop, make changes and then replace it back on to the original hosts file
- Follow the steps 1-2
- Locate, right click the hosts file and select Copy
- Go to your Desktop
- Hold CTRL key and press V
- Now the hosts file should be on your Desktop
- Follow the steps from 3-7 that are given above
- Right click the hosts file (from the Desktop) and select Copy
- Hold Windows key and press R
- Type C:\Windows\System32\drivers\etc and press Enter
- Hold CTRL key and press V
- Select Replace the file in the destination when it asks
Now you should be good to go.
Method 3: Automatic Driver Updates
Downloading the Automatic Driver Updates from the NVIDIA’s official website also solves the problem for a lot of users. This utility will automatically update your drivers.
- Go here and click Download in Automatic Driver Updates section

- Run the file once it is downloaded. Follow any additional on-screen instruction
This updater will automatically update your GeForce and the problem should be solved
Method 4: Uninstall and Re-install
If nothing else works for you then you have to do it the old school way. Just simply uninstall the GeForce program, re-download and re-install it. It will fix the issue that you are having
- Hold Windows key and press R
- Type appwiz.cpl and press Enter
- Locate GeForce Experience program, select it and click Follow any additional on-screen instructions
- Go here and download the GeForce Experience Install the program and the problem should be solved now.
Method 5: Manual Installation
Your last resort is to manually download and install the driver yourself. You can simply download the driver from the NVidia’s website and then install it via the device manager.
Follow the instructions below to manually install the drivers
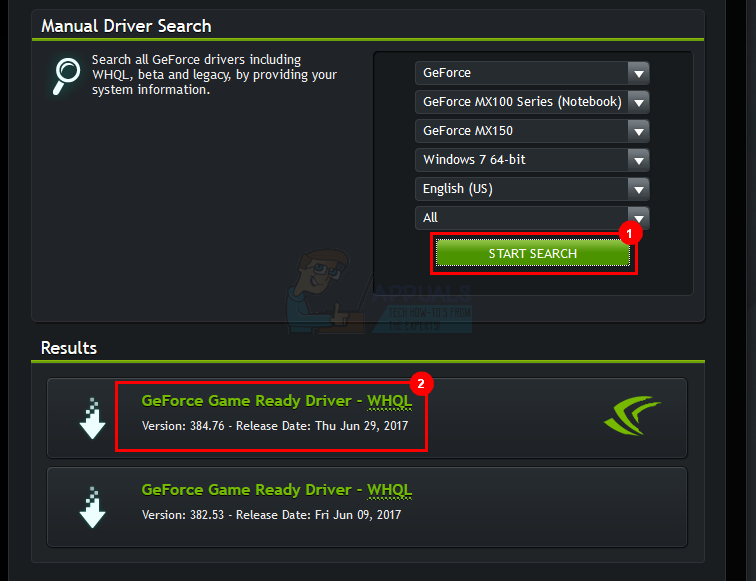
- Go here and search for the driver under section Manual Driver Search.

- Click the driver that you want to download (probably the latest one) from the search results
- Click Agree & Download
- Hold Windows key and press R
- Type devmgmt.msc and press Enter
- Expand Display Drivers by double clicking it
- Right click your Graphic card and select Update driver software…
- Select Browse my computer for driver software
- Click Browse
- Navigate to the location where you downloaded the driver package in step 3 and select it
- Click Next and follow any additional on-screen instructions
Your problem should be solved once the driver is installed.