Fix: The trust relationship between this workstation and the primary domain failed
When the error “The trust relationship between this workstation and the primary domain failed” happens, users are usually blocked from logging into their system via the domain, and see the error message right after entering their login details. This error means the connection between the workstation and the domain controller is broken, typically because the workstation’s secure link with the domain is disrupted.

The most common reason is when a computer’s account in the domain goes out of sync, often due to a password mismatch between the local computer and the domain’s Active Directory. Changes in network settings or problems with the domain controller can also cause this issue.
Here are several methods that can help in solving this error.
1. Check DHCP Configuration
Network issues between the workstation and the domain often result from incorrect settings. Properly configuring the DHCP server is crucial, as it provides the necessary IP address and DNS for connecting to the domain controller. Incorrect network details can break this connection and cause errors. Checking DHCP settings helps restore proper communication with the domain.
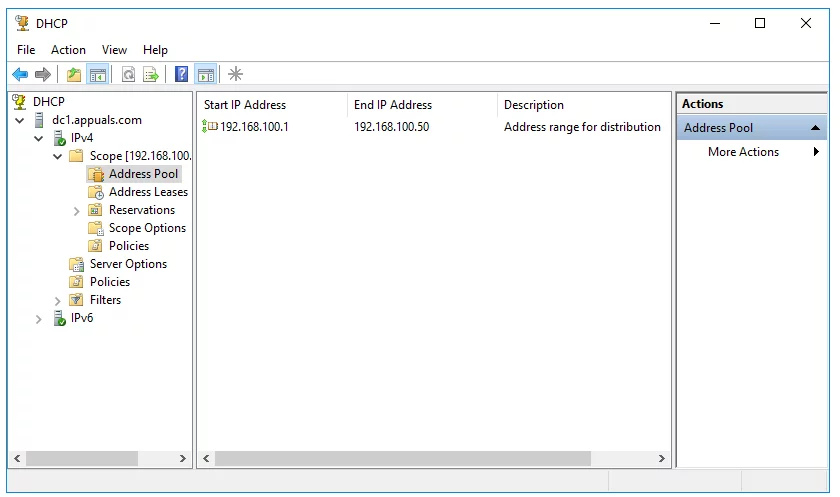
- Press Windows + R, type dhcpmgmt.msc, and hit Enter.
- Expand your server to appuals.com\IPv4\Scope. If your network is 192.168.1.0/24 but configured as 192.168.100.1/24, you need to change the DHCP configuration.
- Close Device Management.
1.1. For a TP-Link router
- Open an Internet browser like Google Chrome, Mozilla Firefox, or Edge.
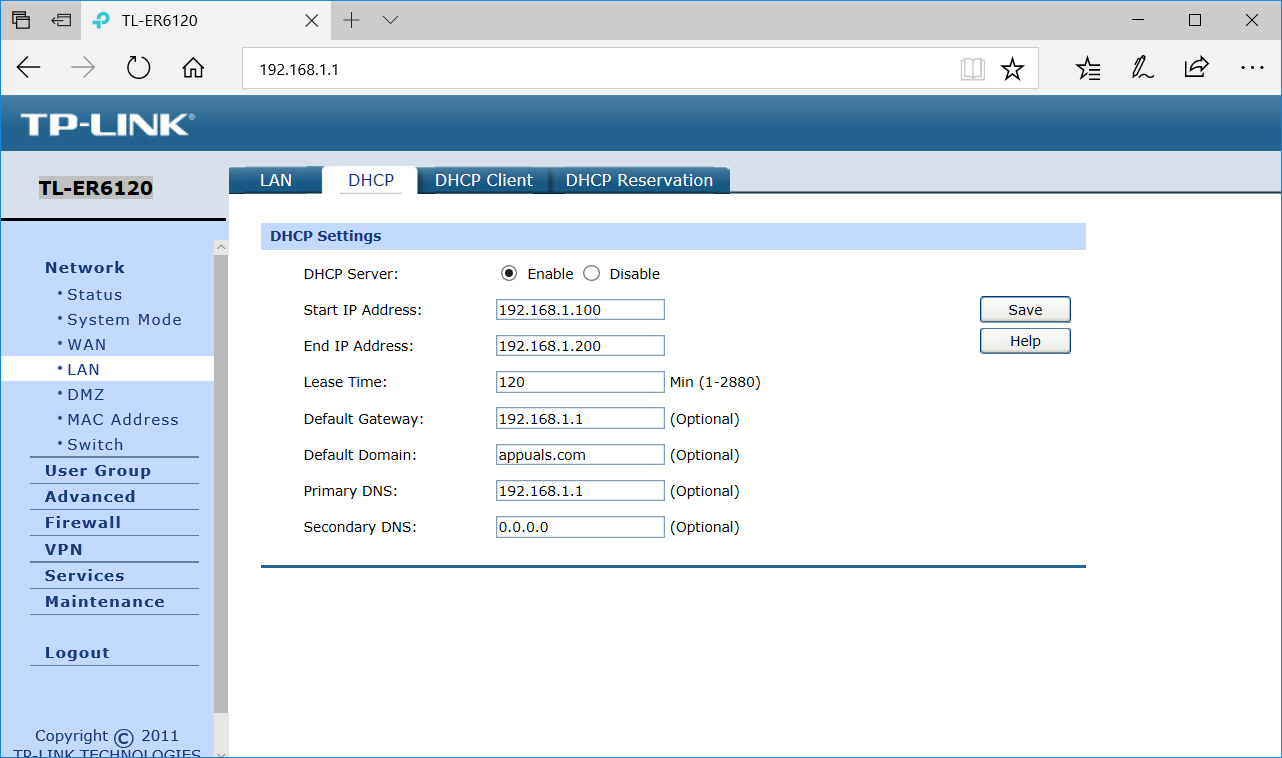
- Type the router IP address to access it.
- Under the Network tab, select LAN, then DHCP to inspect your DHCP settings. In this case, DHCP is enabled and set from 192.168.1.100 to 192.168.1.200, which is correct.
- Close the browser.
2. Rejoin a Computer to a Domain
Rejoining a computer to the domain can fix the trust relationship error by resetting the secure link with the domain controller. Removing and re-adding the machine creates a new computer account in Active Directory, which updates the computer’s credentials and builds a new trust connection, allowing the workstation to authenticate correctly with the domain controller.
- Log on to Windows 10 using a local Administrator account.
- Press the Windows key and press E to open File Explorer.
- Right-click This PC and choose Properties.
- Click Advanced System Settings.
- Select the Computer Name tab.
- Click Change to add the machine to the Workgroup.
- Choose Workgroup and type the name (e.g., WORKGROUP).
- Click OK.
- Enter the domain Administrator account and password, then click OK.
- Click OK and then OK again.
- Close System Properties.
- Restart your Windows machine.
- Log on to Windows 10 using the local Administrator account.
- Press the Windows key and press E to open File Explorer.
- Right-click This PC and choose Properties.
- Click Advanced System Settings.
- Select the Computer Name tab.
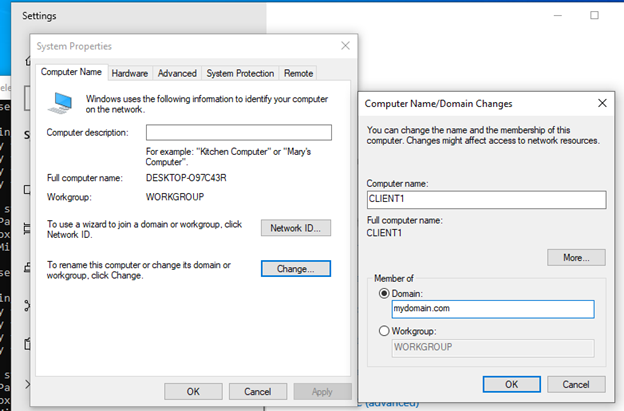
- Click Change to add the machine to the domain.
- Enter the domain (e.g., appuals.com).
- Click OK.
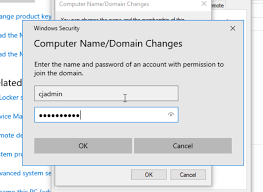
- Enter the domain Administrator account and password, and click OK.
- Click OK and then OK again.
- Close System Properties.
- Restart your Windows machine.
- Log on to Windows 10 using the domain user account.
- Enjoy working on your machine.
3. Reestablish Trust through PowerShell
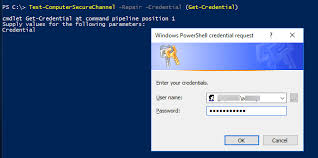
Using PowerShell can efficiently fix the trust relationship error without removing the computer from the domain. The Test-ComputerSecureChannel command checks the secure channel, and the -Repair option fixes it. This method resets the connection with the domain controller quickly, saving time and reducing disruptions, which is why administrators prefer it.
- Log on to Windows 10 using a local Administrator account.
- Click the Start menu and type PowerShell.
- Right-click PowerShell and choose Run as Administrator.
- Press Yes to confirm.
- Type $credential = Get-Credential and press Enter.
- Enter the domain admin account and password, then click OK.
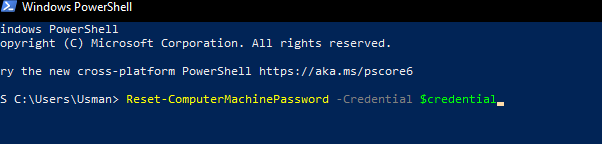
- Type Reset-ComputerMachinePassword -Credential $credential and press Enter.
- Close PowerShell.
- Restart your Windows machine.
- Log on to Windows 10 using the domain user account.
4. Add Domain Controller to Credential Manager
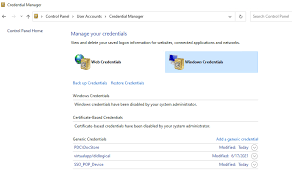
Adding the Domain Controller to the Credential Manager lets the system store the right login details for connecting to the domain controller. This ensures the computer has the needed login info saved, helping to fix trust issues and prevent login problems. It makes communication with the domain more reliable.
- Log on to Windows 10 using a local Administrator account.
- Hold the Windows logo key and press R.
- Type control.exe /name Microsoft.CredentialManager and press Enter to open Credential Manager.
- Select Windows Credentials.
- Enter the website or network location address and your credentials.
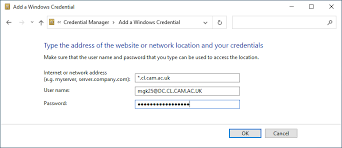
- Click OK.
- Close Credential Manager.
- Restart your Windows machine.
- Log on to Windows 10 using the domain user account.
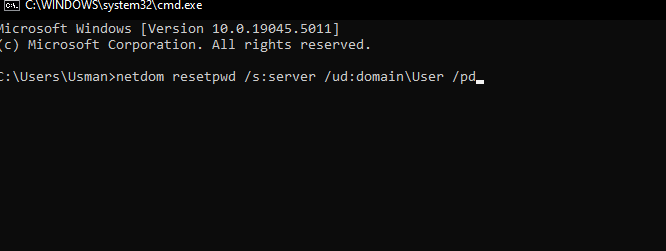
5. Use Netdom.exe to Reset a Machine Account Password
You can reset the computer’s account password using the Netdom.exe tool. This action re-establishes a secure connection between the workstation and the domain by updating the credentials in the Active Directory. It effectively resolves any mismatches causing the trust problems without needing to rejoin the domain, making it a straightforward and efficient solution.
- Log on to the Windows Server using a domain Administrator account.
- Hold the Windows logo key and press R.
- Type cmd and press Enter to open the Command Prompt.
- Type netdom resetpwd /s:server /ud:domain\User /pd:* and press Enter, where s is the domain server name, domain is the domain name, and User is the account that cannot connect to the domain controller.
- Close the Command Prompt.
- Switch to the Windows client machine.
- Restart the Windows machine.
- Log on using a domain user account.
- Enjoy working on your machine.
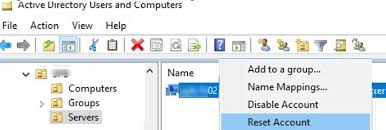
6. Reset Computer Account
To simplify the relationship between your computer and the domain, you can reset the computer account. This action refreshes the connection between your computer and the network domain, clearing outdated details and fixing mismatches. It helps your computer connect correctly to the network again without needing to disconnect and reconnect fully, saving time and effort.
- Hold the Windows logo key and press R.
- Type dsa.msc and press Enter to open Active Directory Users and Computers.
- Expand the domain name; for example, appuals.com.
- Select Computers.
- Locate the computer account that cannot connect to the domain, such as Jasmin.
- Right-click the computer (Jasmin) and choose Reset Account.
- Click Yes to confirm the account reset.
- Click OK.
- Close Active Directory Users and Computers.
- Restart the Windows 10 machine.
- Log on with your domain user account.
- Enjoy working on your Windows machine.
7. Perform a System Restore
If other solutions don’t work, try using System Restore as a last option to fix the trust relationship issue. This method can take your system back to an earlier state, undoing recent changes that might have broken the secure link between your computer and the domain. It won’t affect personal files but will restore system settings, potentially fixing the error and re-establishing the trust relationship.
Learn how to perform a System Restore.
Thanks , well explained.