[Fix] ‘This File came from Another Computer and might Blocked’
If you have ever transferred files from another computer, you might have experienced message stating that this file came from another computer and might be blocked. This is an annoying message and you may experience it on a number of occasions such as when transferring files from another computer or transferring data from another PC.
Windows takes this security action to help protect your computer against files which are not verified and primarily belong to another computer. Although this might prove useful in some cases, it becomes a nuisance when this protocol becomes implemented in a lot of files. There are a few ways through which you can remove this error message for good.
Solution 1: Changing Group Policy or Adding a Registry Key
One of the easiest ways to make this problem go away is to edit your group policy. Editing the group policy makes changes across the computer and the error doesn’t trigger whenever you open another computer’s files.
- Press Windows + R to launch the Run application. Type “gpedit.msc” in the dialogue box and press Enter to launch your Group Policy Editor.
- Now navigate to the following path using the navigation pane present at the left side of the screen:
User Configuration > Administrative Templates > Windows Components > Attachment Manager
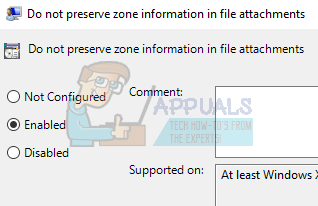
- Once in the above file path, look on the right side of the pane and double-click the entry “Do not preserve zone information in file attachments”.

- Enable the setting to “Enabled”. Press Apply to save changes and exit the menu.
- Reboot your computer and check if you still get the error message. Try transferring another file from the same origin. It is possible that existing files on your computer might already have their zone information saved.
We can also try adding a registry key if the group policy doesn’t work or you don’t have access to it on your system. In this case, we will add a registry key in your user configuration policies. This will hopefully fix this problem for all the incoming files to your computer. However, the same cannot be said with confidence about the files already present on your computer.
- Press Windows + R to launch the Run application. Type “regedit” in the dialogue box and press Enter. This will launch the registry editor of your computer.
- Once in the Registry Editor, navigate to the following file path:
Computer\HKEY_CURRENT_USER\Software\Microsoft\Windows\CurrentVersion\Policies
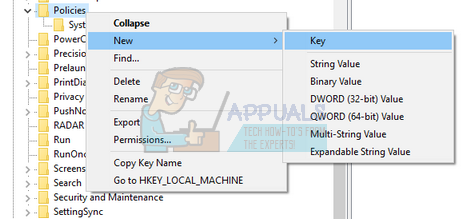
- When in “policies”, right-click it and select New > Key. Name the new key as “Attachments”.
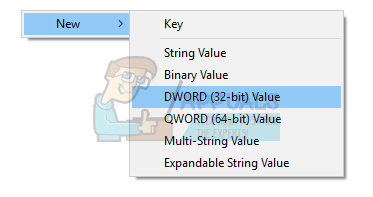
- Now on the right pane, right-click on any empty space and select New > DWORD
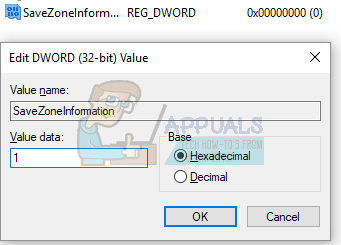
- Save the new registry key as “SaveZoneInformation” and set its value to 1.
- Reboot your computer and check if the error message goes away.
Solution 2: How to Unblock Files in a ZIP folder
If you are downloading a lot of files in bulk (ZIP files), you might come across the problem where you have to unblock each and every file one by one. This can be tiresome and can prove to be quite a nuisance. In this case, try unblocking the .ZIP file first and then extract the data. It seems that whenever you extract the files, the individual files will be marked in the same time zone as the .ZIP file. If you unblock the ZIP file first, the individual files won’t have any problem.
- Right-click on the ZIP file, and open properties. At the bottom of the options, you will see an unblock option.
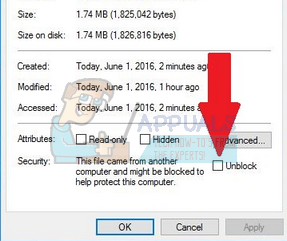
- Check that option, click Apply and exit. Now you can continue extracting the files without the error message in any one of them.
Another workaround for this problem is to copy all the files to .ZIP folder and extract them again.
- Copy all files to a folder.
- Right-click on the folder and select:
Send to > Compressed folder

- After the compressed folder is made, extract it back to an accessible location. Reboot your computer and check if the error message still persists.
Solution 3: Unblocking entire Directories
Another easy way is to unblock entire directories using PowerShell. However, you should be absolutely certain that all the files contained in that directory are perfectly safe and won’t harm your computer in any way. For PowerShell 3.0, you need Windows Management Framework 3.0 installed on your computer.
- Press Windows + S to launch the search bar. Type “PowerShell” in the dialogue box, right-click on the result and select “Run as administrator”.
- Once PowerShell is opened, enter the following command and press Enter.
dir C:\Downloads -Recurse | Unblock-File
Or if this doesn’t work, try
dir C:\Downloads | Unblock-File

- This command will unblock all the files contained in any directory. You can change the file path to whatever folder/directory you want. Reboot your computer and check those files again.
Solution 4: Deleting Data Streams to get rid of Security Message
Alternatively, you can delete all the streams marked as “:Zone.Identifier:$DATA”. This will get rid of all the security blocks instantly. Whenever you download a file from the internet, they get marked with a stream identifying that they don’t belong to this computer. We can use the utility of AlternateStreamView and try deleting all the data streams.
Note: Appuals has no link to any link to any third-party applications. The applications are listed for the benefit of the reader and Appuals will not be responsible for any damage whatsoever.
- Download AlternateStreamView from the official website.
- After extracting it in an accessible location, open its exe file.
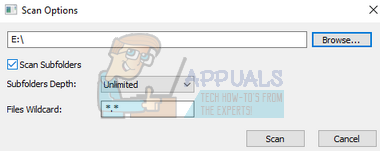
- You will be asked to select the scan location. Click “Browse” and browse to the directory. Press Scan to start scanning.
- Now after scanning, the program will display all the streams attached to your files.
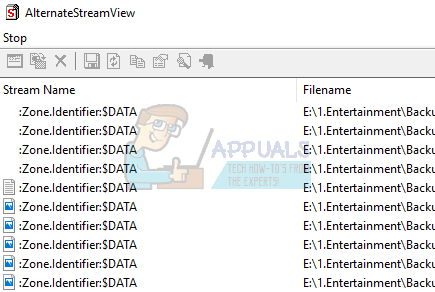
- Browse through them to find streams “:Zone.Identifier:$DATA”. Right-click on it and select “Delete Selected Streams”. This will now remove all the selected streams from your files.

- Reboot your computer and check if the security message went away.
Solution 5: Zipping and Unzipping
There seems to be a workaround for this error, some users discovered that by zipping and unzipping the file in question through Winrar or any other “Extraction” Software. In order to do that:
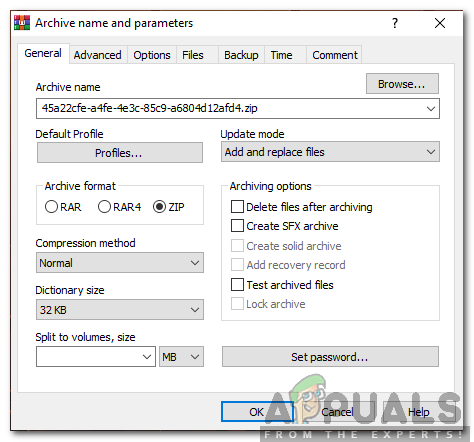
- Right-click on the file in question and select “Add to Archive“.
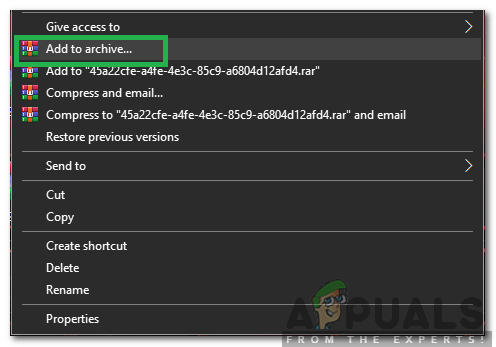
Clicking on the “Add to Archive” option - Check the “Zip” option and click on “OK“.
Checking the “Zip” option - Open the created zip file and click on “Extract“.
- Try to open the file now and check if the issue persists.
Discovered this with game associated files. I’ve noticed it has been screwing with my game textures in a few different titles. I’m glad you are showing this because manually unblocking 100,000 files would not be fun lol. The solution works and sticks and should help alleviate some problems.