3 Verified Solutions of ‘The remote connection was not made’ Error
If you get the ‘The remote connection was not made because the name of the remote access server did not resolve’ error message while connecting to a VPN, it can be either due to the VPN server issue or an issue with your PC’s connection. Back in the days of Windows 7, this error was given a special error code which was 868, however, on Windows 10, the error code has been removed.
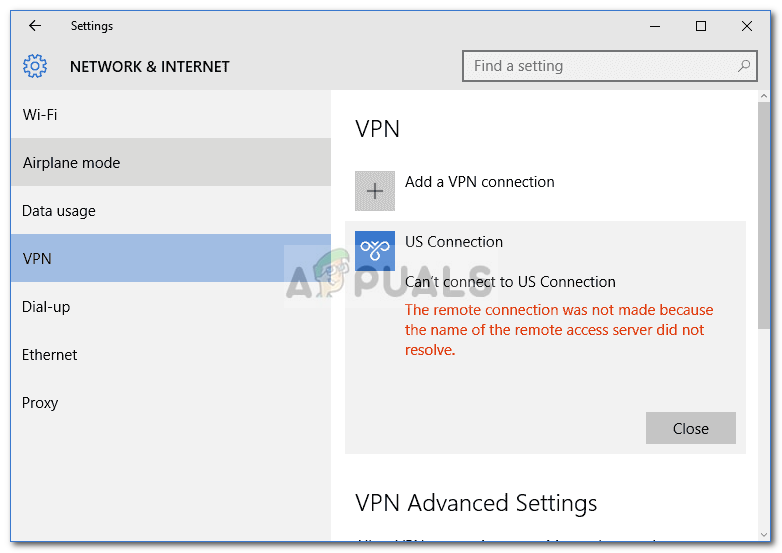
VPNs are being used almost everywhere these days and some of us use them as our primary connection. However, if you are caught in the midst of such VPN related errors, things can be really frustrating. Nonetheless, you do not have to worry anymore as this article will walk you through the possible solutions that you can implement.
What causes the ‘The Remote Connection was not Made Because the Name of the Remote Access Server did not Resolve’ Error on Windows 10?
Well, there are not many factors which can cause the issue, however, whenever it occurs, it is usually due to the following reasons —
- VPN Server: In some cases, the error can be due to a server issue with the network that you are trying to connect to.
- System’s connection: Another cause of the error can be your system’s network connections. Sometimes, it can be due to your DNS cache etc.
- Third-party antivirus: The third-party antivirus that you have installed on your system can also trigger the error. Your antivirus might be imposing restrictions due to which the error emerges.
You can isolate your issue by following the solutions provided down below. We urge you to follow them in the same order as provided down below to get yourself a quick resolution.
Solution 1: Flushing DNS and Resetting Winsock
As we mentioned above, the error can sometimes be triggered due to your DNS cache. Additionally, your network connections can also play a role in creating the error. Hence, to circumvent the issue, you will have to flush your DNS cache and reset Winsock. Here’s how to do this:
- Press Windows Key + X and select Command Prompt (Admin) from the list to open an elevated command prompt.
- Once the command prompt opens up, type in the following command:
ipconfig /flushdns

Flushing DNS Cache ipconfig /registerdns
- Afterward, enter the following commands:
ipconfig /release
ipconfig /renew
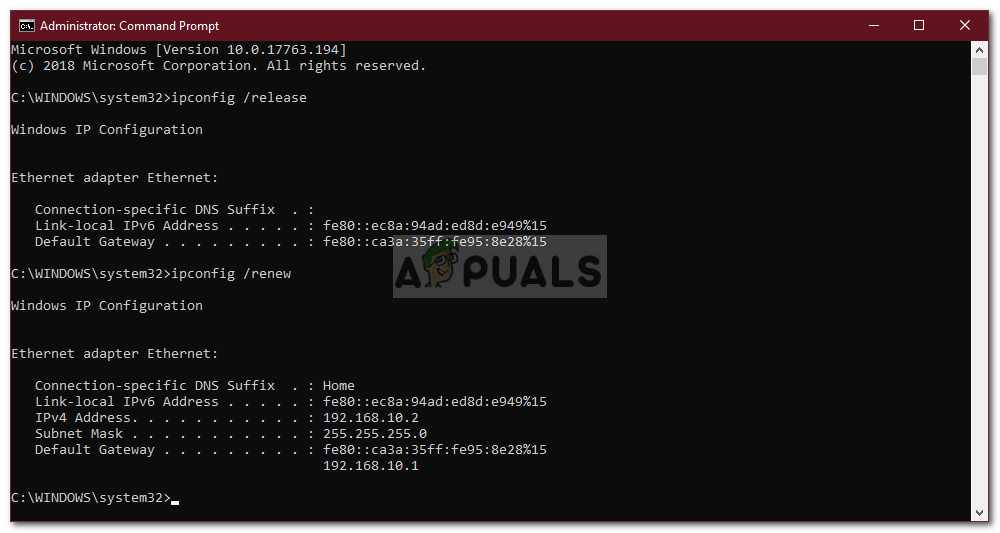
Renewing IP - Then, to reset Winsock, type in the following command and press Enter:
Netsh winsock reset
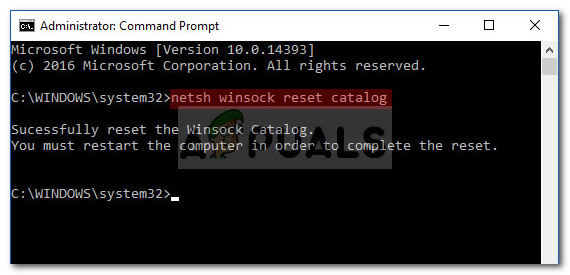
Resetting Winsock - Restart your system and then check if it fixes the issue.
Solution 2: Disable Third-party Antivirus
You can also try to deal with the issue by disabling your third-party antivirus. Antiviruses, once installed, impose certain restrictions on your system’s activity which include network connections. Therefore, to eliminate the possibility of your third-party antivirus causing the issue, you will have to disable it. Once disabled, try to connect to your VPN again.
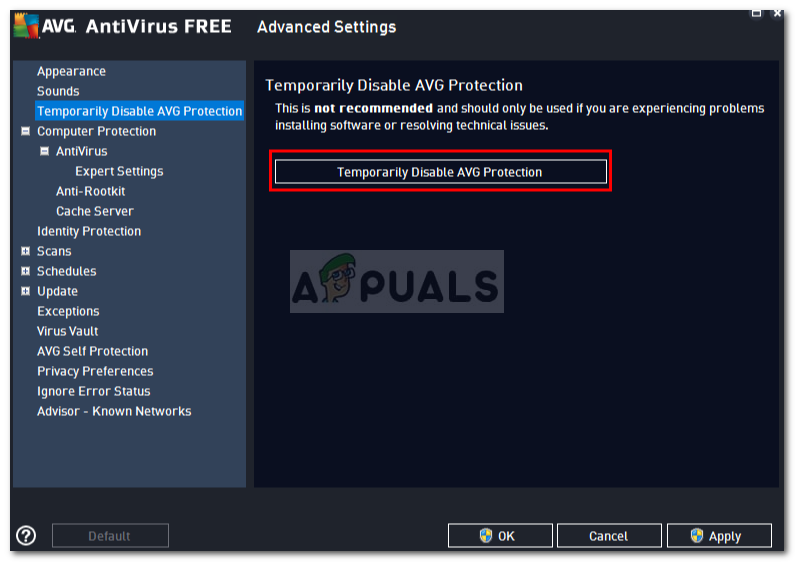
Solution 3: Turn off Windows Defender Firewall
The Windows Defender Firewall is responsible for managing the incoming and outgoing connection requests. In some cases, you are not able to connect to your VPN because the Windows Defender Firewall is blocking the request. In such a case, you will have to disable it for a while and see if it resolves the issue. To disable Windows Firewall, do the following:
- Go to the Start Menu and open up the Control Panel.
- Set the View by to Large icons and then click Windows Defender Firewall.
- On the left-hand side, click ‘Turn Windows Defender Firewall on or off’.
- Make sure ‘Turn off Windows Defender Firewall’ is selected under both the settings and then click OK.
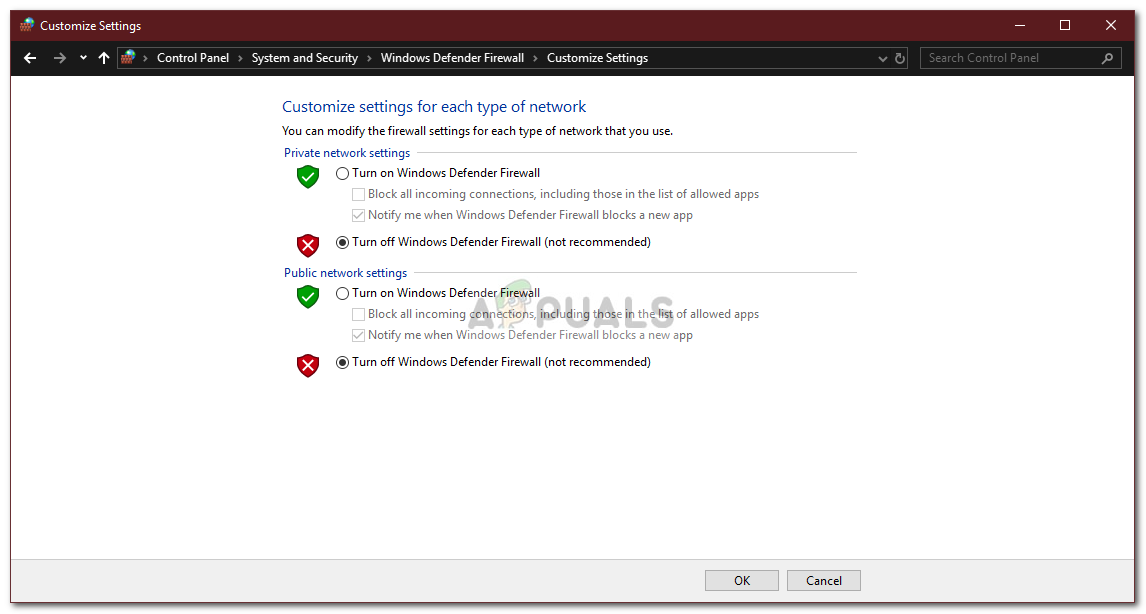
Turning off Windows Defender Firewall - Check if it resolves the issue.
If this still doesn’t fix your issue, you will have to contact your VPN Provider and submit your queries there.


