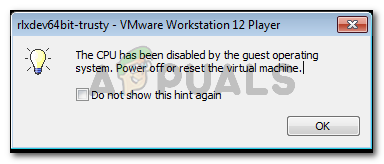
Fix: The CPU has been disabled by the guest operating system
Power off or reset the virtual machine
Several users have been complaining about getting the “CPU has been disabled by the guest operating system” error when trying to play a virtual machine inside the VMware Workstation application. Most affected users report that the issue suddenly started occurring after the image was functioning fine for. This doesn’t seem like an OS-specific error since users have reported this occurring with Linux, MacOS and Windows images.
What is causing The CPU has been disabled by the guest operating system error
We investigated this particular issue by looking at various user reports. As it turns out, there are several scenarios that will lead to the apparition of this particular issue. Here’s a list of common scenarios that are known to trigger this error message:
- The guest machine is not able to start correctly – The most common causes of this error is a disk configuration problem or a recent corruption problem to your guest machine that made it unusable.
- VT-X is not enabled from BIOS settings – Another reason why this issue occurs is when the VT-X technology (also known as Intel Virtualization) -which VMware Workstation needs- is disabled from the BIOS settings.
- CPU ID is breaching the license agreement – There are several scenarios in which the OS image can no longer start because the software is detecting an incompatible CPU. This can be resolved by masking the CPU ID.
If you’re struggling to resolve this particular issue, this article will provide you with a couple of troubleshooting methods that will help your cause. Below you have a few methods (with step-by-step instruction) that other users in a similar situation have successfully used to get the issue resolved.
For the best results, follow the methods below in order until you encounter a fix that is successful in resolving the issue for you. Let’s begin!
Method 1: Enable VT-X (Intel Virtualization) from BIOS Settings
Since this is one of the most common scenarios, let’s start by ensuring that VT-X is enabled in your BIOS settings. Your machine might have shipped with VT-X disabled by default, a 3rd party application might have done it for you or you might have manually disabled the technology in the past.
In any case, every motherboard manufacturer will include an option to disable or enable the VT-X technology in their BIOS settings. It’s just a matter of finding out the exact path of doing so.
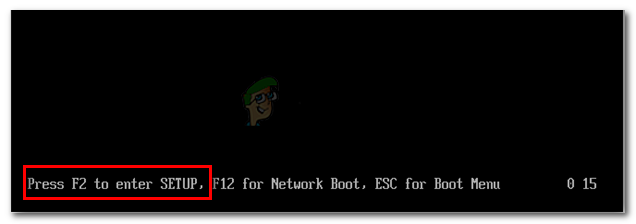
Keep in mind that the exact steps for accessing the BIOS setting will be different according to your motherboard manufacturer. But there is some common ground – you’ll need to press the BIOS (SETUP) key during the initial startup procedure to gain entry into your BIOS Settings.
Typically, the BIOS key is either one of the F keys (F2, F4, F8, F10, F12) or the Dell key (for Dell computers). If you don’t know your BIOS key, you can spot it during the very first screen (referred to as SETUP). Additionally, you can search for your specific BIOS key online according to your motherboard model.
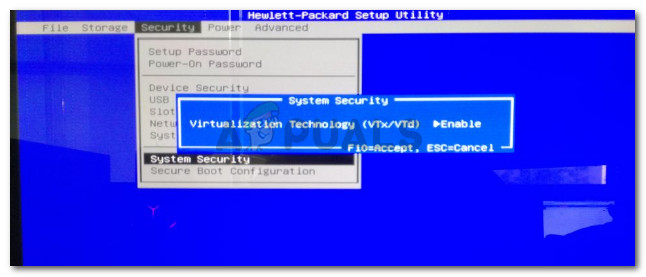
Once you gain entry into your BIOS settings, you can typically find the Virtualization Technology entry listed as VTx/VTd. Enable it, save the changes in your BIOS settings and reboot your machine.
At the next startup, open the same image in VMware Workstation and see if the issue has been resolved. If you’re still encountering the same issue, move down to the next method below.
Method 2: Performing a CPU ID masking procedure
The “CPU has been disabled by the guest operating system” error can also occur if a security check disables the processor – if an unwelcomed processor is found. This typically happens if you try to move the image from a machine with an Ivy Bridge architecture to another with Sandy Bridge architecture (or vice versa).
Whenever this scenario occurs, your system will refuse to boot up the image unless the CPU ID is masked. This modification can be done pretty easily if you have VMware ESXi or a different premium product, but with VMware workstation, there is no GUI option to do this.
However, there is a way to mask the CPU ID by modifying the VMX file of the image. To do this, you’ll need a powerful text editor like Notepad++. Here’s a step by step guide on how to edit the VMX file of the image in order to resolve the “CPU has been disabled by the guest operating system” error:
- Make sure you have Notepad++ installed on your system. If you don’t, visit this link (here), and click on the Download button to download the installation executable.

Downloading the Notepad++text editor - Open the Notepad++ installation executable and follow the on-screen prompts to install it on your system.
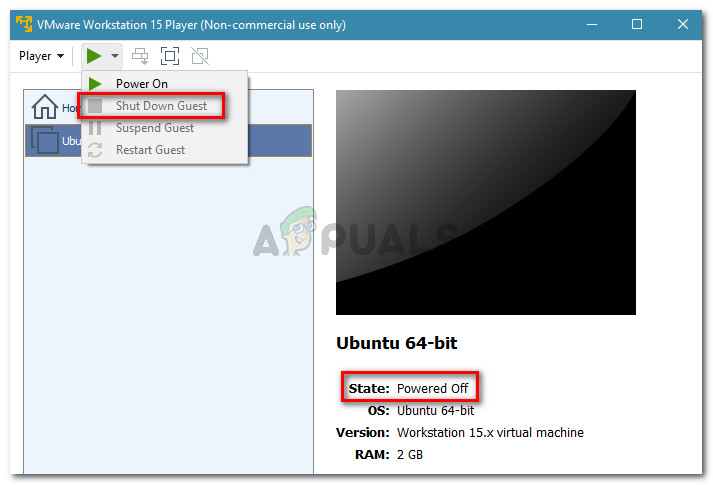
- Once the text editor is installed, make sure that the State of your image is set to Powered Off (not suspended). You can do this by clicking the drop-down menu associated with the Play icon and choosing Shut down guest from the list.

Making sure that the State of the Guest machine is set to Powered OFF - Next, make sure that the guest machine is selected, then click on Edit virtual machine settings (from the right-hand pane).
Click on the Edit virtual machine settings link - In the Virtual Machine Settings menu, select the Hardware tab and then click on the Hard Disk (SCSI) device. Then, move over to the right pane and view the exact location of the Disk file. Either copy it or store it in your memory because you’ll need to get to that path in the next step.
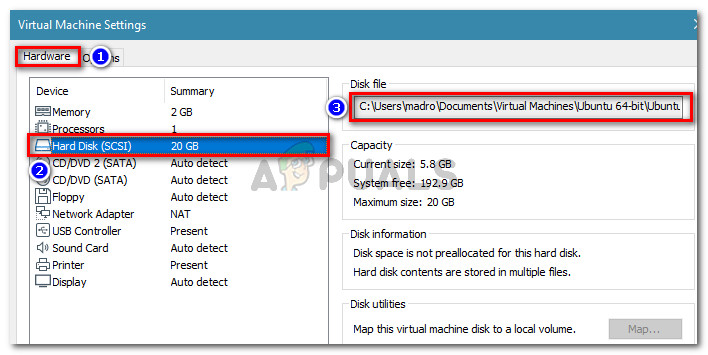
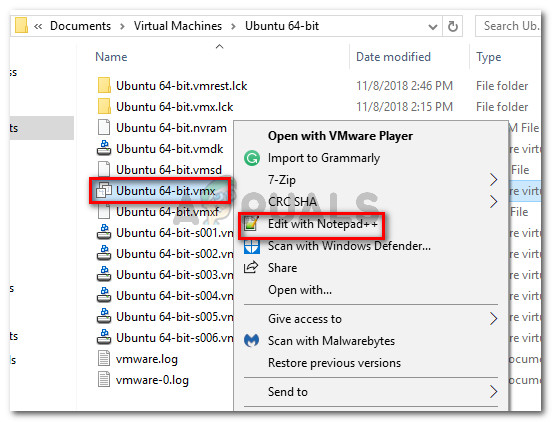
Hard Disk (SCSI) and view the location of the Disk file” width=”708″ height=”355″> Go to Hardware > Hard Disk (SCSI) and view the location of the Disk file - Open File Explorer (or the Finder app if you’re on Mac) and navigate to the Disk file location. You should see a bunch of different file types. Among them, you should find a file that has the .vmx extension. When you spot it, right-click on it and choose Edit with Notepad++.
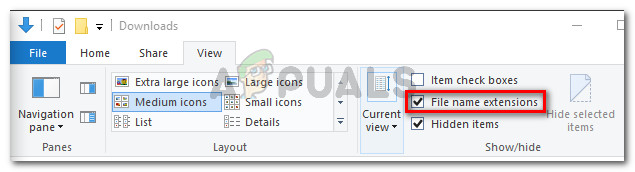
Right-click on the .vmx file and choose Edit with Notepad++ Note: If you’re on Windows 10 and you can’t see the extensions in File Explorer, access the View tab using the ribbon at the top and make sure that the box associated with File name extensions is checked.
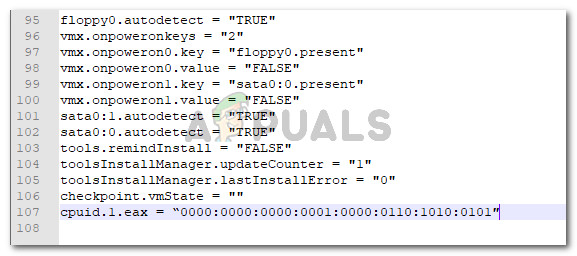
Enabling File Name Extensions from File Explorer - With the .vmx file opened with Notepad++, scroll down to the bottom of the configuration file and insert the following code line:
cpuid.1.eax = “0000:0000:0000:0001:0000:0110:1010:0101″
- Once the code line is inserted at the end of the document, hit Ctrl + S to save the changes and close Notepad++.
Inserting the config option at the end of the configuration file - Start the virtual machine again from the Wmware Workstation Player application. The guest machine should boot successfully without the “CPU has been disabled by the guest operating system” error message.
If this method was not successful, move down to the final method below.
Method 3: Creating a new virtual machine
If the two methods above didn’t enable you to resolve the “CPU has been disabled by the guest operating system” error, you either have a disk configuration problem or you recently performed an operation that corrupted your virtual machine.
But regardless of what caused the error, you can resolve it by creating a new guest machine from scratch. But keep in mind that doing so means that you’ll lose any data stored within the guest machine.
If you decide to do this, here’s a quick guide on creating a new virtual machine:
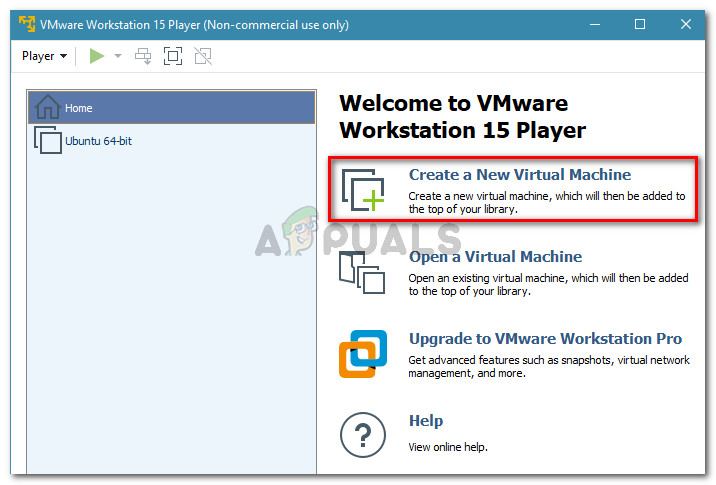
- Open VMware Workstation, select the Home screen from the left pane, then click on Create a new Virtual Machine from the right pane.
Creating a new virtual machine - Next, select the Installer disk image file (iso) toggle and hit the Browse button to select the image. The wizard will automatically detect the operating system and prepare for the Easy Install operation. Once the ISO file is loaded, click the Next button.

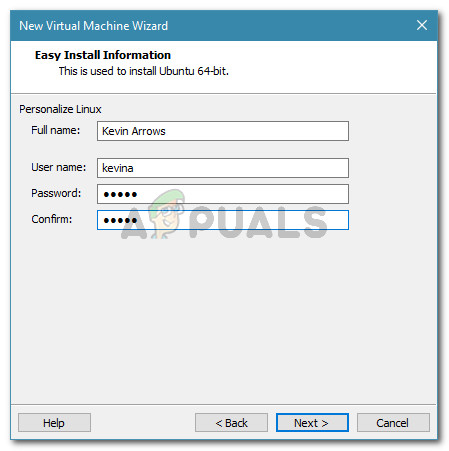
Load up the ISO image and hit the Next button - Insert the required credentials and hit the Next button again.
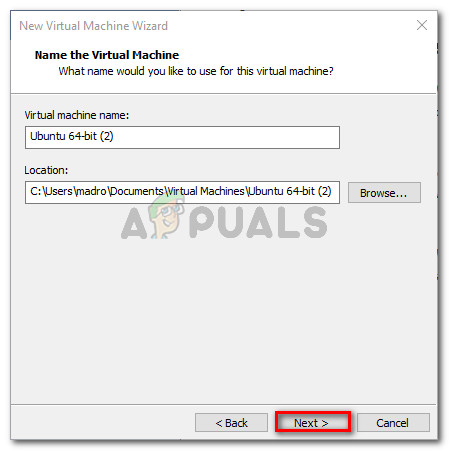
Insert the required credentials for Easy Install - Name your new Virtual machine and set a location for it. Then, hit the Next button again.
Set the name and location of your new virtual machine - Specify your desired Disk capacity by choosing the Maximum disk size and decide on the storing method. Then, click the Next button again.

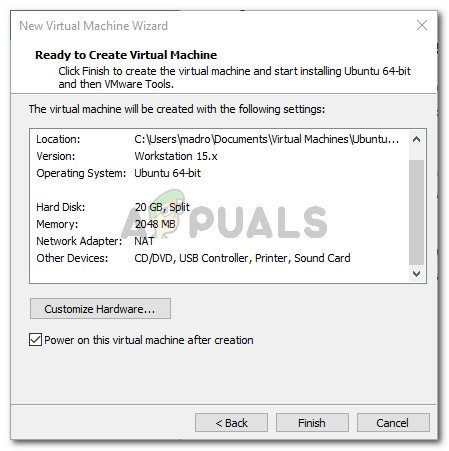
Set the Disk Capacity Settings - Finally, hit the Finish button to create the new virtual machine.
Finishing the creation of the new VMware virtual machine
You will be able to run the new guest machine without seeing the “CPU has been disabled by the guest operating system” error during the initial Boot procedure.


None of your ‘solutions’ worked!