Fix: Teredo Tunneling Pseudo-Interface Error Code 10
Imagine going through your device manager and finding a yellow exclamation mark right next to Teredo Tunneling Pseudo-Interface. And when you click on the device, it displays the error: “The device cannot start (Code 10)”. If this has actually happened to you, then there’s no need to fret. This article is dedicated to the solution of this problem.
The usual cause for this error is that the system isn’t properly recognizing the driver. Code 10 actually is an indication of a device with problematic driver. If you go here and click on the Code 10 section, you will be able to see the complete message that says “This device cannot start. Try upgrading the device drivers for this device. (Code 10)”. So, that is the main cause of the problem.
There are a couple of methods that can be used to update or reinstall the drivers. All of which are given below.
Method 1: Uninstall & Reinstall Teredo Adapters and Interfaces
As the most probable cause can be an issue with an installed driver, there’s one conventional way to fix it. Remove it and then install it again. Here’s how to install Teredo Adapters and interfaces:
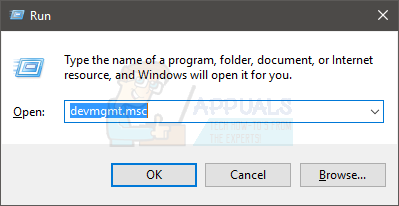
- Open the run dialog box by pressing the Windows + R
- Type devmgmt.msc and then press Enter.

- This will open the Device Manager Window.
- In the list, find and double click Network Adapters to expand it.
- In this expanded list, find and right click Teredo Tunneling Pseudo-Interface and select Uninstall.
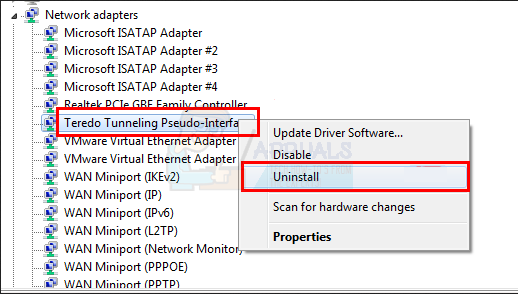
- In the same list also look for options such as Microsoft Teredo Tunneling Adapters. (There can be multiple options with numbers like Microsoft Teredo Tunneling Adapter #2 and/or Microsoft Teredo Tunneling Adapter #3 and so on). Uninstall all of these options by right clicking on them and selecting uninstall.
This will complete the un-installation process. Now, you have to reinstall the drivers.
To reinstall the drivers, do the following:
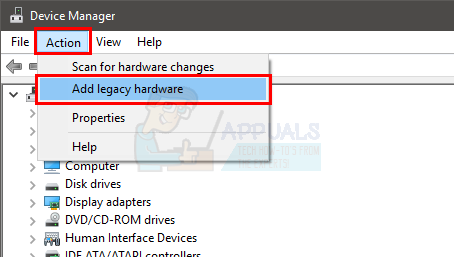
- At the very top, click the Action tab; next to the File tab and then click Add legacy hardware.
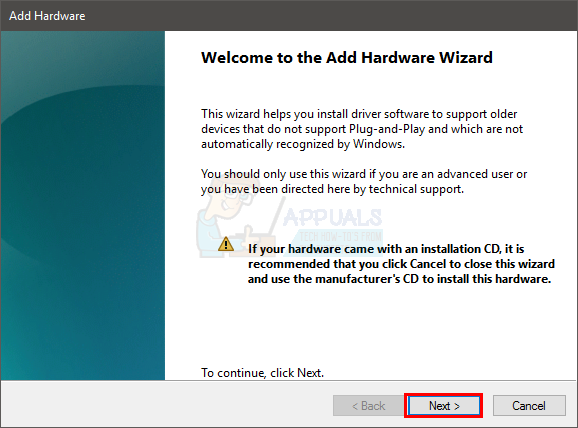
- This will open the Add Hardware
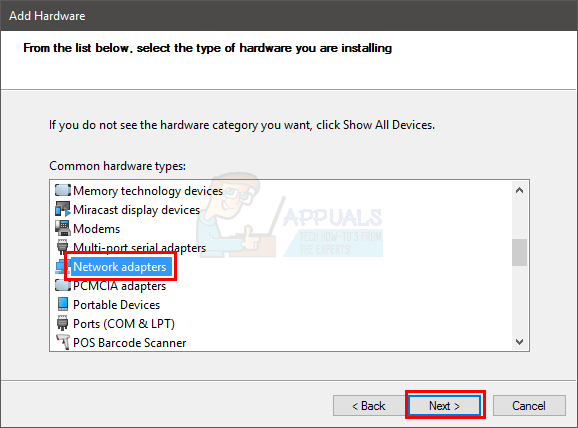
- Click the Next button at the bottom until you see the statement: “If you do not see the hardware category you want, click Show all devices”.
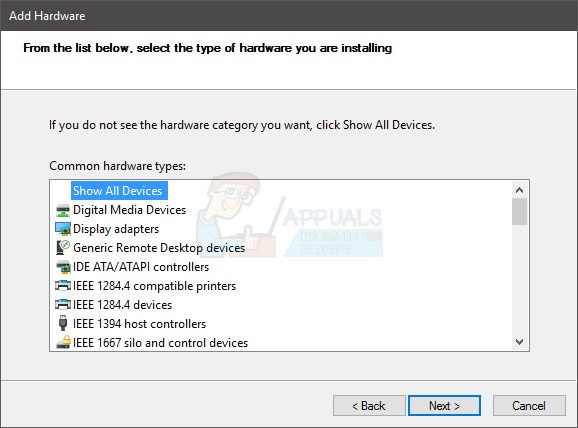
- In this window, click Show all devices.
- In the list that appears, locate and left click on Network Adapters and then click the Next button at the bottom.
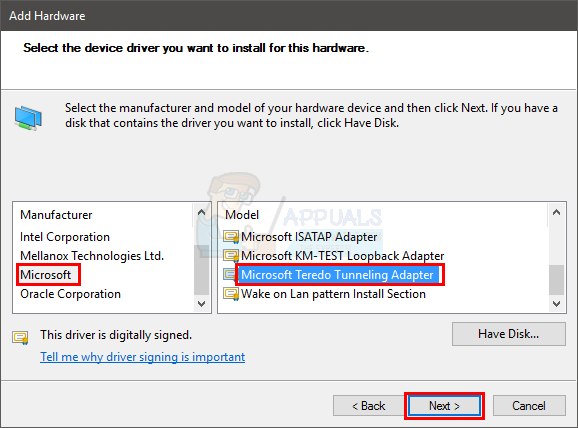
- This will open a window with two panes.
- Find and click Microsoft from the left hand pane. Once done, locate and select Microsoft Teredo Tunneling Adapter from the right hand pane and click Next.
This will initiate the installation process. After it is completed, recheck the device manager to see whether or not the yellow exclamation mark has disappeared. If the yellow mark hasn’t disappeared then move to the next method.
Method 2: Update the driver
Since we know that the problem is related to the driver of the device, it can be because of an outdated driver. May be you reinstalled your operating system and now the current Microsoft Teredo Tunneling Adapter driver is outdated. You can easily update the driver by doing the following:
Update
If you didn’t update your driver for quite some time then this might be the reason behind the issue.
- Open the run dialog box by pressing the Windows + R
- Type devmgmt.msc and then press Enter.
- This will open the Device Manager Window.
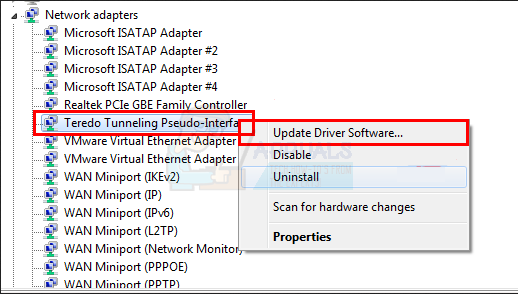
- Locate and right click Teredo Tunneling Pseudo-Interface
- Select Update Driver Software…
- Click Search automatically for updated driver software
- Wait for the Windows to finish the scan. Windows will help you update the driver if it finds a newer version
Provided this installation completes successfully, the problem will be resolved.
Method 3: Uninstall and Reinstall Teredo via Command Prompt
If the method 1 didn’t work then you can uninstall and reinstall the Teredo Tunneling Pseudo-Interface via command prompt as well. In the steps given below, we will first stop the Teredo and then uninstall the driver. Once done, we will reinstall the driver and enable Teredo. To do so, follow these steps:
- Press Windows key once and type command prompt in the search bar.
- Right click the Command Prompt application that appears after search completion and click on Run as administrator
- Click Yes when prompted for confirmation.
- In the CMD, first type netsh then press enter.
- Then type int teredo and press enter. (Make sure to insert the space)
- After this command, type set state disabled.
- Once this command is executed, the command window will print the message “Ok”.

- After you’ve done this, go to the device manager and uninstall the drivers.
- Open the run dialog box by pressing the Windows + R
- Type devmgmt.msc and then click Ok or press Enter.
- This will open the Device Manager Window.
- In the list, find and double click Network Adapters to expand it.
- In this expanded list, find and right click Teredo Tunneling Pseudo-Interface and select Uninstall.
- In the same list also look for options such as Microsoft Teredo Tunneling Adapters. (There can be multiple options with numbers like Microsoft Teredo Tunneling Adapter #2 and/or Microsoft Teredo Tunneling Adapter #3 and so on). Uninstall all of these options by right clicking on them and selecting uninstall.
- After the completion of the un-installation process, open the Command prompt again.
- Click on the start menu and type command prompt in the search bar.
- Right click the CMD application that appears after search completion and click on Run as administrator
- Click Yes when prompted for confirmation.
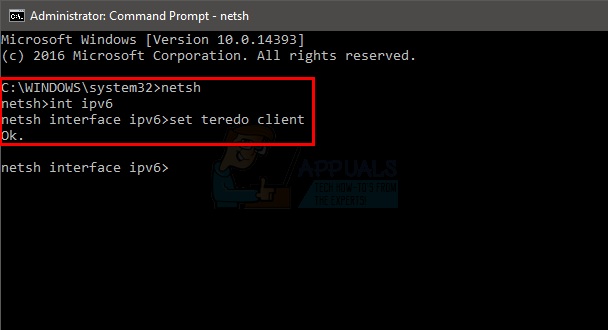
- Type netsh in the Command window and then press Enter.
- Then type int ipv6 and press Enter. (Make sure to keep the space)
- And then type set teredo client and press Enter.
- After this command is executed, the command window will print “Ok”.
- Now close the command window and open the Device Manager.
- Open the run dialog box by pressing the Windows + R
- Type devmgmt.msc and then click Ok or press Enter.
- This will open the Device Manager Window.
- At the top of this window, among the buttons; find and click the Scan for hardware changes
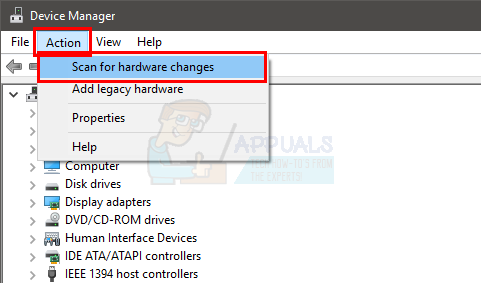
Once done, recheck the Teredo Tunneling Pseudo-Interface, it should no longer have the yellow exclamation mark.
Method 4: Registry Editor
If the above given methods didn’t work then it’s time to get into the Registry Editor. There is a parameter that can be changed in the Registry Editor to solve this issue. Follow hte steps given below to change the parameters value
Note: Changing a wrong key in the Registry Editor can cause serious issues. So, it’s vital that you make a backup of your registries before making any change. Here are the steps for backing up your registries.
- Open the run dialog box by pressing the Windows + R
- Type regedit.exe and then press Enter.
- This will open the Registry Editor
- Now, look in the left pane. Make sure you are scrolled at the top within that left pane.
- Right click Computer and select Export
- Navigate to the location where you want to save the backup, name the file and click Save
That’s it. Now you have a backup of your registries. If something goes wrong, you can always use this backup file to recover your registries.
Now, let’s have a look at how to solve the Code 10 issue for Teredo.
- Open the run dialog box by pressing the Windows + R
- Type regedit.exe and then press Enter.

- This will open the Registry Editor
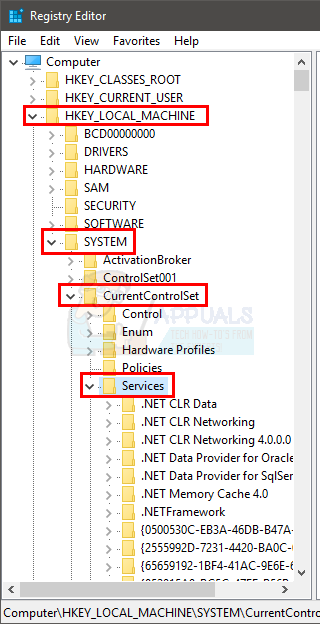
- Now, navigate to this location: HKEY_LOCAL_MACHINE\SYSTEM\CurrentControlSet\Services\Tcpip6\Parameters. If you don’t know how to navigate to this address then follow the steps given below
- Locate and double click HKEY_LOCAL_MACHINE from the left pane
- Locate and double click SYSTEM from the left pane
- Locate and double click CurrentControlSet from the left pane
- Locate and double click Services from the left pane
- Locate and double click Tcpip6 from the left pane
- Locate and select Parameters from the left pane
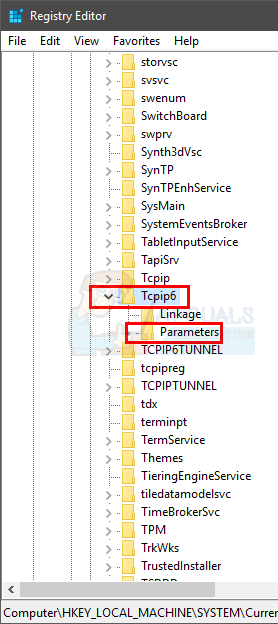
- In the right pane, right click the entry named Disabled Components and select Modify…
- Enter 0 in the Value data section and click
Once done, reboot your system. This should solve the Teredo Tunneling Pseudo-Interface issue