How to Solve ‘System found unauthorized changes on firmware’
Several users are struggling with the System found unauthorized changes on the firmware error at every startup or when trying to take their computer out of hibernation mode. Most affected users report that the issue started occurring after they installed some pending Windows updates. The issue is mostly encountered on Windows 7.
![The system found unauthorized changes on the firmware, operating system or UEFI drivers. Press [OK] to run the next boot device or enter directly to BIOS Setup if there are no other boot devices installed.](/wp-content/uploads/2018/11/system-found-unauthorized-error.jpg)
What is causing the System found unauthorized changes on the firmware error
We investigated this particular issue by looking at various user reports. This error will occur whenever your system is checking the firmware one some computer hardware parts as part of a new security feature. To be precise, the error is occurring because not all Windows versions will support this new security feature.
As it turns out, there are several scenarios that will lead to the apparition of this issue. Here are a couple of culprits that might trigger this particular error message:
- Optional Windows Update (KB3133977) – This Windows security update was released to patch a Bitlocker vulnerability. However, a lot of Windows users have reported that this supposedly changes the firmware signature, leading to this particular warning message. This is mostly encountered with ASUS motherboards. In this scenario, the message is benign, meaning that the system is still able to boot up and run normally.
- The computer is running into a Secure Boot violation – Most likely, the computer’s bootloader has been replaced with one that is improperly signed by Microsoft. This is known to happen on Windows 7 (and older) machine that has recently installed some pending updates. Apparently, some of these updates will force Secure Boot to be enabled on Windows 7, even though Windows 7 does not support Secure Boot.
What is Secure Boot?
Secure boot is a newer security standard developed by the leading members of the PC industry in order to ensure that a device can safely boot using only software trusted by the OEM (Original Equipment Manufacturer). Secure boot verifications are done at every startup – when the PC starts, the firmware checks the signature of each piece of boot software.
The error at hand is occurring because the OS version is not designed to support Secure Boot – even tough a few Microsoft security updates will enable this security feature automatically (as soon as they are installed).
If you’re struggling to resolve this particular issue, this article will provide you with a couple of verified troubleshooting methods. Below you have a couple of fixes that other users in a similar situation have successfully used to get the issue resolved. For the best results, follow the methods below in order until you discover a fix that successfully resolves the System found unauthorized changes on the firmware error in your particular scenario.
Method 1: Disabling Secure Boot
If you have Windows 7, it’s extremely likely that this error is occurring is because a recent Windows security update enabled a security feature which your Windows version doesn’t support.
If this scenario applies to your current situation, you can resolve the issue by simply disabling the Secure Boot feature from BIOS or UEFI settings. Of course, steps of accessing your BIOS or UEFI settings will slightly be different depending on your motherboard manufacturer.
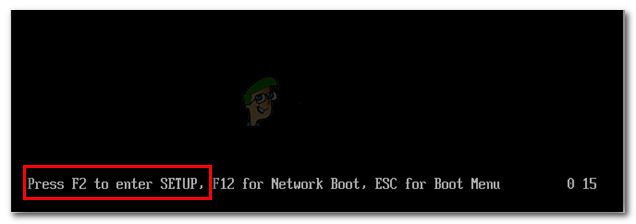
Immediately after you start your PC, you’ll need to press the BIOS/UEFI key repeatedly until you enter the settings menu. Typically, the BIOS key is one of the F keys (F2, F4, F6, F8) or the DEL key (for Dell computers). With most motherboard manufacturers, you can typically see the BIOS key listed in the initial startup sequence.
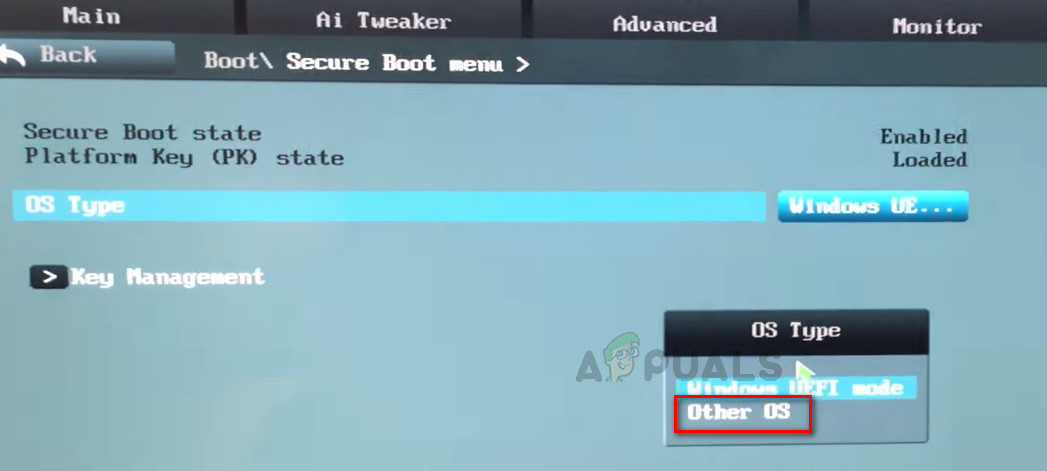
Once you get into your BIOS/UEFI settings, look for a Boot tab (or option) and see if you are able to find any option named Secure Boot. Once you do, access it and change the OS Type from Windows UEFI mode to Other OS. What this basically does is effectively disable Secure Boot, reverting the startup procedure to the old behavior.
Once the Secure Boot option has been changed to Other OS, save the BIOS/UEFI changes and reboot your computer. At the next startup, your computer should boot up normally and you won’t see the System found unauthorized changes on the firmware error anymore.
If this method wasn’t applicable or you’re looking for a different method to resolve this issue, move down to Method 2.
Method 2: Using a System Restore point
Another way to go around solving this problem is to use a System Restore point to revert your machine state to a point where the update causing the BIOS change was not installed. Several users have reported that this approach enabled them boot normally without encountering the System found unauthorized changes on the firmware error.
But keep in mind that unless you follow through with all the below-specified steps to prevent the update causing the issue from installing, you will encounter the same error again once Windows Update decides to install it again.
Here’s how to resolve the issue by using an older System Restore point:
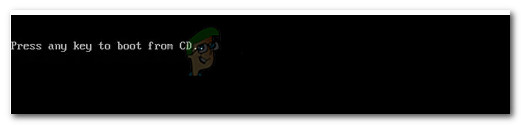
- Insert the Windows installation media and press any key at the prompt to boot from it at the beginning of the startup sequence.
Press any key to boot from installation media - Once you arrive at the first window, click Next, then click on Repair your computer link.

Click the Repair my computer link - After a short while, the Startup Repair utility will start performing a series of scans on your OS. When you see the Startup Repair prompt, click the Restore button.
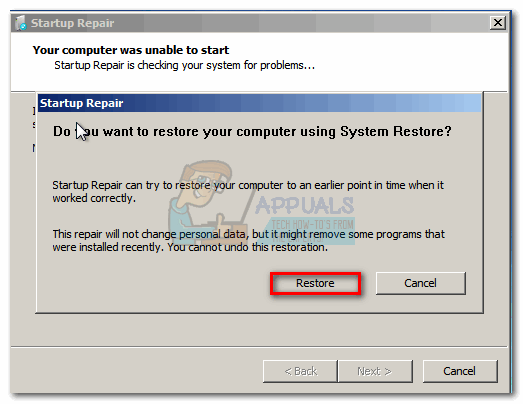
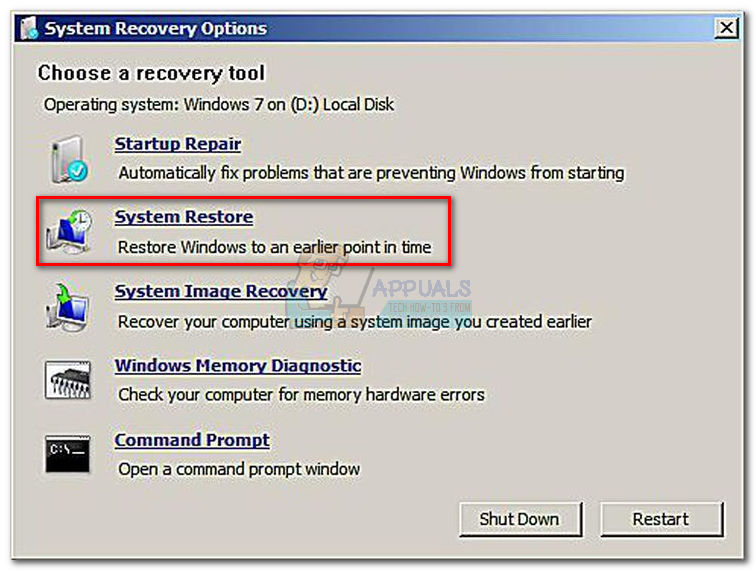
Click the Restore button Note: If the Startup Repair prompt never shows and you are presented with the System Recovery Options directly, click on System Restore.
Click on System Restore from the System Recovery Options menu - Once you get to the System Restore screen, click Next at the next prompt.
- Make sure that the box associated with Show more restore points is checked. Then, select a system restore point that is dated before the apparition of this particular error. With the system restore point selected, click Next to proceed to the next screen.
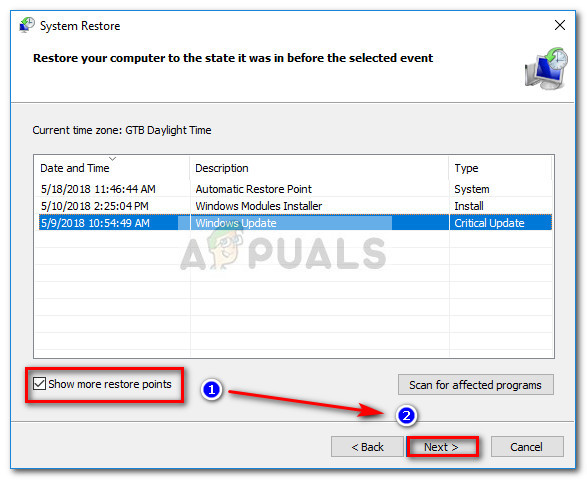
Enable Show more restore points box and click Next - After clicking Finish, you will be prompted to confirm one final time that you want to restore your machine to an older state. Click Yes to confirm.
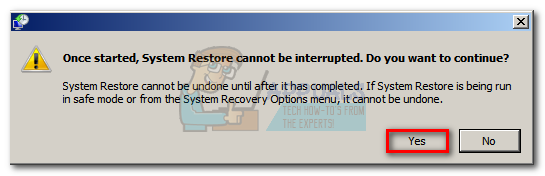
Confirm that you want to restore your machine using a System Restore Point - Wait patiently until the procedure is complete. At the end of this process, your computer will restart and the older state will be enforced. At the next startup, your computer will boot up without the System found unauthorized changes on the firmware error.
Note: Even though you no longer encounter the error, for now, it will return swiftly unless you follow the next steps below to ensure that Windows Update will not install the troublesome update again. - To prevent the update from installing, you’ll need to use the Microsoft Show or hide troubleshooter package. You can download it from this link (here).
- Once you’ve downloaded the utility, open it and click Next at the first prompt while leaving the Apply repair automatically box unchecked.

Uncheck the Apply repairs automatically box and click Next - After the initial scanning procedure, click on Hide updates from the Show or hide updates screen.
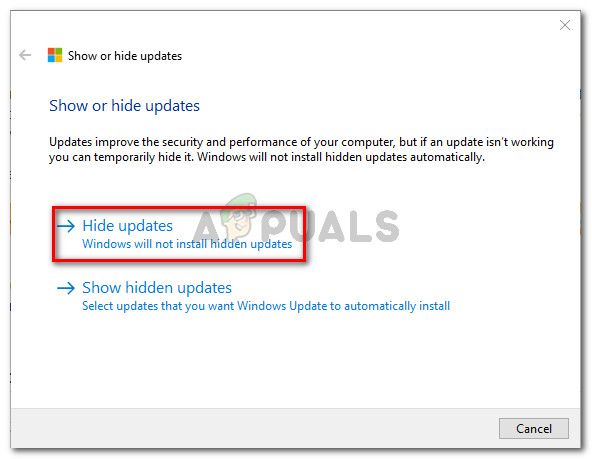
Click on Hide Updates - Check the box associated with the Microsoft Optional Update (KB3133977), then click Next to hide it. Then, hit Next once again to side the update until a further change is made.
That’s it! You can continue using your machine without worrying that WU will install the optional security update again and the System found unauthorized changes on the firmware error will resurface.


Great article!
You just saved me 4 hours of trial-and-error research, b/c MicroSnot refuses to warn people of the issues w/their KB updates.
Thanx!