Fix: SearchProtocolHost.exe High CPU Usage
If you are reading this article, you may have come across the problem where you noticed the process “SearchProtocolHost.exe” consuming huge amounts of CPU on your computer. So what is this process? SearchProtocolHost is part of the Windows search mechanism and is related to Indexing on your computer.
Windows Search Indexer is a service which maintains an index of most of the files on your computer to improve search performance on your computer. It automatically updates the indexes without any interference from the user. This index is similar to the index we see in certain books. The computer keeps a record of all the files located on different drives. Instead of going out and searching the drives for the file you are trying to locate, the computer refers to the index table, locates the files and directly navigates to the address saved in it. If it doesn’t find the file in the index table, it begins iterating through the drive accordingly.
Normally, Windows is programmed to start indexing for files when your computer is idle and isn’t doing any work. If you see this process running, let it run for some time. If it keeps on running for indefinite periods of time, you can start following the workarounds listed below.
Solution 1: Checking Newly Installed Third-Party Applications
If you have recently installed new third-party applications on your computer, you should check if they are causing the problem. There were many applications such as ‘iFilter for PDF’s’ which cause the service to run again and again on your computer. These applications have certain features present which causes the search service to be triggered again and again on your computer. We can try disabling them and then run the troubleshooter to see if there are any other problems.
- Press Windows + R, type “appwiz.cpl” in the dialogue box and press Enter.
- Here all the applications installed on your computer will be listed. Navigate through all of them and locate any newly installed application/applications prior to when you noticed the CPU usage. Either disable their services (Windows + R, type “services.msc”, locate the service and stop it) or uninstall it using the same window.

- Now press Windows + S, type “Windows Search” in the dialogue box and open the application “Find and fix problems with Windows Search”.

- Select both options “Run as administrator” and “Apply repairs automatically”. Press Next and follow the on-screen instructions.

- After the troubleshooting is complete, restart your computer and check if the CPU usage got solved. Windows search might index for a little while after the troubleshooting is complete. Give it some time but if the CPU usage by ‘SearchProtocolHost.exe’ still doesn’t get fixed, follow the other workarounds listed below.
Solution 2: Changing Indexing Options
You can manually change the indexing options. If you remove one location from the checklist, Windows will not index the files present at the location. Your search might not be as fast as before but it might improve the situation in our case.
- Press Windows + R, type “Indexing options” in the dialogue box and open the application.

- Now click “Modify” present at the bottom left side of the screen.

- Click “Show all locations”. Now the locations which are checked means they are actively indexed by the computer. Uncheck huge locations (in this case, local disk C) and other file locations which may prompt the search process to spawn again and again. Press OK to save changes and exit.

- Restart your computer and check if ‘SearchProtocolHost.exe’ is still consuming High CPU usage.
Solution 3: Running SFC and DISM Tool
You may be encountering this error because there may be bad system configurations present in your computer. Because of these discrepancies, the search process might be spawning again and again and cause the high usage of resources as under discussion. We can run the System File Checker (SFC) to check for any integrity violations. If after any fixes by SFC the system is still not fixed, you can run the DISM tool to check system health and restore any missing system files.
- Press Windows + R to launch the Run application. Type “taskmgr” in the dialogue box and hit Enter to launch your computer’s task manager.
- Now click on File option present at the top left side of the window and select “Run new task” from the list of options available.

- Now type “PowerShell” in the dialogue box and check the option underneath which states “Create this task with administrative privileges”.

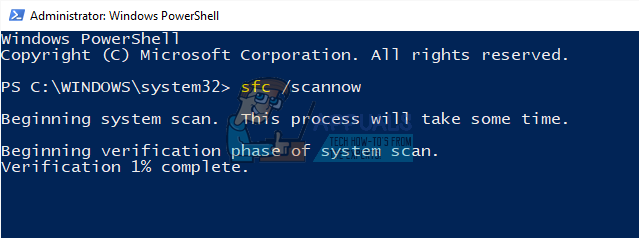
- Once in the Windows Powershell, type “sfc /scannow” and hit Enter. This process may take some time as your entire Windows files are being scanned by the computer and being checked for corrupt phases.
- If you encounter an error where Windows prompts you that it found some error but was unable to fix them, you should type “DISM /Online /Cleanup-Image /RestoreHealth” in the PowerShell. This will download the corrupt files from the Windows update servers and replace the corrupt ones. Do note that this process can also consume some time according to your internet connection. Don’t cancel at any stage and let it run.
If an error was detected and was fixed using the above methods, restart your computer and check if the CPU usage by ‘SearchProtocolHost.exe’ got fixed.
Solution 4: Disabling Windows Search
If all the above workarounds don’t prove any results and ‘SearchProtocolHost.exe’ is still causing high CPU usage, we can try disabling the Windows Search from your computer. Do note that you may not be able to use Windows search on your computer. This workaround has its drawbacks but the problem will be fixed certainly.
Before you go on with disabling the Windows Search, it is recommended that instead, you disable the indexing of all the locations of your computer using Solution 2. Uncheck all the locations and press Apply. This will turn indexing off; you might get slow results but at least you will be able to search when needed.
- Press Windows + R, type “services.msc” in the dialogue box and press Enter.
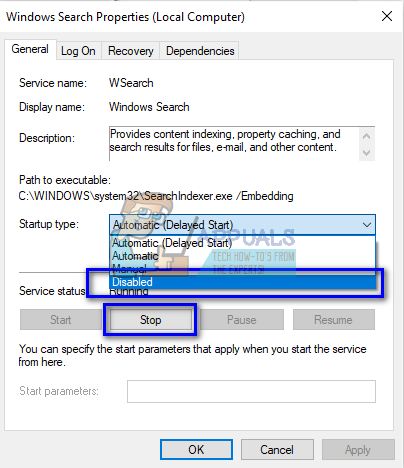
- Locate the process “Windows Search”, right-click it and select “Properties”.

- Set the Startup type as “Disabled” and Stop the process by clicking the button. Press Apply and restart your computer.
- After restarting, check if the problem at hand got solved. You can always turn Windows search back on using the same steps listed above.
Is there a way to PAUSE the darn Search while we need my computer to be extra quiet for recording purposes? Every time we open Task Manager, and Right click on Windows Index Search Protocole related items, and click STOP, the elements run again a few minutes later. Extremely infuriating. It’s like Western Digital SmartWare, stopping the Apps in Task Manager is NOT always successful.