Fix: Reset your Security Processor to Fix Functionality Issues
This error was first spotted after a recent Windows 10 update and it’s related to the Trusted Platform Module. The error message appears in two different places. The first one is visible after navigating to Settings >> Update & Security >> Windows Security >> Device Security >> Security Processor >> Security Processor details.
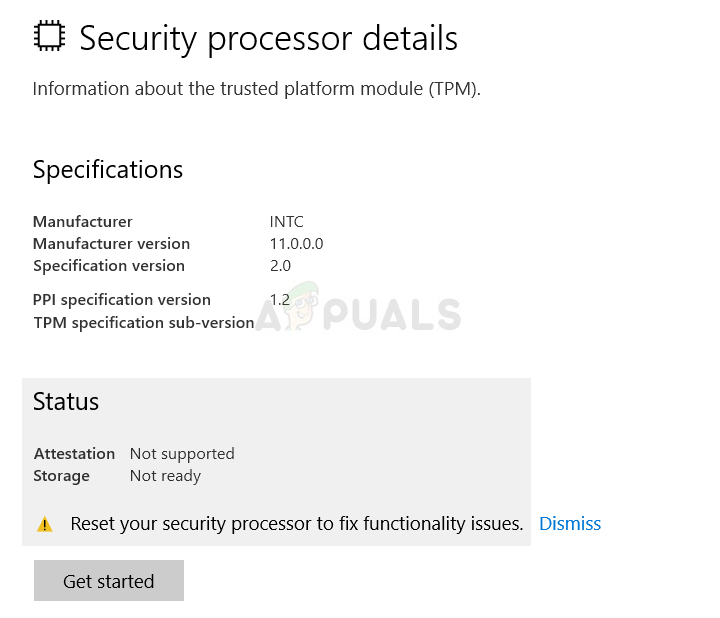
The other place where you can find the error is in Windows Defender as a yellow warning triangle displaying that there is an error with the Security processor with the “Reset your security processor to fix functionality issues” text. Follow the solutions we have prepared in order to resolve the problem on your computer.
What Causes the “Reset your security processor to fix functionality issues” Error?
The list of things which cause this error is not so long and the problem is usually solved according to this list. The error message is not so self-explanatory so we recommend you double check the list below for the error:
- An update for Windows Defender is available
- Virtualization should be disabled in BIOS
- Something is wrong with TMP and its settings should be cleared or you should take ownership of it
Solution 1: Install the Update for Windows Defender
This is often just a weird way of Windows Defender notifying you that there is an update available and that you should install it as soon as possible. Windows Defender updates are released like Windows Updates and they are often installed automatically. If that has changed for any reason, you can install it manually by following the steps below:
- Visit the Microsoft support site in order to find out which is the latest released update for your version of Windows Defender. It should be located at the top of the list at the left part of the site with the current Windows 10 version at the top. Look for the update for Windows Defender.
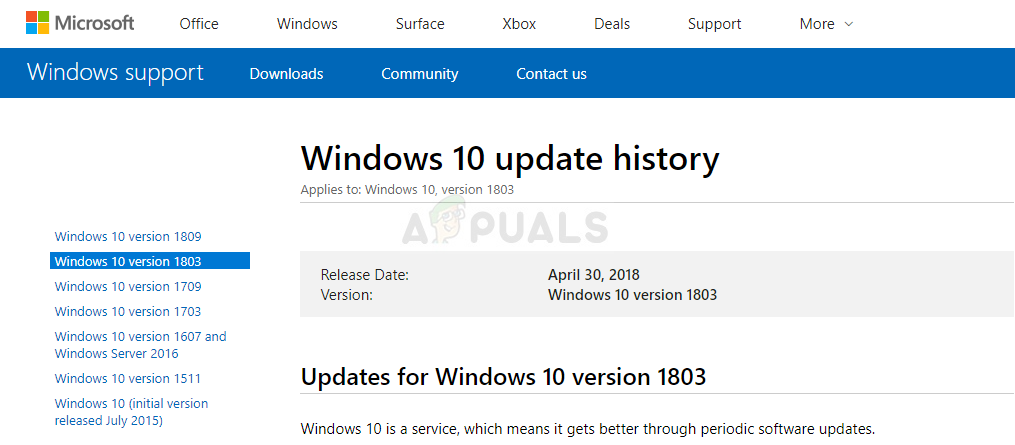
- Copy the KB (Knowledge Base) number together with “KB” letters as well (e.g. KB4040724) next to the latest released update for Windows Defender.
- Open the Microsoft Update Catalog and perform a search by pasting the Knowledge Base number you copied and by clicking on the search button at the top right corner.
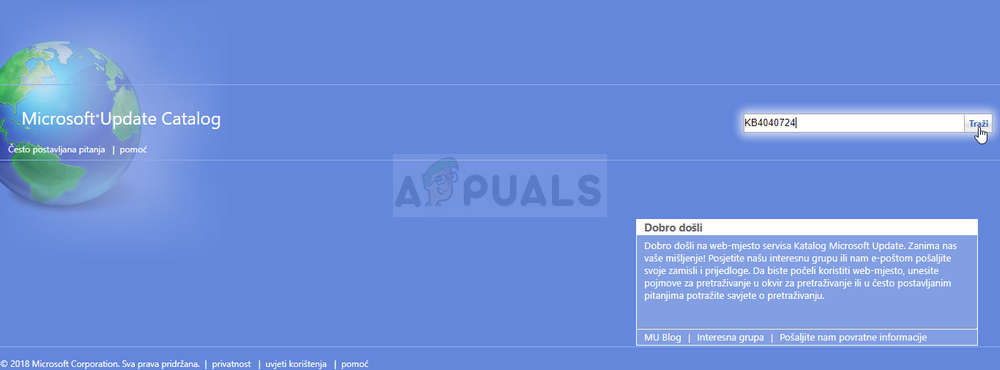
- Click on the Download button to the left and choose the correct architecture of your PC (32bit or 64bit). Make sure you know the architecture of your PC’s processor before choosing this option.
- Run the file you downloaded and follow the instructions on the screen carefully in order to complete the updating process.
- After the update has finished, make sure you restart your computer and the update will be installed on your computer. The problem shouldn’t occur anymore and you can check it either in Settings or by visiting Windows Defender.
Solution 2: Disable Virtualization in BIOS and Reset TMP Settings
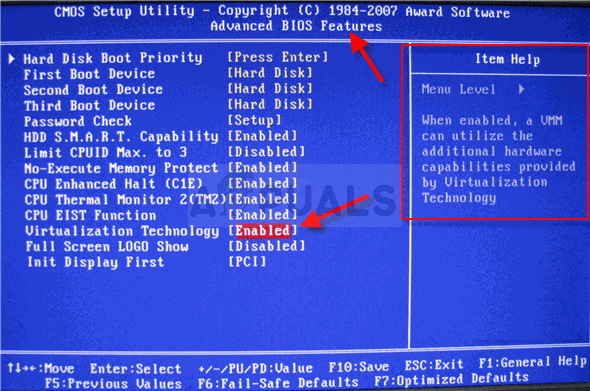
CPU virtualization is a feature which allows a single processor to simulate multiple CPUs and efficiently use the CPU power. Sometimes this option can trigger problems with your system in general and plenty of users have reported that they have stopped seeing the error message at hand after disabling CPU virtualization in BIOS.
Another thing you can try while still in the BIOS environment is to try and reset the TMP settings from within BIOS to see if certain settings have malfunctioned. This has also helped plenty of users online.
Why don’t you try as well?
- Restart your computer by going to the Start Menu >> Power Button >> Restart.
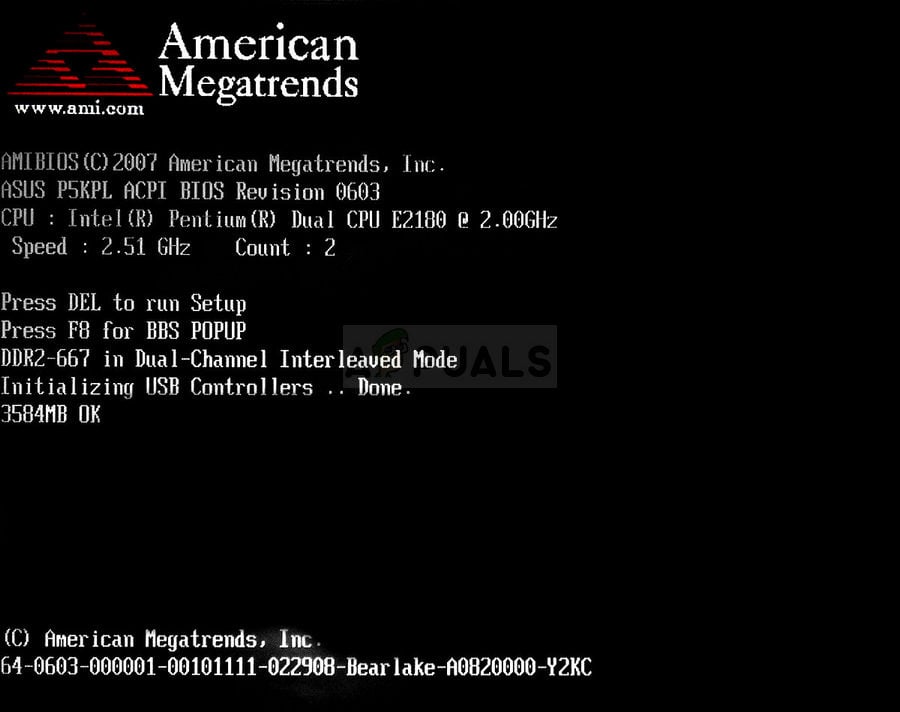
- Try to enter BIOS settings on your computer by pressing the BIOS setup key while the system boots.
- The BIOS key is typically displayed on the boot screen, saying “Press ___ to enter Setup.” There are other ways in which you may see the message but it will be quite self-explanatory. Common BIOS keys are F1, F2, Del, Esc, and F10 so make sure you click it fast enough or you will have to restart your computer again.
- The CPU Virtualization option which you will need to change is located under various tabs in the BIOS tools on different computers made by different manufacturers and there is no rule to where the setting should be located. Even the name differs and you can expect to see Virtualization Technology, AMD-V or similar.
- It’s usually located under the Advanced tab or various Tweaker or Overclock tabs which may be available. No matter where it is, the name of the option is as mentioned above.
- Once you locate the correct option, change it to Disabled or Off.
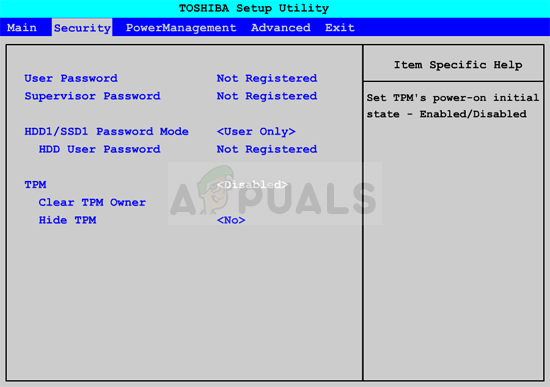
- The second option you should tweak is called TMP (Trusted Platform Module). This option is also located in different places under various configurations but it’s often in the System Configuration tab.
- Wherever you locate this option after browsing for a while, you should select it, scroll, and select the option to restore TMP to default settings. If you notice that TMP is turned off, you should Enable it as well.
- Navigate to the Exit section and choose to Exit Saving Changes. This will proceed with the boot. Make sure you check if the problem still appears on your computer.
Solution 3: Clear TPM or Claim Ownership
If you don’t actually use this module, then this is the right solution for you. Clearing the TMP from the Windows Defender Security Center is probably one of the easiest ways to resolve the problem and this has actually helped people who stopped receiving the error message.
- Right-click on the shield icon on your taskbar and click on Open. If you don’t see the icon, you can open the Settings app by clicking the Start menu button and clicking the gear icon just above the Start menu button.
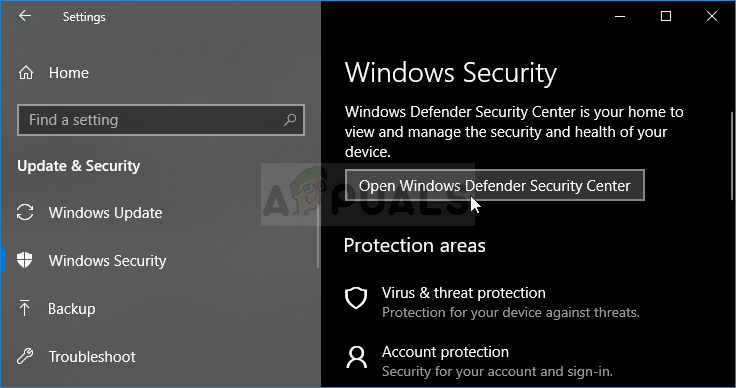
- Click to select the Update & Security section and navigate to the Windows Security tab. From the top of the window, click the Open Windows Defender Security Center button.
- When Windows Defender Security Center opens, click on the Device security laptop icon from the main screen.
- After the window switches to Device security, click on Security processor details under the Security processor section and you should see your error message.
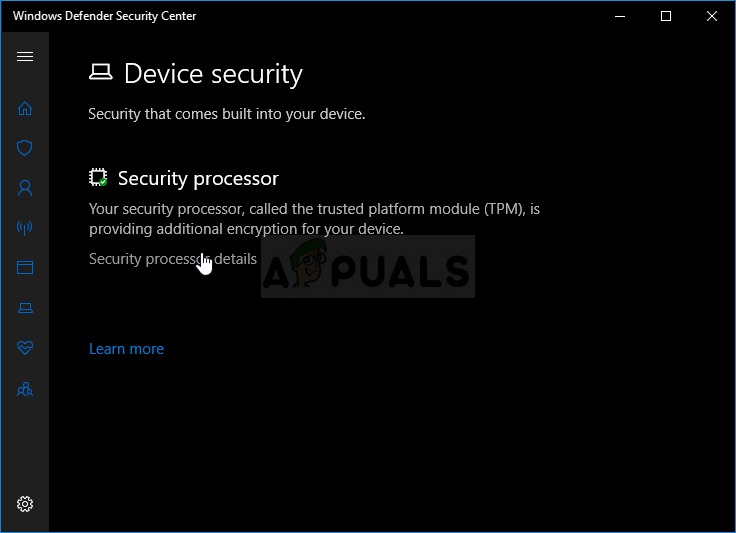
- There should be a Get started button below the Status screen and you should click on it immediately. Click the Clear TPM option and confirm the dialog prompt. Backup anything you may have created with this module and wait for your PC to restart to see if the problem is gone.
Another thing you may want to try is to take ownership of TPM.
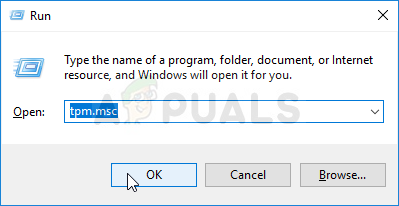
- Open the Run utility by using the Windows Key + R key combination on your keyboard (press these keys at the same time. Type “tpm.msc” in the newly opened box without the quotation marks and click OK in order to open the Trusted Platform Module (TPM) Management tool.
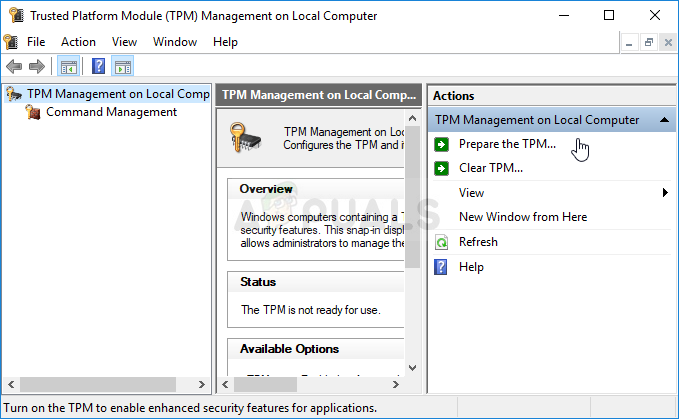
- Under the Actions section at the right part of the window, click the Prepare the TPM… button. Confirm any dialogs and your system should restart into a BIOS-like screen prompting you to enable and take ownership of TPM.
- Hit F10 to accept this and Windows should restart normally. The error should be gone now!


