Fix: QuickBooks Error Code -6123, 0
This particular error sometimes occurs when users are updating their company files to a newly released version of QuickBooks Desktop, when opening a company file located on someone else’s computer, or when restoring a backup. The -6123, 0 error code appears along the following message:
Connection to the QuickBooks company file has been lost.
This error may occur because of quite a few reasons such as a new update being incompatible, a broken company file, misconfigured firewall permissions, etc. There are several ways in which you can approach the solution and we recommend you follow the instructions below one by one until you solve your problem.
Solution 1: Use the QuickBooks File Doctor
This tool is currently only available in UK, USA, and Canada and its purpose is mainly to fix broken company files which have gone corrupt because of a variety of different reasons. This solutions is recommended if you are updating your company file to a new version of QuickBooks.
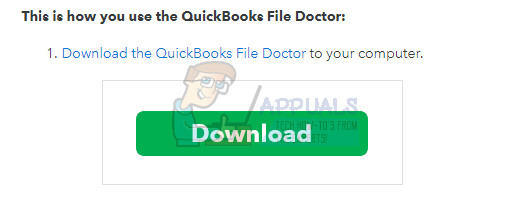
- Download the QuickBooks File Doctor to your PC by clicking on this link.
- After the download is completed, double-click on qbfd.exe and follow the on-screen instructions to install the QuickBooks File Doctor.
- The QuickBooks File Doctor will open automatically after installing. If you do not see it opening, look for a green wrench icon in your Windows taskbar.
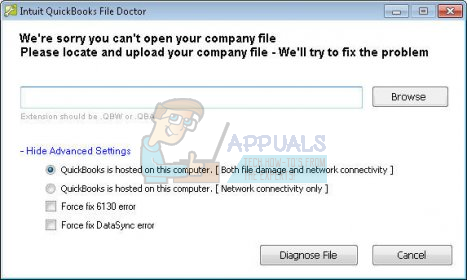
- Use the drop down list to find your company file (this is based off your last 10 opened companies). If you do not see your company file on the list, click on the Browse button and manually locate it to continue.
- Select the following option “Both file damage and network connectivity” (If you suspect your company file is damaged, or you see a 6xxx error (such as -6150, -6000 -82, -6000 -305, -6000 -301, -6147, -6130, or -6123) when you try to open your company file (data file problems).
- When prompted, enter the Admin password for your company file then click Next.
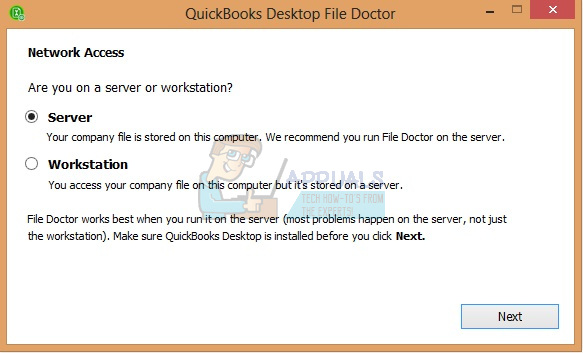
- You will then be prompted to choose between Host/Server or Workstation. It is important to make sure you choose the right option!
- If you are running the tool on a workstation (meaning your QuickBooks file is physically not stored/hosted on this machine), then pick Workstation.
- If you are running File Doctor on a Server computer (meaning the QuickBooks file is physical stored on this machine), then pick Server. You should also pick Server if you are the only user and use QuickBooks on only one computer.
- Choose one of the following options, if prompted to share your company file:
- Yes: If you are running File Doctor on the computer hosting the company file (only choose this if you are running File Doctor on your server computer or host computer).
- No: If you are running File Doctor on a computer that is not hosting the company file (aka your Workstation).
- Wait until the File Doctor finishes diagnosing.
- Note: If you are running the data damage + networking option, you will need to wait until the tool finishes. Depending on whether your file is local or on a network, and file size, it could take a while to finish diagnosing and repairing your data file. The network only mode shouldn’t take any longer than a minute or two.
- After QuickBooks File Doctor completes repair and diagnosis:
- After the tool finishes diagnosis, close File Doctor.
- Regardless of the results screen, try opening your QuickBooks file again to see if the issue is resolved.
Solution 2: Reinstall Using a Clean Install
If the error code mentioned above appears when updating your company file to a new version of QuickBooks, the best solution would be to simply reinstall it using a clean install.
A clean install is usually done when one of the program’s features are damaged and need repair and also when the usual reinstall fails to provide any comfort or a solution to the problem. In order to start the installation process make sure you havethe setup file you downloaded from QuickBooks’ official site. You will also need your license number before you start.
- First of all, make sure you are logged in with an administrator account as you won’t be able to delete programs using any other account.
- Backup the data you want to save because deleting QuickBooks will remove it.
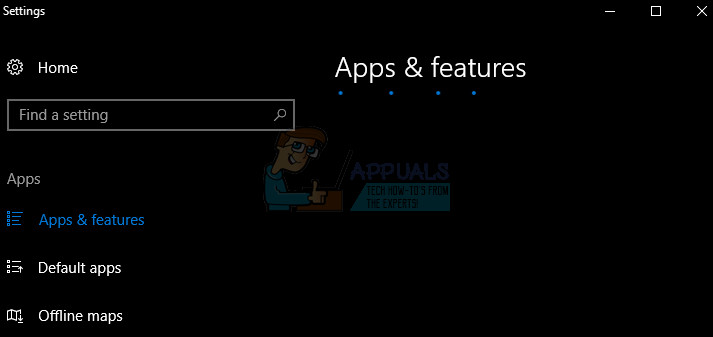
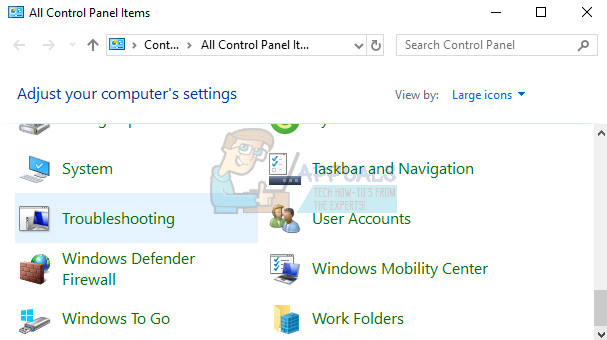
- Click on the Start menu and open Control Panel by searching for it. Alternatively, you can click on the gear icon in order to open settings if you are using Windows 10.
- In Control Panel, select to View as: Category at the top right corner and click on Uninstall a Program under the Programs section.
- If you are using the Settings app, clicking on Apps should immediately open a list of all installed programs on your PC.
- Locate Quickbooks in Control Panel or Settings and click on Uninstall.
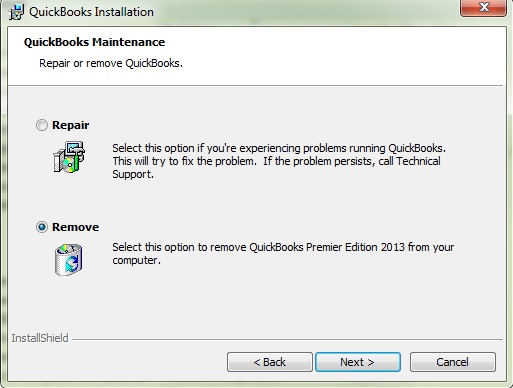
- QuickBooks’ uninstall wizard should open with two options: Repair and Remove. Select Remove and click Next in order to uninstall the program.
- A message will pop up asking “Do you want to completely remove QuickBooks for Windows?” Choose Yes.
- Click Finish when the uninstalled completes the process and restart your computer to see whether errors will still appear.
The next thing in the process is to rename the installation folders so that QuickBooks does not use the remaining files after you reinstall it. This is an easy task.
- Navigate to the C >> Windows folder on your computer by clicking on This PC option located at your desktop.
Note: If you are not able to see some of the folders we mention below, you will need to enable the Show Hidden Files and Folders option from within the folder.
- Click on the “View” tab on File Explorer’s menu and click on the “Hidden items” checkbox in the Show/hide section. File Explorer will show the hidden files and will remember this option until you change it again.

- Navigate to each of the folders displayed below and rename them by adding ‘.old’ to their name. This means that the new installation of QuickBooks won’t use these folders or the files located in them.
C:\ProgramData\Intuit\QuickBooks (year)
C:\Users\(current user)\AppData\Local\Intuit\QuickBooks (year)
C:\Program Files\Intuit\QuickBooks(year)
64-bit version C:\Program Files (x86)\Intuit\QuickBooks (year)
Note: You may end up receiving the “Access Denied” error when you try to rename these folders. This only means that one of the QuickBooks processes is running and it prevents you from modifying any of the files and folders these processes are using. Follow the steps below to fix this:
- Use the Ctrl + Shift + Esc key combination in order to bring up the Task Manager. Alternatively, you can use the Ctrl + Alt + Del key combination and select Task Manager from the menu. You can also search for it in the Start menu.
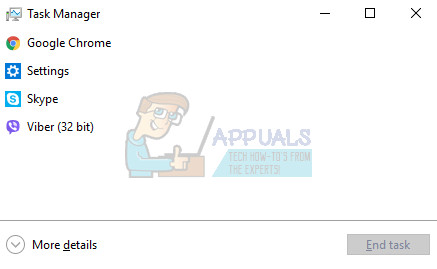
- Click on More details in order to expand the task manager and search for the entries displayed below on the list in the Processes tab of Task Manager, right-click on each one of them, and choose the End task option from the context menu which appears.
QBDBMgrN.exe
QBDBMgr.exe
QBCFMonitorService.exe
Qbw32.exe
- Click Yes to the message which is going to be displayed: “WARNING: Terminating a process can cause undesired results including loss of data and system instability….”
- Now you are ready to reinstall QuickBooks Desktop by running the file you downloaded earlier. The link is at the very start of this Solution. Follow the instructions which appear on screen and check to see if the same error appears.
Alternative: If the clean uninstall doesn’t work for some reason, you can always try and repair the installation by choosing the Repair option in Step 7 of this Solution. After the process finishes, try to see if the error message still appears.
Note: If you are encountering your error when opening your company file on QuickBooks Desktop, you can also try performing a clean install or running the File Doctor as these methods apply for this type of problems as well.
Solution 3: Fixing the Proper Settings Manually by Renaming the .ND and .TLG files
These extensions may sound unknown to you but these files are actually a part of your QuickBooks files. They contain the settings and configuration needed to open the company file in a multi-user environment.
When these files go corrupt, you can always expect these errors to occur but you can always rename them. This won’t make you lose your data. In fact, these files will be recreated when you use the QuickBooks Database Server Manager to rescan and when you open your company file.
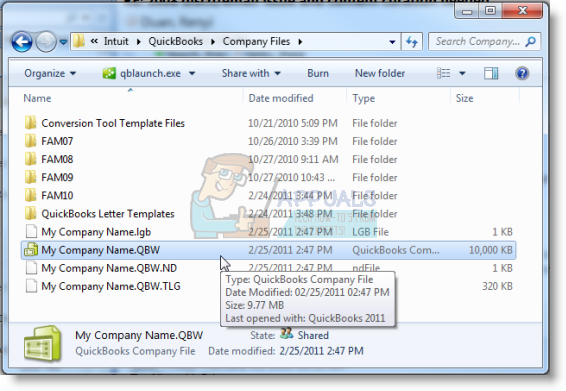
- Navigate to the folder that contains your company file.
- Find the files which have the same file name as your company files but with extensions .ND and .TLG. The name of the file should look like this:
qbw.nd
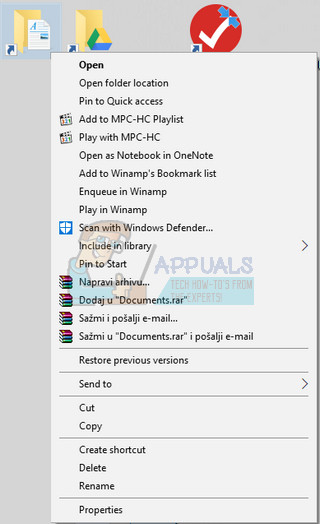
company_file.qbw.tlg - Right-click on each file and select Rename. Add the word OLD at the end of each file name. An example would be similar to the one below. Note that adding the word old is not exactly necessary as long as you change the file’s name.
qbw.nd.OLD
- Open QuickBooks again and try to sign in to your company file. If the same issue occurs, proceed to the solutions below.
Solution 4: Setting Proper Folder Permissions
This error can occur even if you don’t possess the proper permissions for the folder where the company files are located. This is easy to solve so first, let’s check if that is the real issue.
- Right-click on the folder which contains the company file and select Properties.
- Navigate to the Security tab and click Advanced. Select QBDataServiceUserXX and click on Edit.
- Make sure that the following settings are set to Allowed:
Traverse Folder/Execute File
List Folder/Read Data
Read Attributes
Read Extended Attributes
Create Files/Write Data
Create Folders/Append Data
Write Attributes
Write Extended Attributes
Read Permissions
- If that was not the case, you can always change the folder permissions by following the simple set of steps presented below.
- Use the Win Key + E key combination in order to open File Explorer.
- Navigate to the parent folder of the company folder where you company file is located, right-click and select Properties.
- Note: You will need to perform these steps for each folder on the list but not all folders may apply to each installation as they refer to a specific version of QuickBooks Desktop. This means that you should do this for the folders below only if they exist on your PC.
C:\Program Data\Intuit\Entitlement Client\v8
C:\Program Data\Intuit\Entitlement Client\v6.0
C:\Program Data\Intuit\Entitlement Client\v5
C:\Program Data\Intuit\Entitlement Client\v3
C:\Program Data\Intuit\Entitlement Client
C:\Program Data\Intuit\QuickBooks Enterprise Solutions X.0 (X = version) or C:\Program Data\Intuit\QuickBooks 20XX.
C:\Program Data\COMMON FILES\INTUIT
C:\Program Data\COMMON FILES\INTUIT\QUICKBOOKS
C:\Users\Public\Public Documents\Intuit\QuickBooks\FAMXX (XX = year)
C:\Users\Public\Public Documents\Intuit\QuickBooks\Company Files
C:\Users\Public\Public Documents\Intuit\QuickBooks\Sample Company Files\QuickBooks Enterprise Solutions X.0 (X = version) or C:\Users\Public\Public Documents\Intuit\QuickBooks\Sample Company Files\QuickBooks 20XX (XX = year)
- Click on the Security tab and select Everyone. If you are not able to see this option, click on Add and type in “Everyone”. Make sure you click OK.
- Select the Full Control option and click on either Apply or OK.
Solution 5: Move the Company File to a New Location
If the path to your company file gets to long or too complex, it may confuse the software and you should definitely consider changing the location of where you store your files. Having your files on Desktop will test whether it’s the location which is causing these issues.
- Navigate to the folder that contains your company file.
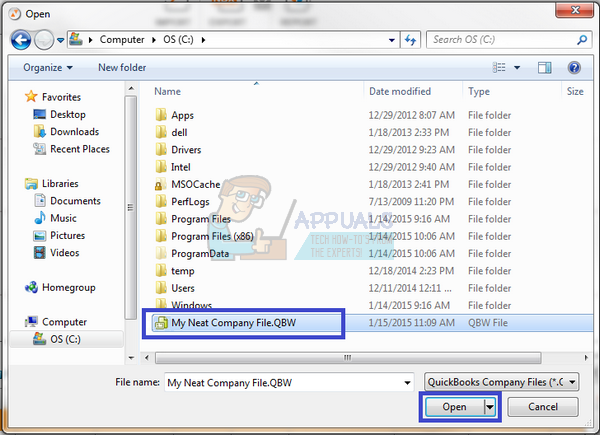
- Find the files which have the same file name as your company files but with the extension .QBW. Right-click on this file and select Copy.
- Navigate to your Desktop, right-click anywhere on it and choose the Paste option.
- Hold down the CTRL key while opening QuickBooks so that you are automatically redirected to the No Company Open window.
- Choose the Open or restore an existing company option and locate the file you have copied to the Desktop in the previous steps.
- Select the file and check to see if the same error still occurs with the company file. If the error disappears, consider saving your files to more simple locations such as a folder on your Desktop.
Solution 6: Check Your Firewall & Anti-virus Ports
The solutions above have referred to the situation where you did everything in a single-user setup. However, if the company file is located on someone else’s computer, you may experience issues with your firewall if it is not adjusted to allow QuickBooks through. Follow the steps below in order to fix this.
- Navigate to Control Panel by searching for it in the Start menu and click on System and Security >> Windows Firewall. You can also switch the view to Large or Small icons and click on Windows Firewall instantly.
- Select the Advanced settings options and highlight Inbound Rules in the left section of the screen.
- Right click on Inbound Rules and click on New Rule. Under the Rule type section, select Port. Select TCP from the first set of radio buttons (TCP is recommended) and switch the second radio button to “Specific local ports. You will need to add the following ports in order to fix QuickBooks updating functionality:
QuickBooks Desktop 2018: 8019, 56728, 55378-55382
QuickBooks Desktop 2017: 8019, 56727, 55373-55377
QuickBooks Desktop 2016: 8019, 56726, 55368-55372
QuickBooks Desktop 2015: 8019, 56725, 55363-55367
- Make sure you separate them by a coma right to the last one and click on Next after you have finished.
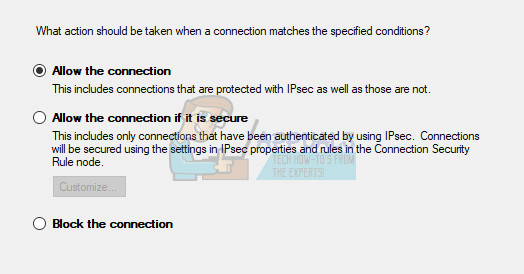
- Select the Allow the connection radio button in the next window and click Next.
- Select the network type when you want to apply this rule. If you switch from one network connection to another quite often, it’s recommended that you keep all of the options checked before clicking Next.
- Name the rule something which makes sense to you and click Finish.
- Make sure you repeat the same steps for Outbound Rules (choose Outbound rules in Step 2).