Fix: QuickBooks Error Code 1603
The error code 1603 typically appears when users are either trying to install or to update QuickBooks. This is quite a big problem since QuickBooks needs to stay updated if you want to keep in touch with the latest tax files, especially if you just entered a new year. However, the error can be quite easy to fix if you know where to begin. The error is usually displayed along the following error message:
Error 1603: There was a problem installing Microsoft .NET Framework [version] OR
Error 1603: The update installer has encountered an internal error.
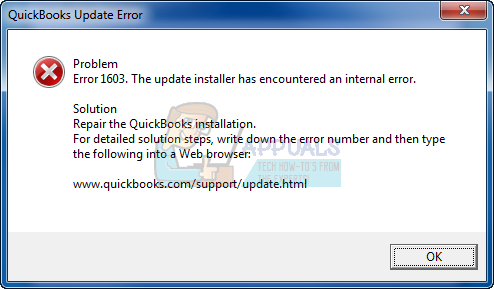
This doesn’t necessarily mean that the problem occurs simply because of Microsoft .NET Framework but faulty .NET Framework files are the main cause. Additionally, the error may occur if the installation files of QuickBooks are corrupt. Follow the instructions below in order to fix this issue.
Solution 1: Repair or Reinstall Microsoft .NET Framework
There are two ways on how you can approach this solution. You can either use the QuickBooks Install Diagnostic Tool and let it scan and fix issues related to Microsoft .NET Framework, or you can try and solve the problem manually. The tool is quite efficient but dealing with the problem manually may help you realize what the real problem was.
Using the QuickBooks Install Diagnostic Tool:
- Download the QuickBooks Install Diagnostic Tool by clicking on the following link which will initiate the download process immediately.
- When prompted, save the file to the Desktop or have it saved to the Download folder automatically.
- Close any running programs then run the program by double-clicking on the QBInstall_Tool_v2.exe which is the file you just downloaded.

- Note: The process of diagnosing may take up to 20 minutes to complete, depending on your internet speed and computer’s performance.
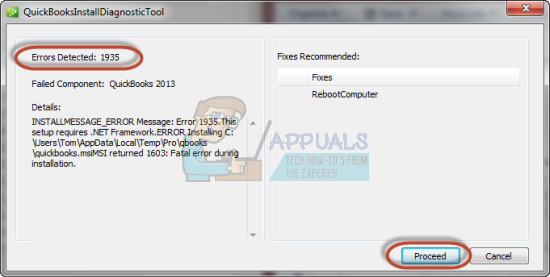
- Once the file has finished with its process, make sure you restart your computer in order to make sure that all components have been successfully updated.
Diagnosing the Problem Manually:
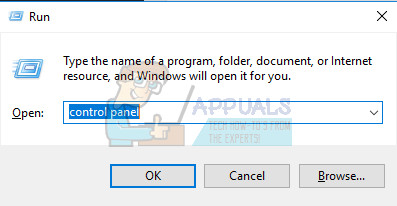
- On your keyboard, use the Windows Key + R key combination to open the Run dialog box.
- Type in Control Panel and click OK in order to open it.
- Click the Uninstall a Program option and click Turn Windows features on or off. Make sure you locate the .NET Framework 4.5 or 4.7 entry and make sure it’s enabled.
- If the check box next to .NET Framework 4.5 or 4.7 is not enabled, enable it by clicking the box. Click OK to close the Windows Feature window and reboot the computer.
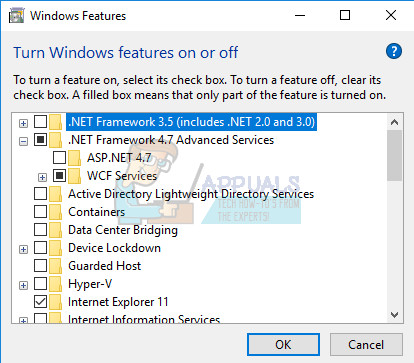
- If .Net Framework 4.5 is already enabled, you can repair .Net Framework by clearing the box and rebooting the computer. After the computer has restarted, re-enable .Net Framework and restart the computer again.
- Verify that .NET Framework 3.5 SP1 is enabled by locating it on the same list and checking the box next to it.
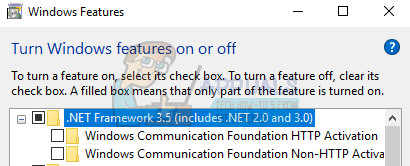
- If the check box next to .NET Framework 3.5 SP1 is not enabled, enable it by clicking the box. Click OK to close the Windows Feature window and reboot the computer.
- If .NET Framework 3.5 SP1 is already enabled, you can repair it by clearing the box and rebooting the computer. After the computer has restarted, re-enable .NET Framework and restart the computer again.
Solution 2: Reinstall QuickBooks Using a Clean Install
If the error code mentioned above appears when updating QuickBooks, the best solution would be to simply reinstall it using a clean install.
A clean install is usually done when one of the program’s features are damaged and need repair and also when the usual reinstall fails to provide any comfort or a solution to the problem. In order to start the installation process make sure you havethe setup file you downloaded from QuickBooks’ official site. You will also need your license number before you start.
- First of all, make sure you are logged in with an administrator account as you won’t be able to delete programs using any other account.
- Backup the data you want to save because deleting QuickBooks will remove it.
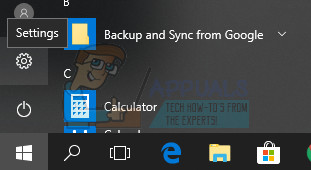
- Click on the Start menu and open Control Panel by searching for it. Alternatively, you can click on the gear icon in order to open settings if you are using Windows 10.
- In Control Panel, select to View as: Category at the top right corner and click on Uninstall a Program under the Programs section.
- If you are using the Settings app, clicking on Apps should immediately open a list of all installed programs on your PC.

- Locate Quickbooks in Control Panel or Settings and click on Uninstall.

- QuickBooks’ uninstall wizard should open with two options: Repair and Remove. Select Remove and click Next in order to uninstall the program.
- A message will pop up asking “Do you want to completely remove QuickBooks for Windows?” Choose Yes.
- Click Finish when the uninstalled completes the process and restart your computer to see whether errors will still appear.
The next thing in the process is to rename the installation folders so that QuickBooks does not use the remaining files after you reinstall it. This is an easy task.
- Navigate to the C >> Windows folder on your computer by clicking on This PC option located at your desktop.
Note: If you are not able to see some of the folders we mention below, you will need to enable the Show Hidden Files and Folders option from within the folder.
- Click on the “View” tab on File Explorer’s menu and click on the “Hidden items” checkbox in the Show/hide section. File Explorer will show the hidden files and will remember this option until you change it again.

- Navigate to each of the folders displayed below and rename them by adding ‘.old’ to their name. This means that the new installation of QuickBooks won’t use these folders or the files located in them.
C:\ProgramData\Intuit\QuickBooks (year)
C:\Users\(current user)\AppData\Local\Intuit\QuickBooks (year)
C:\Program Files\Intuit\QuickBooks(year)
64-bit version C:\Program Files (x86)\Intuit\QuickBooks (year)
Note: You may end up receiving the “Access Denied” error when you try to rename these folders. This only means that one of the QuickBooks processes is running and it prevents you from modifying any of the files and folders these processes are using. Follow the steps below to fix this:
- Use the Ctrl + Shift + Esc key combination in order to bring up the Task Manager. Alternatively, you can use the Ctrl + Alt + Del key combination and select Task Manager from the menu. You can also search for it in the Start menu.

- Click on More details in order to expand the task manager and search for the entries displayed below on the list in the Processes tab of Task Manager, right-click on each one of them, and choose the End task option from the context menu which appears.
QBDBMgrN.exe
QBDBMgr.exe
QBCFMonitorService.exe
Qbw32.exe
- Click Yes to the message which is going to be displayed: “WARNING: Terminating a process can cause undesired results including loss of data and system instability….”
- Now you are ready to reinstall QuickBooks Desktop by running the file you downloaded earlier. The link is at the very start of this Solution. Follow the instructions which appear on screen and check to see if the same error appears.
Alternative: If the clean uninstall doesn’t work for some reason, you can always try and repair the installation by choosing the Repair option in Step 7 of this Solution. After the process finishes, try to see if the error message still appears.