Fix: Print Screen Not Working
The print screen is function popular with people who like to capture what is being viewed on their desktop. Pressing the print screen button on your keyboard captures the screenshot to your clipboard and you can paste it anywhere (mostly in applications like paint etc.).

However, some users reported that they were not able to use the print screen function on their computers. This can be due to several reasons such as the correct driver for keyboard not installed or some interference with third-party programs. We have listed down some workarounds for this issue.
Solution 1: Stopping background programs
Many background programs such as OneDrive, Snippet tool or Dropbox, etc. can cause a problem and restrain you from taking screenshots on your computer. They have features that override the default windows function; hence the problem. You should try closing each of these programs one by one and check each time to know which application is the culprit. Once you have identified the application, you can easily keep it closed when you want to use the print screen function. You may try using the Safe Mode to block all applications from opening at startup and this can help you identify the root cause of the problem.
You may also check your cloud service (e.g. OneDrive or Dropbox) pictures folder for the screenshots being saved there. Because many cloud services have an option that allows your screenshots to be saved in that cloud service.
Also many photo editor apps e.g. Movavi photo editor can take over your print screen command, so make sure that is not the case with you. Moreover, try to delete the contents of the folder that are no more required.
C:\Users\user\Pictures\Screenshots
Then check if the Print screen is functioning properly.
Note: You may also try to clean boot your computer to get rid of any rogue “Services” that may startup with the computer in a normal boot.
Solution 2: Checking if Print Screen is being used correctly
Mostly on laptops, there is an additional button you need to press before you can use the print screen function (mostly a key called “fn”). Press that key and then press the print screen button to capture the screenshot accordingly. The button might different on different machines according to the manufacturer. Look around on your keyboard and look for this kind of buttons present.

Also, there are some cases where the laptop was manufactured in another country and you are using the default English keyboard. In that case, you should check if all the keys present on your keyboard are in sync when you press them (check if the writing correctly represents the key). If there is a difference, you should try pressing other keys around and figure out what is the actual print screen button. You may try using the on-screen keyboard.
Solution 3: Updating your Keyboard Drivers
Incorrect keyboard drivers might also be the reason why you are not able to use the print screen function. This issue usually arises on laptops where you have to install the proper driver for your keyboard for all the keys to work.
You should head over to your manufacturer’s website and download the required drivers accordingly. After you have saved the driver to an accessible location, proceed with the solution.
- Right-click on Windows key and select Device Manager from the list of options available.

Another way to launch the device manager is by pressing Windows + R to launch the Run application and typing “devmgmt.msc”.
- Right-click on the keyboard and select “Update Driver”.

- Now a new window will pop up asking you whether to update the driver manually or automatically. Select “Browse my computer for driver software”.

- Now browse through the folders to where you downloaded the drivers. Select it and Windows will install the required drivers. Restart your computer and check if the problem got solved.
Solution 4: Using Alternatives
If all the above solutions don’t work for you, there are many alternatives through which you can print the screen in front of you. We have listed down the most convenient and reliable alternatives for you to try.
- Snipping tool: This tool comes built-in in most Windows. It provides great functionality where you can specifically select the portion of the screen you want to capture and then save it accordingly. Press Windows + S, type “snipping tool” and open the application for it to launch.

- Pressing Windows + Print screen: This command automatically captures the current screen in front of you and stores the PNG file to Pictures\Screenshots. This is an effective way to instantly capture the current screen without any delays or having to save the picture one by one. In laptops, you have to press Fn + Windows Key + Print Screen. The Fn key might be a different laptop to laptop as discussed above.

Note: You can also try pressing the Alt + Print screen to save the captured screen to your clipboard which you can later paste in other applications (Paint etc.).
Solution 5: Run Hardware Troubleshooter for Keyboard
Windows has many built-in troubleshooters to troubleshoot common Windows problems. If the problem you are facing is a result of a wrong configuration of the keyboard, then running the built-in hardware troubleshoot for the keyboard may solve the problem.
- Press Windows key, type Troubleshoot and in the resulting list, click on Troubleshoot Settings.
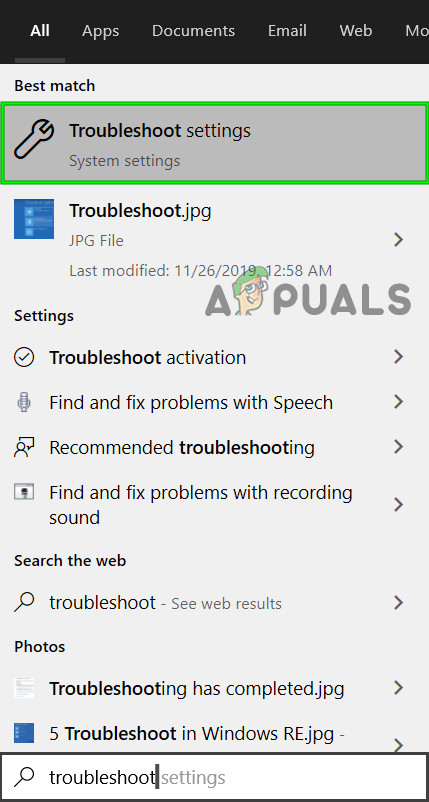
Open Troubleshoot Settings - Now in the right pane of the window, scroll down to find out Keyboard.
- Now click on Keyboard and then click on Run this troubleshooter.
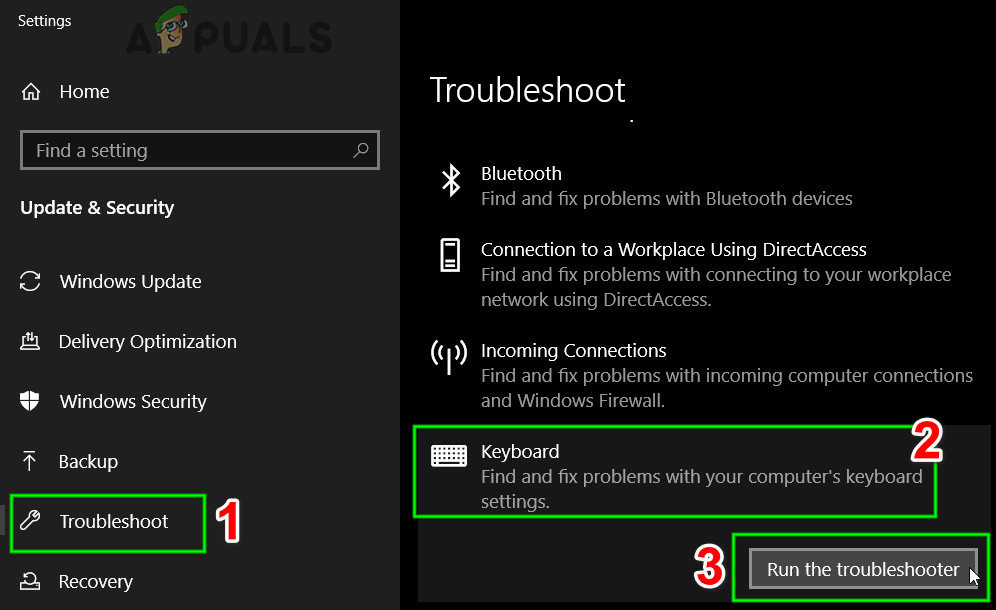
Run Keyboard Troubleshooter - Now follow the instructions displayed on the screen to complete the troubleshooting process and then check if Print Screen command is working fine.
Solution 6: Check for Operating System Updates
In some cases, the Print Screen issue might be getting triggered due to a faulty Windows Update or kernel that might have been installed on your system or this error might even be triggered if you have incorrectly configured some aspects of your Windows settings and even if the System files or configs have been damaged.
Therefore, as a workaround, we will be attempting to scan for and install any available Windows Updates on our computer which should get it back to working normally and might even fix the print screen issue. In order to do that:
- Open Windows Update by clicking the Start button in the lower-left corner. In the search box, type Update, and then, in the list of results, click either “Windows Update” or “Check for updates” option.
- Alternatively, press “Windows” + “I” to open the windows settings.
- In the settings, click on the “Update and Security” option and from the left side, select the “Windows Update” button.
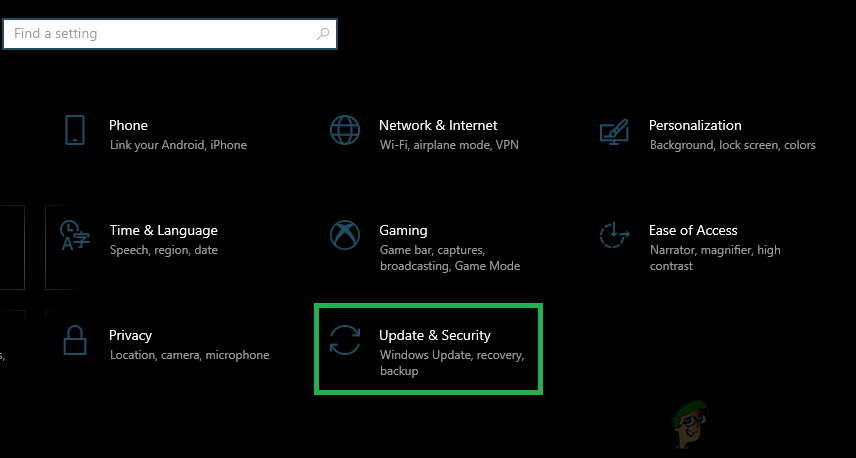
Clicking on the “Update and Security” option - Click the “Check for updates” button and then wait while Windows looks for the latest updates for your computer
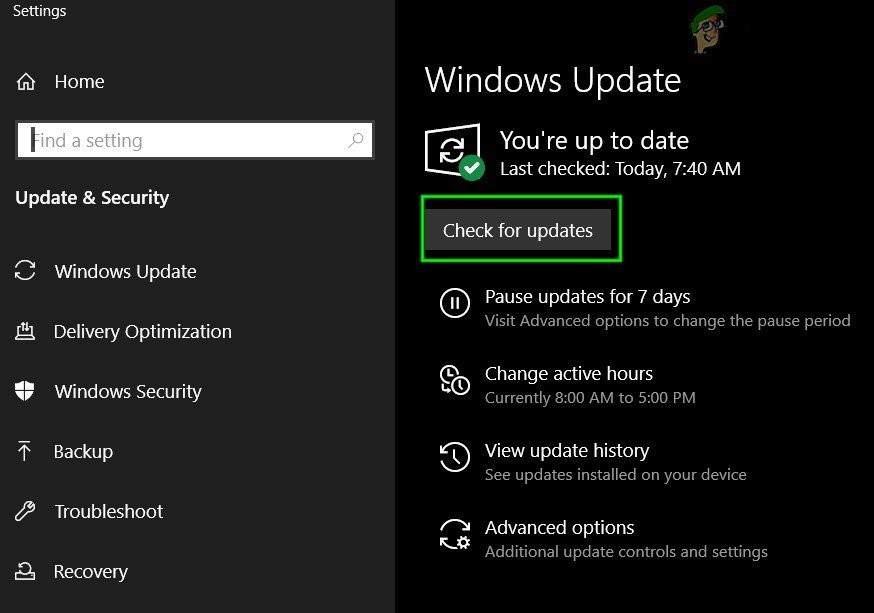
Check For Updates in Windows Update - If you see a message telling you that important updates are available, or telling you to review important updates, click the message to view and select the important updates to download or install
- In the list, click the important updates for more information. Select the checkboxes for any updates that you want to install, and then click
- Click Install updates.
- The system should now automatically start installing updates on your computer.
- Check to see if installing updates has fixed this issue on your computer.
Note: It is important that you do not shut your computer off or allow it to run out of battery during the update process. Doing so can cause a corruption of the operating system, which can often only be fixed by reformatting the computer.
Solution 7: Look For F-Lock Key
The F-Lock key is a toggle key on a PC compatible keyboard used to enable or disable the F1 through F12 key’s secondary functions. The F-Lock key is similar to caps lock in that it “forces” F1 through F12 to use their standard functions, as defined by the program being used. Pressing and releasing the F-Lock key toggles on, or enables, the F1-F12 keys to use their standard functions. Pressing the F-Lock key again toggles off (disables) the F1-F12 key standard functions, and turns on the ability to use the secondary functions on those keys. Today, the F-Lock key is included on very few keyboards. Instead, the Fn key is included, which allows users to activate the F1-F12 keys’ secondary functions on a case-by-case basis.
If there is an F Mode key or F Lock key on your keyboard, the Print Screen not working Windows 10 may be caused by them, because such keys can disable the Print Screen key. If so, you should enable the Print Screen key by pressing the F-Mode key or F-Lock key again.
Solution 8: Configure Alternate Hotkeys for the Print Screen Key
If you cannot get the print screen key to work on your computer, you can temporarily try to use a workaround and configure another key or a macro to perform the function for you. Therefore, in this step, we will be using a third-party tool to perform this function for us which should be an adequate workaround to this issue.
- Download the Screen Print Platinum from here.
- After the downloading process is finished, click on the executable to queue the install and follow the on-screen instructions to completely set up the application on your computer.
- Now click on the “Setup” button from the Screen Print Platinum menu and select the “Screen Print”.
- Click on the “Hotkeys button” at the bottom of the Configuration window.
- Next, checkmark the “Enable Hotkeys” option then under Global Capture Hotkey, select any key from the dropdown such as “P”.
- Similarly, under Global Capture Hotkey checkmark “Ctrl and Alt”.
- Finally, click on the “Save button” and this will assign the “Ctrl + Alt + P keys” to substitute for the Print Screen key.

Configuring Settings - Press Ctrl + Alt + P keys together to get the print screen function to work.
- Check to see if this fixes the issue for you.
Solution 9: Tweak OneDrive Settings
Microsoft One Drive is a file hosting service operated by Microsoft as part of its web version of Office and we got to know that some of Onedrive’s settings were responsible for the Printscreen issue. Hence, follow the steps indexed below to tweak its settings:
- Right-click on Onedrive icon located on the taskbar at the bottom right and click on settings.
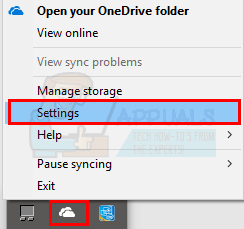
- Afterward, click on Backup
- Now, Check the “Automatically save screenshots I capture to one drive” option.
Note: If it is already checked, then uncheck it and then check it once again. - After checking this option, save your changes and check to see if doing so has fixed the issue.
Solution 10: Monitor Hardware
In some cases, there is a remote possibility that the keyboard that you are using on your computer is acting up and causing this issue. Therefore, it is vital that you actually rule out a faulty keyboard before attempting other fixes because if there is a hardware fault with the keyboard, no software reconfiguration will help you get this functionality back until you actually replace the keyboard.
Therefore, try to connect the keyboard to another computer or connect another keyboard to your computer and check to see if this function works correctly. If it works on the other computer or with the other keyboard, this indicates that the keyboard that you are using is faulty and it needs to be replaced with another one. Make sure to do this before actually trying again.
Solution 11: Modify Registry Editor
Registry Editor allows users to perform the following functions: Creating, manipulating, renaming and deleting registry keys, subkeys, values, and value data. Importing and exporting REG files, exporting data in the binary hive format. There might be an issue with the Registry Editor after the latest Windows Update so it is better to do some modifications in the Registry Editor to get rid of this glitch. Unlike Group Policy Editor, which comes preinstalled in Windows Pro and higher versions only, Registry Editor is available in Windows Home aswell.
- Press “Windows’ + “R” to open the Run prompt and type in “regedit” in the run prompt and then press “Enter” to launch the registry editor.

regedit.exe - After attempting to open the registry editor, there should be a prompt on your screen asking you to verify and provide admin permissions before continuing.
- Under the File option you’ll observe a search box and type the following command in the directory:
COMPUTER\HKEY_CURRENT_USER\Software\Microsoft\Windows\CurrentVersion\Explorer
- Find a file named “ScreenshotIndex” in the right pane of the window. You don’t have to do anything if the file already exists. If the file is missing, right-click on a space in the right window-pane and select DWORD (32-bit) Value under New.
- Name the newly created file as “ScreenshotIndex” and double-click to open it. The Hexadecimal Value data should be set to 4.
- Navigate to this folder now:
HKEY_CURRENT_USER\Software\Microsoft\Windows\CurrentVersion\Explorer\User Shell Folders
- Locate and open this file:
{B7BEDE81-DF94-4682-A7D8-57A52620B86F}
- Double-click on the file to ensure that the Value Data is set to “%USERPROFILE%\Pictures\Screenshots“. If the file is missing, create a String Value file instead of the DWORD file as we did above and enter the value as discussed. Note: If that doesn’t work, try 695 instead of 4 as the value in step 6 and try again.
Workaround: The last thing you can try once you failed to take a screenshot by pressing PrtScn key is that you can try to press Fn + PrtScn, Alt + PrtScn or Alt + Fn + PrtScn keys together to try again. In addition, you also can use a snipping tool at Accessories from the Start menu to take a screenshot.
In addition, if you’re on Windows 7 when you can’t use PrtSc on the physical keyboard, try to use the key on the virtual On-Screen Keyboard: Click the Start button > All Programs > Accessories > Ease of Access > On-Screen Keyboard.