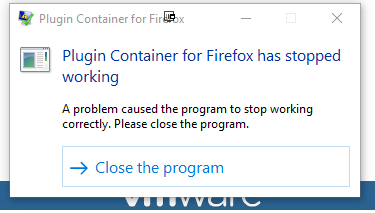
Fix: Plugin Container for Firefox has stopped working
Plugin Container or plugin-container.exe (executable file) is a Mozilla Firefox Plugin’s Handler that was introduced with or around version 3.6.4 incorporated in Firefox and is responsible for handling plugins. This feature was added into Firefox to avoid crashes caused by plugins.

All Firefox plugins are loaded into the Plugin Container for file to avoid Firefox from closing itself due to a crash. The fixes in this guide will also address the following issues
- Plugin Container for Firefox has Stopped Working when Full Screen mode is switched on
- Plugin Container for Firefox has Stopped Working when Firefox is run in VMWare
Solution 1: Update Your Flash Player
Shockwave (Flash) Player is always a troublesome plugin yet you can’t really browse the web normally without it. The real problem with it is that new versions of it keep coming out but users are not so keen on updating it every once in a while – This is one of the main cause for the plugin to stop working in firefox.
This can lead to various problems such as this one on their computers but even more problems when occur if old versions of Shockwave run on suspicious sites as malicious users can use the security flaws of old versions to damage your computer. Here is how to update this plugin on your Mozilla browser.
- First of all, there is no automated process of updating the plugins using the browser as even when you open your Mozilla Firefox browser and go to Tools >> Add-ons >> Plugins and click on the Update Now button, you will just be redirected to this site.
- Go ahead and open the link above. At the left side of the screen, you should see certain settings such as your Windows architecture (32bit or 64bit), the preferred language, and the browser you are downloading the Shockwave Flash player for.

- If you are downloading the player from a different browser or a different computer (which might be possible if Firefox is being unresponsive), click on the “Need Flash Player for a different computer?” option and choose your operating system in step 1 and the browser you are using at step 2 (Firefox).
- Make sure you disable the optional offers at the middle of the browser window which would install McAfee tools on your Pc and click the Download now button.

- Run the file you have just downloaded from the Downloads folder on your computer, wait for installation files to download completely, and follow the instructions on-screen in order to proceed and install the Flash Player. Restart your computer afterwards and check to see if the error still appears.
Note: It’s quite possible that the installation might not go as planned because of various issues reported by uses. That is when you will need to perform a clean install by using the Uninstaller tool made by Adobe.
- Click on the link above in order to start the downloading process of the Uninstaller tool to your computer (the download will start as soon as you click on the link). Make sure you download any apps or programs which may use Shockwave Flash (instant messengers, browsers, games, etc).
- Run the uninstaller file you have just downloaded from the Downloads folder on your computer and follow the instructions on-screen in order to proceed and uninstall the Flash Player.

- Cleanup after the uninstallation is complete simply by navigating to the folders displayed below and deleting all files and folders you might see located inside. The best way to navigate is to use the Windows Key + R key combination in order to bring up the Run dialog box and simply paste in the paths below:
C:\Windows\system32\Macromed\Flash
C:\Windows\SysWOW64\Macromed\Flash
%appdata%\Adobe\Flash Player
%appdata%\Macromedia\Flash Player

- Restart your computer and try installing the Flash Player using the info above.
Solution 2: Broken Xmarks Add-on
Xmarks is a plugin designed for the Mozilla Firefox browser and it’s one of the most popular tools used to properly manage your bookmarks. However, if certain errors occur with the plugin, the plugin-container responds by crashing showing the error Plugin Container for Firefox has stopped working and you might have luck solving the problem simply by repairing the Xmarks plugin using the browser.
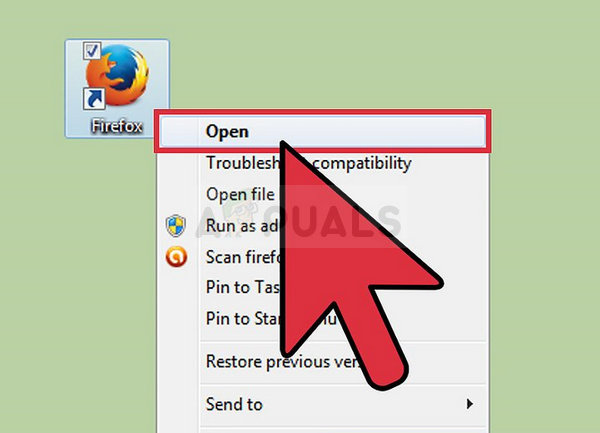
- Open your Mozilla Firefox browser by double-clicking its icon on the Desktop or by searching for it in the Start menu.
- Locate the blue Xmarks icon at the top right side of the window. Click on it and choose the Xmarks Settings option.

- If Xmarks is not currently running you can open the settings via Add-ons. Click on the menu button located at the top right part of the browser’s window and click on Add-Ons. You can also type in “about:addons” in the address bar at the top of the Mozilla browser.
- Locate the Xmarks add-on and click on the Options button located there.
- From the Xmarks Settings window, navigate to the far right Advanced tab and click on Repair button. Follow the prompts which will appear on screen and restart your browser afterwards. Check to see if the problem is gone.

Solution 3: Update Your Current Version of Firefox
As it should be expected, updates are there so solve problems and to fix certain bugs which occurred before. As several users have claimed online, updating their copy of Firefox managed to solve the problem immediately so you should definitely consider this solution.
Firefox usually keeps itself updated with its auto-update functionality but, if you have disabled it because it annoyed you, you can still launch the process manually without problems.
- Open Firefox by double-clicking its icon on the Desktop or by searching for it in the Start menu and clicking the first option which shows up.

- Click the menu button at the top right part of the browser’s window, click on the Help section and choose the About Firefox option.
- As soon as the About Mozilla Firefox window opens, the browser will start checking for updates and downloading them immediately if there are any. When the download process is complete, you will be able to see the Restart to update Firefox button so click on it.
- Check to see if the same problem reappears when Firefox has started again.
Solution 4: Disable Adobe Flash Protected Mode
This solution is primarily aimed at folks using 32-bit computers since this option doesn’t even exist in its pure form on browsers running on 64-bit versions of Windows. The protected mode option is designed to keep you safe from intruders and malicious attacks but even the developers at Mozilla acknowledge that it may cause constant crashes and errors such as this one. That is why you can disable it and check to see if that will solve your problem.
For 64-bit Windows users, there is a different method located below this one and it’s a little more advanced, but nothing too complicated
- Open your Mozilla Firefox browser by double-clicking its icon on the Desktop or by searching for it in the Start menu.
- Click on the menu button located at the top right part of the browser’s window and click on Add-Ons.

- At the right pane of the screen, locate and click on the Plugins option in order to view the full list of plugins installed in your browser. Click on Options next to the Shockwave Flash entry and remove the check mark next to the “Enable Adobe Flash protected mode” entry.

- Check to see if the problem is solved after restarting your browser.
Windows 64-bit OS Users:
- Open your File Explorer and try navigating to this location from either My Computer or This PC:
C:\Windows\SysWOW64\Macromed\Flash
- If you are unable to see any of the folders in the process, that is because the hidden files are disabled from your system and you will need to enable the view of them.
- Click on the “View” tab on File Explorer’s menu and click on the “Hidden items” checkbox in the Show/hide section. File Explorer will show the hidden files and will remember this option until you change it again.

- Locate a file named mms.cfg. Right-click on it and choose Edit. Note that you will need to have administrator permissions in order to do so. If the file does not exist, right-click anywhere in the Flash folder and choose New >> Text File. Save the file as “mms.cfg” and set the Save as type option to All types.
- Either way, open the mms.cfg file and put the following line at the bottom of the document:
ProtectedMode=0
- Save the changes and close Notepad. This change will be applied only after the Flash plugin is completely not in use which means you will need to close Firefox and wait for a couple of minutes.
Solution 5: Disable Hardware Acceleration
Hardware acceleration can sometimes improve performance of your browser but there has been countless errors and problems which users could have avoided simply by turning off this problematic feature. It can be done easily via Firefox settings but you should still disable this option straight in the Flash settings as well.
Firefox:
- Click on the menu button located at the top right part of the browser’s window and click on Options. Navigate to the General panel.

- Scroll down to the Performance section and clear the Use recommended performance settings check box in order to gain access to the “Use hardware acceleration when possible entry”. Clear the check box next to it as well and close the menu. Restart your browser and check to see if the error still occurs.
Flash:
- The quickest way to disable it is by using a Flash animation on their official Help page. Open this link and scroll down to the tree animation. Make sure you right-click on it and lick on the Settings option.

- In the settings dialog window which should open, stay in the first Display tab of the settings window and clear the box next to the “Enable hardware acceleration” option there before clicking the close button and restarting your browser.


