Fix: Please Insert a Disk into Removable Disk
The error “Please insert a disk into removable disk” usually occurs due to two reasons; the disk name is conflicting with another name which is already allocated to any system hard drive or other storage device or the USB device you are plugging in is corrupted or damaged physically.
This error usually starts when the computer prompts that your drive needs to be repaired. However, when you repair it, the error message starts popping which further complicates things. The properties of the memory device show that there no memory available nor there is any used. We will go through few solutions which are known to fix this problem.
Solution 1: Changing Drive Letter and Path
Each drive is identified by a unique drive name along with a path through which it can be accessed. It is possible that the drive letter is conflicting with another one which is already reserved by the system for another memory device. We can allocate another drive name to your drive and see if this makes any difference.
Make sure that you insert the removable device before you boot your computer. Shut down your computer, plug in the device, and then start it up. Do note that the first boot device in your BIOS settings is not the removable device (it is should be the hard drive where your Windows is installed).
- Press Windows + R, type “diskmgmt.msc” in the dialogue box and press Enter.
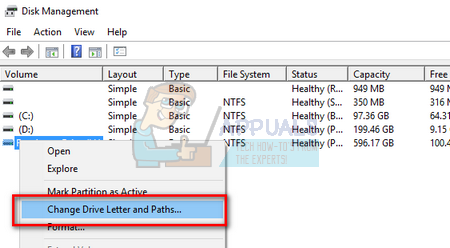
- Once in disk management, right-click on your drive and select “Change Drive Letter and Paths”.
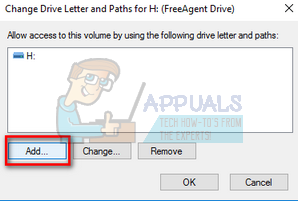
- Click on the “Add” button present at the list of options present.
Note: If your drive already has a name, click on “Change” instead of “Add”. In this case, since the drive is already named “H”, we will click on “Change and select a new drive letter for the hard drive”.
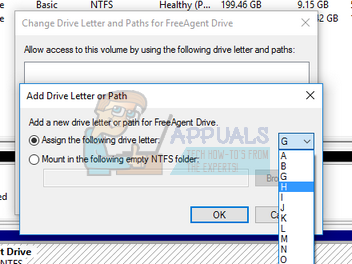
- Now select a new drive letter for your hard drive. Press OK to save changes and exit.
- Now check if you can access the removable device successfully. If you still can’t, restart your computer and check again.
Solution 2: Using DISKPART
DISKPART is a command line disk partitioning utility which was introduced to replace its predecessor “fdisk”. This utility is used to clean and create partitions on various disks and uses scripts to automate its usage.
If the above solution doesn’t work, it probably means that you have to erase all the data in your device and partition it in hopes to make the device recoverable again. Do note that this will erase all the data present on your device and the end product will be a clean device with no data on it. You may want to try the third-party recovering software before you try this utility if you want to extract the data which was already present in the device.
- Press Windows + S, type “command prompt” in the dialogue box, right-click on the application and select “Run as administrator”.
- Once in elevated command prompt, execute the following instructions:
diskpart
list disk
select disk (disk number present in the table)
clean

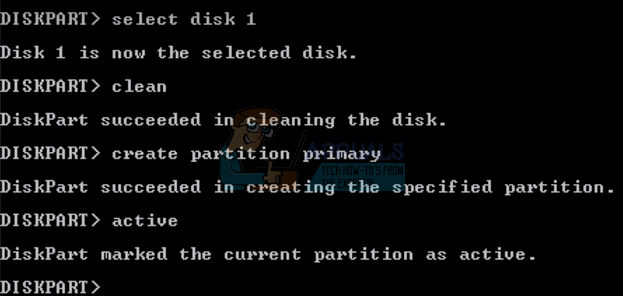
Here we are listing all the disks present on your computer. Once the list comes up, determine which one is the USB device/Pen drive causing the issue. In this case, Disk 1 was causing the problem. After selecting the disk, we will perform the clean operating to wipe all the data present.
- Once the device is cleaned up, execute the following command to create a partition.
create partition primary
active
Since we have created the required partition and marked it as active, we can move ahead to format the disk to FAT32 format.
- Now execute the following commands in order:
select partition 1
format fs=fat32
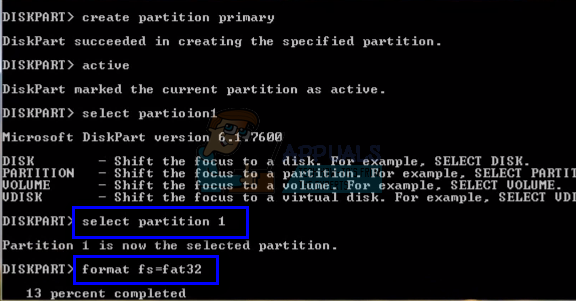
Here we are selecting the partition first, and then formatting it to the format FAT32. This might take some time so be patient and let the process finish.
- Close the command prompt after the partitioning is complete, press Windows + E to launch the explorer, and check if you can access the drive successfully.
Solution 3: Checking for Physical Damage
If both the above solutions don’t work, check if the memory device is physically damaged. You should also try plugging the device into another USB port and see if this does the trick. If you have a PC, try plugging it into the ports present at the back side. If you have exhausted all the options, try giving the USB a little heat and plug it back in. If you are using a card reader for an SD card, check if the card reader is functioning properly.
Still, if nothing works, it means that your flash storage device is damaged. If you have the warranty, try claiming it and to get your device replaced.