Fix: PFN LIST CORRUPT Blue Screen Error on Windows 10
The PFN_LIST_CORRUPT Blue Screen of Death is caused whenever the page frame number (PFN) list becomes corrupted. The PFN is used by your hard drive to determine the location of each one of your files on the physical disk. A BSOD happens when your computer encounters something it can’t process — corruption of the PFN is one of those things, but fortunately, it’s very fixable.
This BSOD is a very common one so nothing to worry about. We have highlighted the workarounds to solve this problem. It is usually related to RAM or incorrect/outdated drivers etc. Follow the solutions listed below starting from the first one.
What to do if you get the PFN LIST CORRUPT Error?
1. Troubleshoot your PC/Laptop RAM
The first thing to do whenever you encounter this error is to check your RAM for any discrepancies. RAM (Random Access Memory) is a core part of your machine and if there is a problem with it, it may be the reason why you are getting this BSOD.
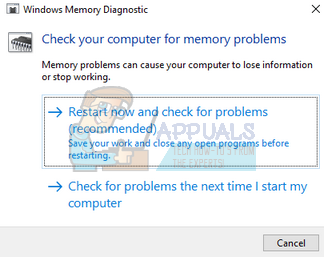
- Press Windows + R to launch the Run application. Type “mdsched.exe” in the dialogue box and press Enter.
- A Windows Memory Diagnostic window will pop up. Now you have two options, either Restart now and check for problems or check for problems that next time your computer start.
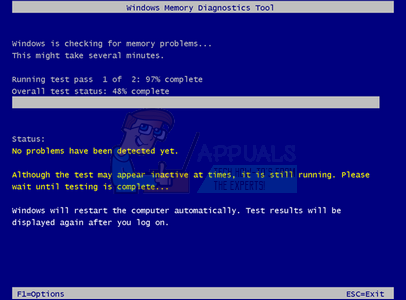
- After the restart, you might see a window like this. Let the process run completely and do not cancel at any step. If you see the progress stuck, don’t worry. The computer will restart itself after the check is complete.
2. Diagnose your hard drive
Another issue due to which this error might emerge is because of bad sectors on your hard drive. It is possible that there are some discrepancies present due to which your Windows crashes every time it tries to access the information supposed to be contained in those sectors. We can try running the hard drive diagnostics and check if this helps.
- Press Windows + S to launch the search bar. Type “command prompt”, right-click on the application and select “Run as administrator”.
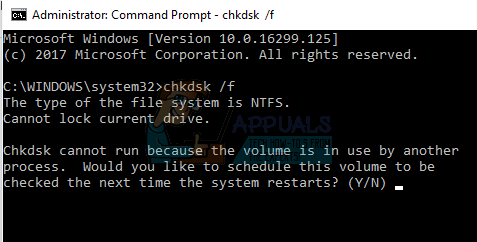
- Once in elevated command prompt, execute the following command:
chkdsk /f
Windows will now start checking your hard drive and automatically try fixing the errors.
Note: If you experience a window like this, it means that the hard drive is currently in use (obviously, you are using the computer). Type “Y” and press Enter. Now restart your computer and upon the restart, the hard drive will be checked.
3. Check Drivers for Errors
We can use a tool developed by Microsoft to check for unusual behavior of the system and the hardware. In many cases, illegal actions of some system modules or the hardware can lead to the BSOD under discussion. Furthermore, if any driver is of incorrect configuration, this might be the problem. Do note that during this process, your system might crash so make sure that all your data is backed up safely. You can also create a restore point just in case.
- Press Windows + S, type “command prompt”, right-click on the application and select “Run as administrator”.
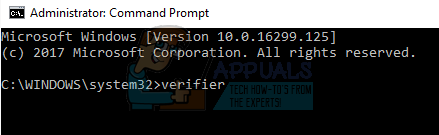
- Once in elevated command prompt, execute the following command:
verifier
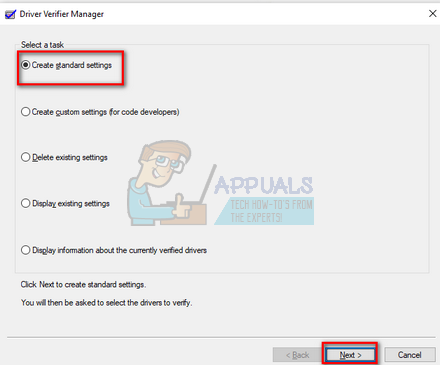
- Select “Create standard settings” and press “Next” to proceed.
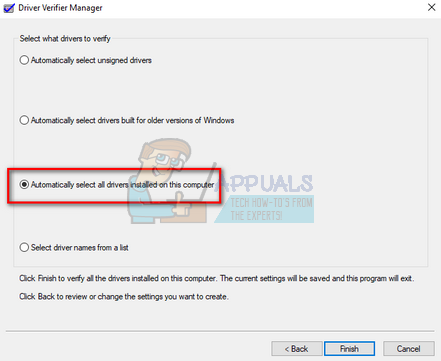
- Select “Automatically select all drivers installed on this computer” and click “Finish”. Now Windows will scan for errors. Make sure that you have backed up all your progress before proceeding. A prompt will come forward for you to restart your computer. Restart your computer.
- Windows will scan all the drivers upon the next restart. Wait patiently if the process consumes too much time. Once the process is complete, the computer will be restarted automatically. If it finds any driver, it will notify you and you can attend to it.
4. Update PC/Laptop Drivers
Outdated, broken or incompatible drivers also often cause the problem. The device drivers may not be installed properly or they might not be configured as expected. We can try updating the drivers automatically using the Windows Update (the first option when you click on “update drivers”).
If you still don’t get the desired drivers installed, we can manually install the drivers after downloading them from the manufacturer’s site.
- Press Windows + R to launch the Run Type “devmgmt.msc” in the dialogue box and hit Enter. This will launch your computer’s device manager.
- Here all the installed devices on your computer will be listed. Navigate through all the devices and update the display/graphics drivers as first priority. You should check updates for all the drivers present on your computer.
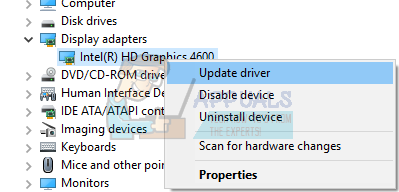
- Click on the Display adapters dropdown to see your installed display card. Right click on it and select “Update driver”.
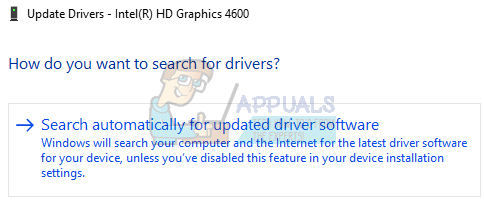
- Now Windows will pop a dialogue box asking you which way do you want to update your driver. Select the first option (Search automatically for updated driver software) and proceed. If you are unable to update the drivers, you can head over to your manufacturer’s site, download the drivers manually and select the second option.
- Update all your drivers before restarting your computer. After restarting, check if the problem is solved.
5. Disable Antivirus and other Applications
Another important cause of this BSOD is firewall applications. Many users reportedly said that Avast antivirus was causing all the trouble. Whenever it took any action whether manually or automatically, the computer crashed. You should disable/uninstall Avast before moving on to the system restore. Furthermore, you should also disable other applications (especially the ones which are monitoring your system such as CCleaner) and then check. These applications are known to cause problems as they interfere with system functions directly.
6. Restore your System to the last Restore point
If all the above methods don’t work, we can try restoring your system to the last system restore point. Save all your work correctly and backup any important data. Do note that all the changes to your system configurations after the last restore point will be removed.
- Press Windows + S to launch the start menu’s search bar. Type “restore” in the dialogue box and select the first program which comes with the result.

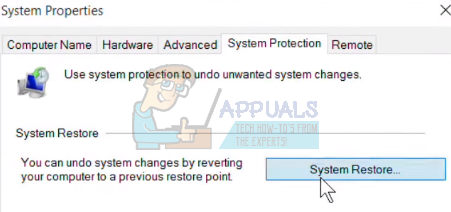
- One in the restore settings, press System Restore present at the beginning of the window under the tab of System Protection.
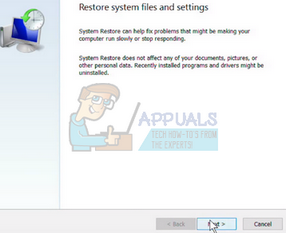
- Now a wizard will open navigating you through all the steps to restore your system. Press Next and proceed with all the further instructions.
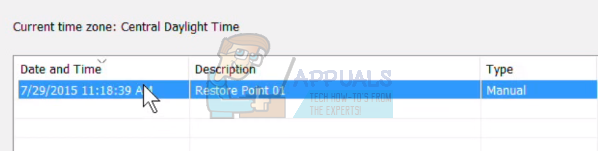
- Now select the restore point from the list of options available. If you have more than one system restore points, they will be listed here.
- Now windows will confirm your actions for the last time before it starts the system restore process. Save all your work and backup important files just in case and proceed with the process.

You can learn more about system restore to gain more knowledge about what it does and what are the processes involved.
- Once you have restored successfully, log into the system and check if the error at hand got fixed.
Note: You should also try running Windows update to check if there are any updates available for your computer. If there are, perform the updates immediately and check if the error is fixed.