Fix: Partner Did not Connect to Router in TeamViewer
Some Windows users are encountering the “Partner did not connect to router” error when trying to connect to another computer via Teamviewer. Prior to the attempt, both computers appear to be ready for the connection (according to the information presented inside the Teamviewer app).

Partner did not connect to router.
What is causing the “Partner did not connect to router” error?
We investigated this particular issue by looking at various user reports and the repair strategies that most affected users have deployed to resolve this particular problem. Based on what we gathered, there are several fairly common scenarios that will trigger this particular error message:
- One (or both) computer is not configured to allow Full Access – The most frequent reason why this error occurs is if TeamViewer is configured to disallow Full Acess Control. This can happen on one or both involved computers. in this case, the solution is to access the Advanced settings of TeamViewer and reconfigure the software to allow Full Access.
- Network connection is triggering the error – Another fairly common reason that will trigger this error is an inconsistency with the internet connection. This typically happens with computers using an ISP that grants dynamic IPs. In this case, the easiest fix is to restart all involved network connections.
- Microsoft Store Teamviewer app is buggy – There are numerous reports of users encountering this exact issues with the Microsoft Store version of the TeamViewer app. The vast majority of affected users have managed to resolve the problem by simply installing the desktop (classic) version of TeamViewer.
- The latest TeamViewer version is not supported by one (or both) computer – There are cases where the latest version of TeamViewer will trigger this particular issue on low-spec computers. Downgrading the TeamViewer version on all involved parties should resolve the issue in this case.
If you’re currently struggling to resolve the “Partner did not connect to router” error, this article will provide you with several troubleshooting steps. Down below, you’ll find a collection of methods that other users in a similar situation have used to get the issue resolved.
Since the methods are ordered by efficiency and simplicity, we advise you to follow them in the order that they are presented in. One of them is bound to resolve the issue in your particular scenario.
Method 1: Allowing Full Access
In order to ensure that the TeamViewer client is not prohibited from facilitated a connection between the two computers, you’ll need to make sure that both computers are configured to allow full Access Control. This setting should be enabled by default, but certain 3rd party security applications might override this preference automatically.
Here’s a quick guide on making sure that Access Control is set to Full Access on both of the involved computers:
Note: The procedure below needs to be followed on every computer involved in the operation.
- Open TeamViewer and click on the Extras tab. Then, from the newly appeared drop-down menu, click on Options to bring up the settings menu.
- Inside the TeamViewer options menu, select the Advanced tab from the left-hand side menu.
- With the Advanced tab selected, move to the right-hand side menu and click on Show advanced options to make the hidden settings visible.
- Once the Advanced options menu is visible, scroll down to Advanced settings for connections to this computer and modify the drop-down menu associated with Access Control to Full Access.
- Save the settings by clicking the Ok button.
- Restart Teamviewer on both computers and see if the issue has been resolved.

If you’re still encountering the “Partner did not connect to router” error after following the steps above on both computers, move down to the next method below.
Method 2: Restarting the network connection both PC
As some users have reported, restarting the network connection on both involved computers might be enough to resolve the “Partner did not connect to router” error. There are confirmed situations where the partner was initially not ready for the connection and a router/modem restart solved the issue.
So, before trying anything else, let’s see if a simple network refresh will do the trick. With this in mind, disconnect your computer from the network and ask your partner to do the same. The best approach to switch your router/modem off and on again, then wait for the connection to be re-established.
After the internet connection on both computers has been re-established, try to re-create the TeamViewer connection and see if the same issue is still occurring.
If you’re still seeing the “Partner did not connect to router” error, move down to the next method below.
Method 3: Using the Teamviewer desktop app on both computers
As it turns out, this problem seems to be a lot more frequent when the involved parties are both using the Windows App store app. Several affected users have reported that the issue was no longer occurring if they use the full desktop app downloaded from TeamViewer’s website.
The Windows Store app was buggy from the start and the issues seem to persist 2+ years after the original launch.
Note: Remember that in order to implement this method, you’ll need to install the desktop app of Teamviewer on both involved parties. In other words, you’ll need to follow the instructions below twice – one for each involved computer.
Here’s how to install the TeamViewer desktop app :
- Visit this link (here) and click the Download TeamViewer button to initiate the download of the installation executable.
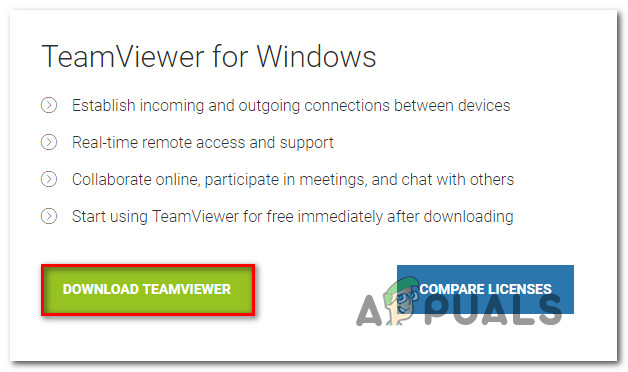
Downloading the desktop version of TeamViewer - Once the download is complete, open the installation executable (TeamViewer_Setup.exe) and follow the on-screen prompts to complete the installation.
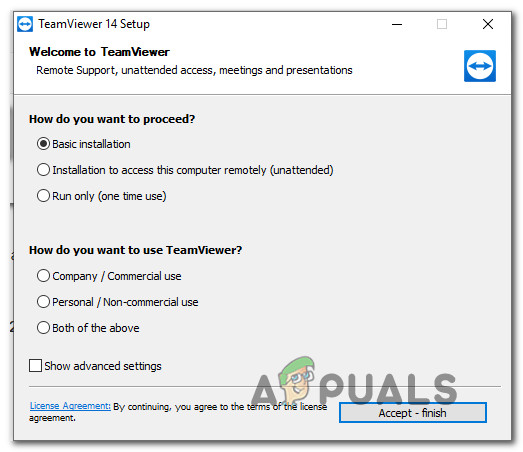
Installing the desktop version of TeamViewer on both computers - When prompted by the UAC (User Account Control), click Yes to grant administrative privileges.
- Once the desktop version of TeamViewer is installed on both computers, reboot both and see if the error is still occurring when you try to connect after the next startup is complete.
If you’re still encountering the same “Partner did not connect to router” error, move down to the next method below.
Method 4: Downgrading to a previous version
If you’ve come this far without a result, one last thing that you might try is to downgrade the TeamViewer version to a previous, more stable version. But keep in mind that you’ll need to install the same version on both computers.
Several users struggling to resolve the same issue have managed to circumvent the issue by downgrading to version 11. Here’s a quick guide on how to do this:
Note: You’ll need to follow the steps below on both computers.
- Press Windows key + R to open up a Run dialog box. Then, type “appwiz.cpl” and press Enter to open the Programs and Features menu.

Type appwiz.cpl and Press Enter to Open Installed Programs List - Inside Programs and Features, scroll down through the list of installed applications to locate the TeamViewer installation. Once you see it, right-click and click on Uninstall.
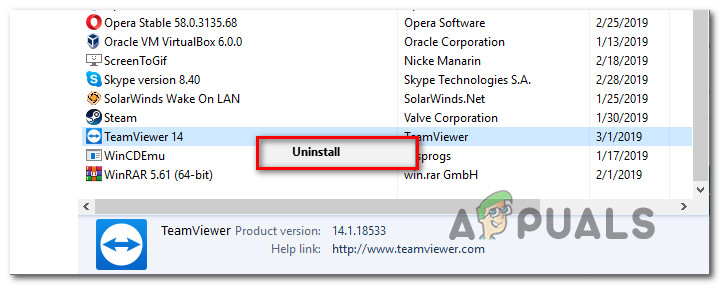
Uninstalling the newer version of TeamViewer Note: Make sure TeamViewer is completely closed before attempting to uninstall.
- Follow the instructions on the Uninstall screen to get rid of the software, then restart your computer.
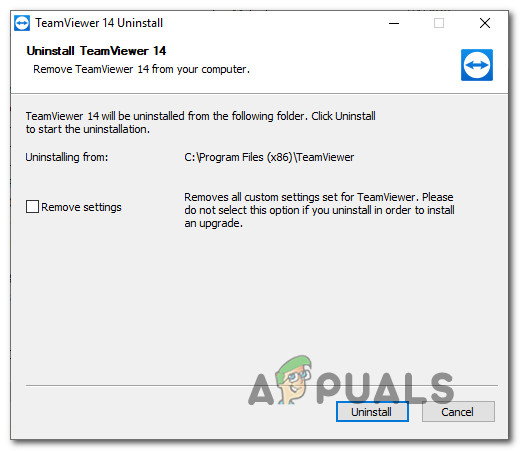
Uninstalling TeamViewer 14 - At the next system startup, visit this link (here), click on the Version 11.X tab, then click on TeamViewer to download the installation executable.
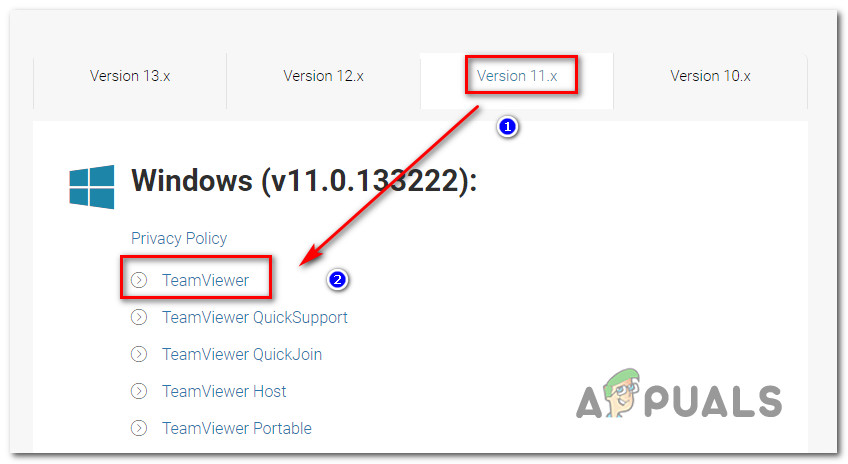
Downloading a previous TeamViewer version - Follow the install instructions to install the older version on both computers.
- Once the installation is complete, restart both computers again and re-create the connection. The “Partner did not connect to router” error should no longer occur.


