Fix: No Sleep Option in Power Menu
If your Power Menu is missing the Sleep option, this might be due to your system’s power settings, local group policy configuration etc. There have been several reports submitted by users which state that there’s no option for sleep mode in the Power menu. According to some of the reports, the issue occurred after they updated their Windows 10 system while in the meantime, for some, upgrading to Windows 10 happened to be the cause.

The sleep mode tends to be really useful in certain scenarios and is used by most of the users. If you don’t already know, with sleep mode you can put your system to sleep which will minimize the power usage and still keep your current session running. Nonetheless, you can resolve your issue by going through this article.
What causes the Missing Sleep Option Issue on Windows 10?
The missing of sleep option in Power menu can be caused by several factors, however, primarily it is due to the following reasons —
- Power menu settings: One of the causes of the issue would be your power menu settings where the sleep option has been disabled.
- Local Group Policy configuration: Another reason due to which your power menu is missing the sleep option could be your system’s group policies configuration. The dedicated policy might be disabled due to which the option is disabled as well.
- Display Drivers: For some users, the issue was caused by their video adapter driver. If the video card driver hasn’t been installed on your system, it might result in the issue.
Getting onto the solutions, you can circumvent your issue by following the fixes given down below. Please make sure you are using an administrator account and that you follow the provided solutions in the same order as given to ensure a quick resolution.
Solution 1: Checking Power Settings
In some cases, your sleep mode option is missing because you have configured your power settings as such. To eliminate the possibility, make sure you have enabled sleep mode in the Power options setting window. Here’s how to do it:
- Go to the Start Menu and open up the Control Panel.
- Set the View by to Large icons and then select Power Options.
- On the left-hand side, click on ‘Choose what the power buttons do’.
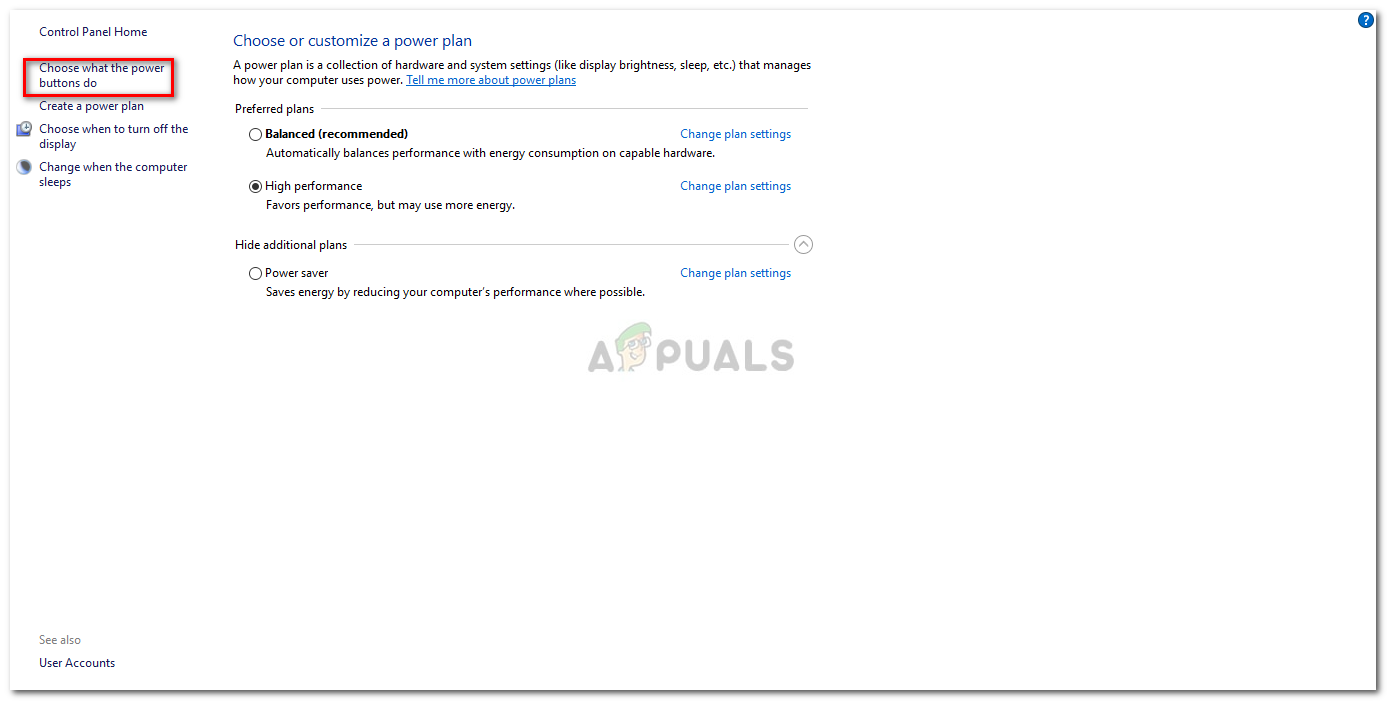
Power Options - Click Change settings that are currently unavailable.
- Under Shutdown settings, make sure Sleep is checked and then click Save changes.
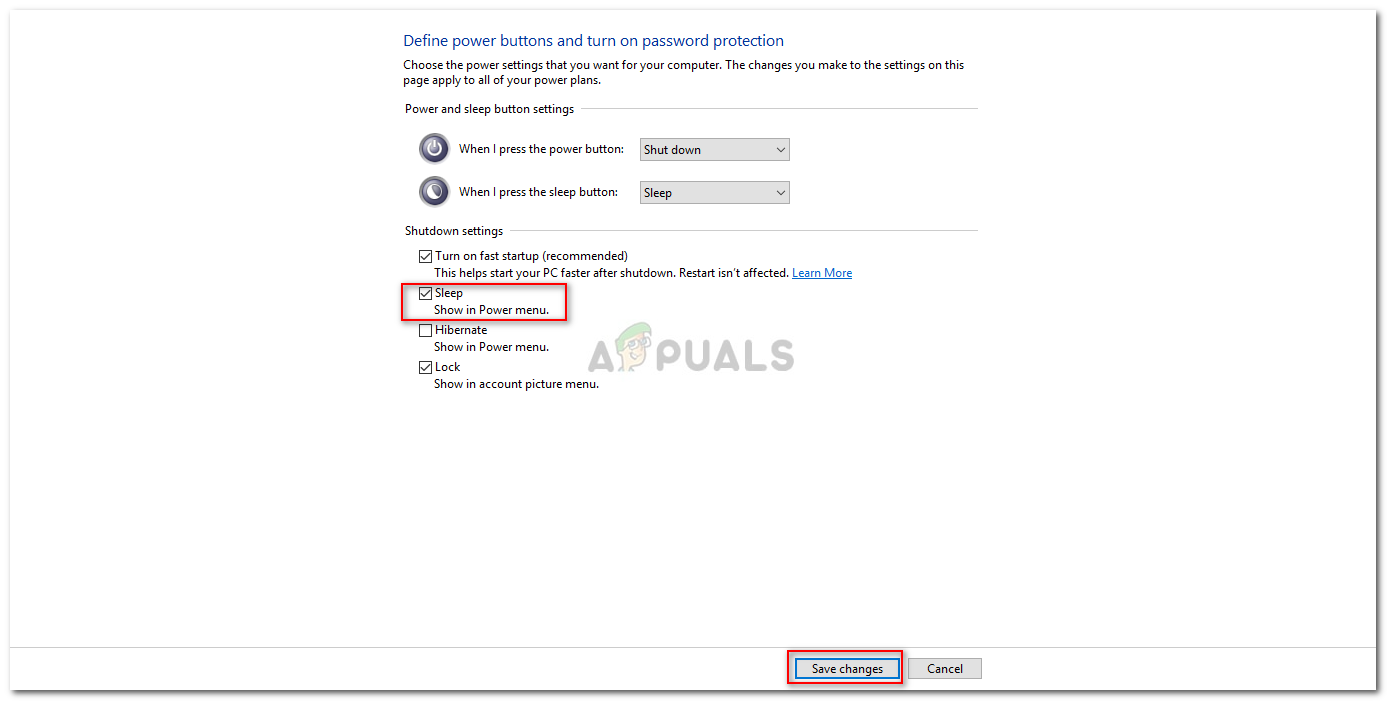
Enabling Sleep Option from Power Options
Solution 2: Modifying Local Group Policy
Another way of fixing your issue would be to edit your Local Group Policies. There’s a dedicated policy for showing sleep option in the power menu. If the policy is disabled, the sleep option won’t appear in the Power menu. Here’s how to change the policy:
- Press Windows Key + R to open Run.
- Type in ‘gpedit.msc’ and then press Enter.
- Afterward, navigate to the following path:
Computer Configuration -> Administrative Templates -> Windows Components -> File Explorer
- On the right-hand side pane, locate the ‘Show sleep in the power options menu’ and double-click it.
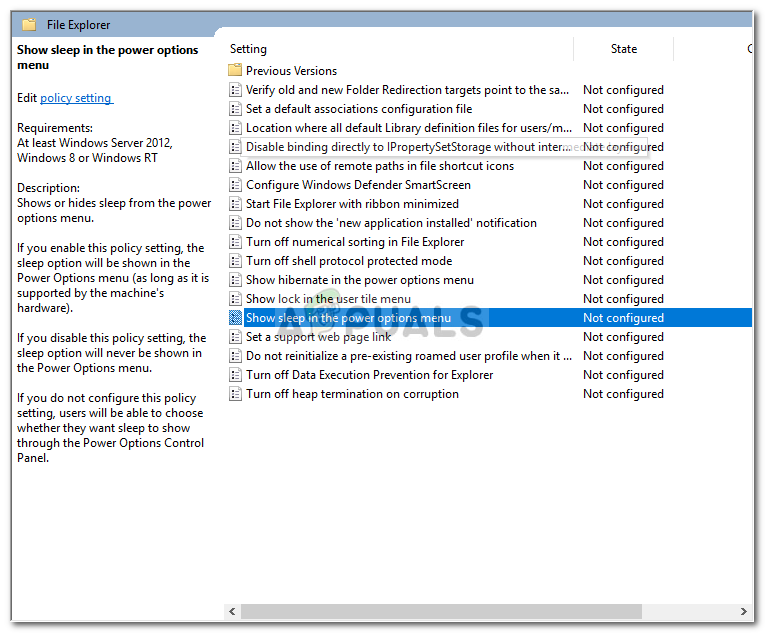
Dedicated Sleep Policy - Change it to Enabled, hit Apply and then click OK.
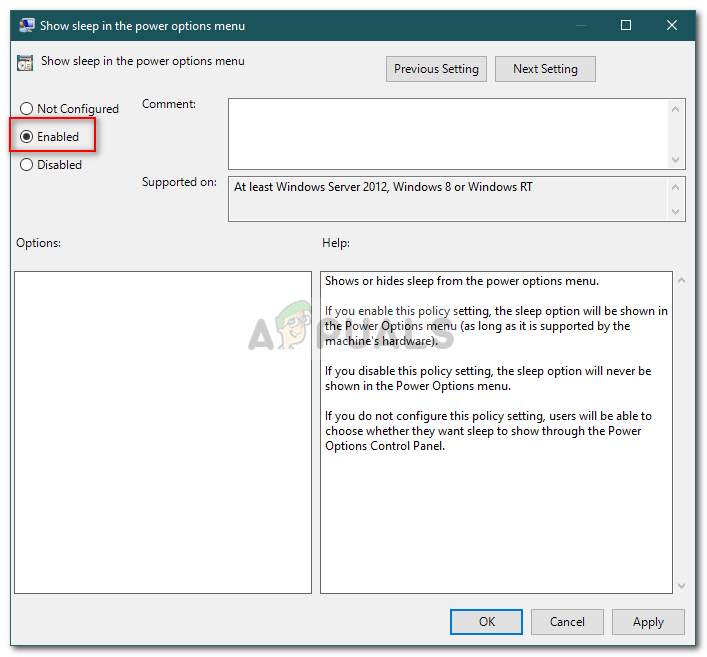
Enabling Sleep Through Local Group Policy - Restart your system.
Solution 3: Turning on Standby
Standby or InstantGo is a Windows 10 and 8 feature that lets you maintain network connectivity after your system has been put to sleep. If this feature has been disabled, it can cause the Sleep option to disappear. Here’s how to turn it on:
- Press Windows Key + R to open Run.
- Type in ‘regedit’ and press Enter.
- Navigate to the following path:
HKEY_LOCAL_MACHINE\SYSTEM\CurrentControlSet\Control\Power
- Afterward, on the right-hand side pane, locate and double-click CsEnabled key.
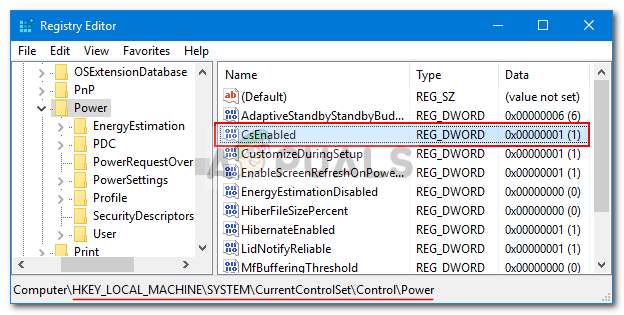
CsEnabled Key – Windows Registry - Set the value to 1 and then click OK.
- Restart your system.
Note:
If you cannot find the CsEnabled key from the list of keys, then this means your system does not support Standby. Please jump to the next solution.
Solution 4: Installing Video Card Driver
For some users, the issue was due to their video card driver. If your system is lacking the video adapter driver, it can cause the issue to occur. Windows 10 usually install the video card driver on its own, however, in case it doesn’t, you will have to manually do it. Just go to your manufacturer’s website, search for your card’s driver, download it and then install it. Afterward, restart your system and see if it fixes your issue.


thank, my problem was apperently graphics driver, i have a really old 9 year old laptop that i updated to windows 10, the amd graphics card was giving me issues, “hp, not supporting the card.” so i disabled it, and APERRENTLY windows found an error with the intel one a auto disabled it, so i was operating on the most basic card possible.