How to Fix a New Hard Drive Not Showing Up in Disk Management?
If a new hard drive isn’t showing up in Disk Management, it often means the system isn’t recognizing the drive correctly, typically due to the drive being uninitialized, unformatted, or lacking an assigned drive letter. This problem can originate from an unallocated drive, outdated drivers, a faulty SATA connection, or the drive being part of a virtual storage pool like Windows Storage Spaces.
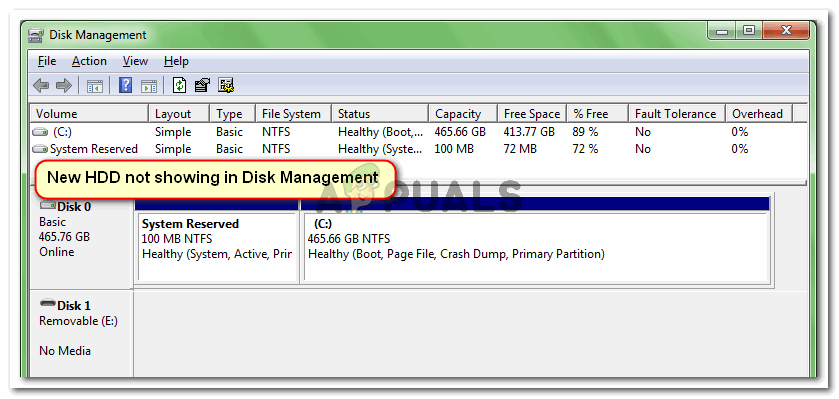
After reviewing various user reports and solutions, we’ve identified several common causes behind a new hard drive failing to appear in Disk Management.
- Faulty SATA cable or port: If the HDD appears in BIOS but not in Device Manager, the SATA cable or port might be faulty.
- Unrecognized ATA devices: Deleting all ATA channels from the IDE ATA/ATAPI controller can prompt Windows to re-detect connected devices.
- HDD included in a storage pool: Drives included in Windows Storage Spaces may not display individually until the virtual storage space is deleted.
- Missing or corrupted SATA (RAID) driver: Reinstalling the appropriate driver from the motherboard manufacturer may resolve the issue.
- Foreign disk status: New drives may be labeled as foreign, requiring manual import within Disk Management.
This article outlines proven troubleshooting steps used by others with similar issues. For optimal results, follow these methods sequentially until the issue is resolved.
1. Check if HDD is Showing up Inside your BIOS
Before trying any deeper troubleshooting, it’s essential to check if your new hard drive appears in the BIOS, as this is where hardware components are first detected. If the drive shows up in the BIOS, it confirms that the hardware is properly connected and functioning. However, if it doesn’t appear, the issue might be due to physical connections, like SATA or power cables, or a faulty port.
Access your BIOS settings by pressing the Setup key repeatedly at the start of the startup. Most motherboards display the Setup key during the initial boot at the bottom of the screen. If you don’t see it, try pressing an F key (F2, F4, F8, F10, F12) or the Del key for Dell computers.
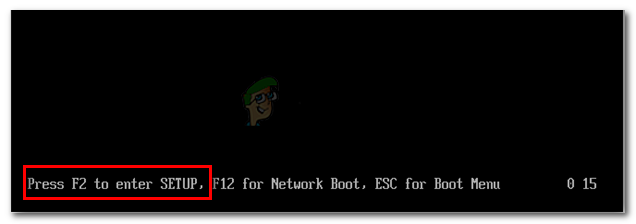
Note: You can search online for your specific BIOS key.
Once in the BIOS settings, go to the Boot tab (or Boot Device Priority) and check if your new HDD is visible.
If the HDD is visible here but not in Disk Management, power off your computer and replace the SATA cable connecting your HDD to the motherboard. You might also try a different SATA port.
Once you’ve changed the SATA cable and port, power on your computer again and see if the HDD now appears in Disk Management.
2. Delete all ATA Channel Drivers with Device Manager
By removing all ATA channel drivers through Device Manager, you force Windows to re-detect and reconfigure ATA devices, including your hard drive, during the next startup. This process can resolve issues with outdated or corrupt drivers causing the hard drive to be undetected. After restarting, Windows reinstalls fresh drivers, often resolving detection problems.
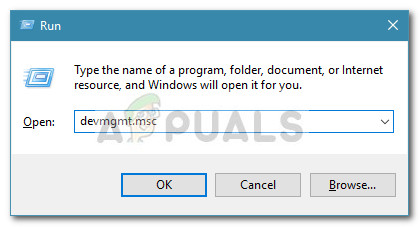
- Press Windows + R, type “devmgmt.msc” and press Enter to open Device Manager.
Run dialog: devmgmt.msc - In Device Manager, expand the IDE ATA/ATAPI controllers section.
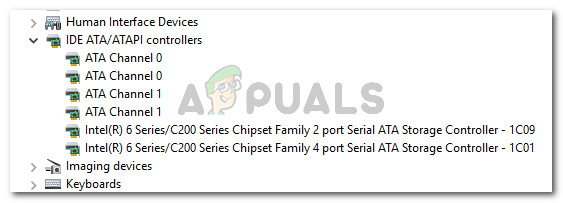
Expand the IDE ATA/ATAPI controllers - Right-click on the first ATA Channel and select Uninstall device.
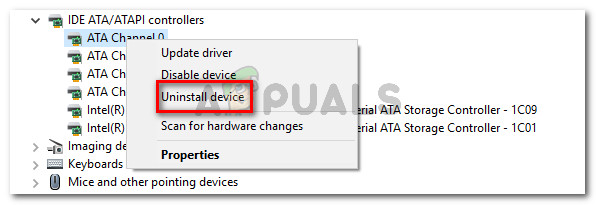
Right-click on an ATA channel and choose Uninstall device - Repeat this for all ATA Channels under IDE ATA/ATAPI controllers.
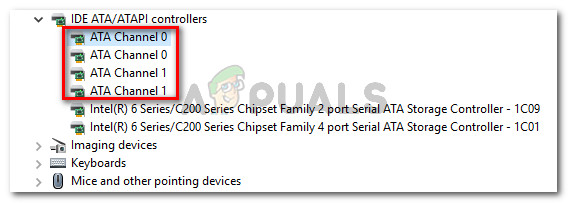
Uninstall every ATA Channel under IDE ATA/ATAPI controllers - Restart your PC to let Windows automatically reinstall the drivers.
- After rebooting, check if the HDD appears in Device Manager and Disk Management.
3. Delete the Storage Space that is Using the HDD
Storage Spaces are virtual drives that appear in File Explorer as regular local drives. This feature, introduced with Windows 7, works with ATA, SATA, SAS, and USB drives. It allows you to group different types of drives (such as SSDs and traditional HDDs) into a single storage pool.
- Press Windows + R, type “control” and press Enter to open the Control Panel.
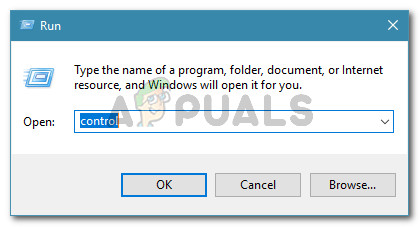
Run dialog box: control - Go to System and Security, then click on Storage Spaces.
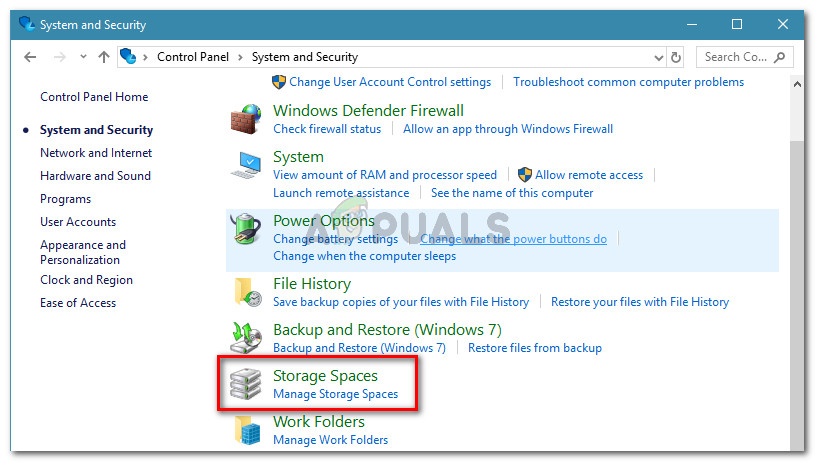
Go to System and Security, then click on Storage Spaces - Expand the Storage pool, then click Delete for the storage space containing your HDD.
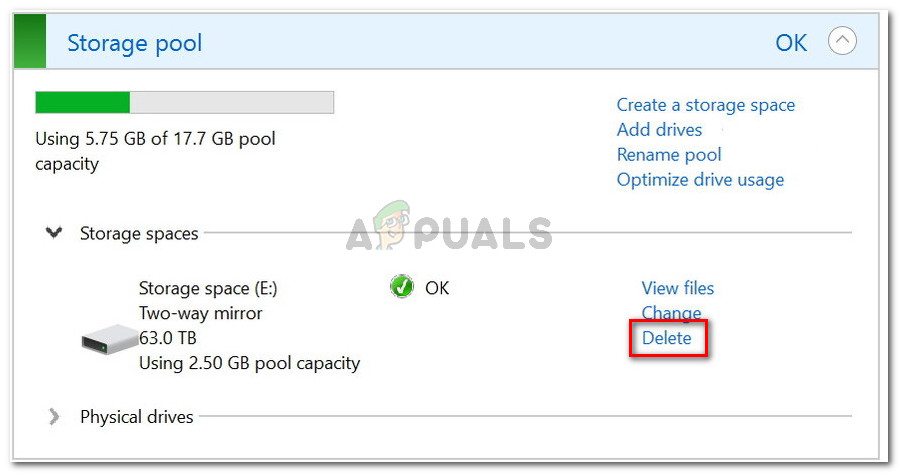
Deleting the storage space including the HDD - Confirm by clicking Yes, then restart your PC.
- After reboot, check Disk Management to see if the HDD is now visible.
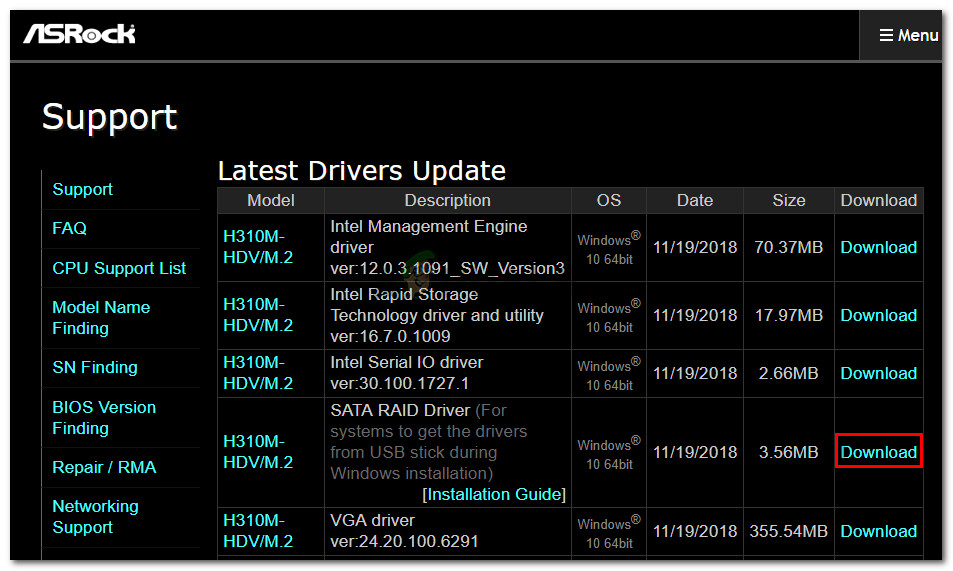
4. Installing the SATA (RAID) Driver from the Motherboard Manufacturer’s Website
Sometimes, a hard drive won’t show up in Disk Management because the SATA (RAID) drivers are outdated or missing. Installing the right drivers from the motherboard’s website allows Windows to detect and manage the drive properly. Without the right drivers, the system may fail to recognize the drive.
To download the SATA (RAID) driver, search online using “your motherboard manufacturer and model + SATA (RAID) driver” and download the latest version from the official download center.
Once the driver is downloaded, double-click on the installation executable and follow the on-screen prompts to install it. After installation is complete, restart your computer and check if the HDD is visible at the next startup.
5. Importing The Foreign Disk from Disk Management
When a drive is marked “foreign” in Disk Management, it means Windows doesn’t recognize it from a previous system. Importing the disk allows Windows to access and display the drive, making it usable without losing any data.
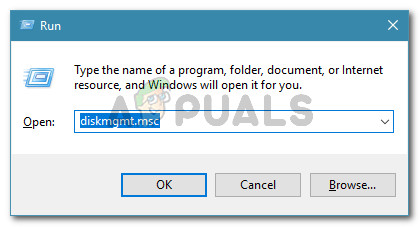
- Press Windows key + R, type “diskmgmt.msc” and press Enter to quickly open Disk Management.
Run dialog: diskmgmt.msc - In Disk Management, if you see a disk with an exclamation icon, right-click it and choose Import Foreign Disks.
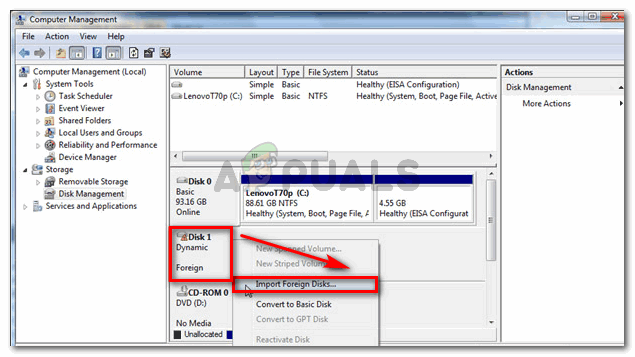
Importing the Foreign disk utility - Your new hard drive should appear in Disk Management and File Explorer after a brief moment.


Thanks a lot it worked for me. I used the third method but it wouldn’t let me remove the HDD, so i removed the whole pool and created it again and instead of putting 2 mirror way i chose the first option “simple” (dont remember what it was called) and TADA it was working again. it formatted the disk but its fine.