Fix: You Must Initialize a Disk Before Logical Disk Manager Can Access it
When a Windows user connects an external hard drive to their computer via a USB cable, the external hard drive, with all of its partitions, shows up in Computer or My Computer along with all the other drives connected to the computer. However, there exists an issue first discovered on Windows 7 where an external hard drive connected to a Windows computer does not show up in My Computer, and when a user affected by this problem goes in to Disk Management to see what’s up, they see the following error message:
“You must initialize a disk before Logical Disk Manager can access it.”

Now initializing a disk is something you do to a completely new, unformatted hard drive so you can format it with a file system and start using it. Initializing a disk that has already been in use will result in the loss of any and all data stored on it. What this error message is basically saying is that Windows cannot access the external hard drive you have connected to it, and initializing the disk is the only way to gain access to it. Thankfully, though, provided that the external hard drive you are connecting to the computer itself is not at fault or completely dead (in which case your only course of action would be to replace it), this problem can be fixed. The following are some of the most effective solutions that any user affected by this issue can use to try and fix it:
Solution 1: Manually update the external hard drive’s drivers
Windows might be having trouble accessing the external hard drive and displaying its contents to you because the device drivers your computer has for the hard drive are outdated. Outdated drivers can cause a boatload of different kinds of issues, this one included. If this problem is caused by outdated external hard drive drivers in your case, simply updating the drivers should get the job done. To manually update the drivers for the affected external hard drive, you need to:
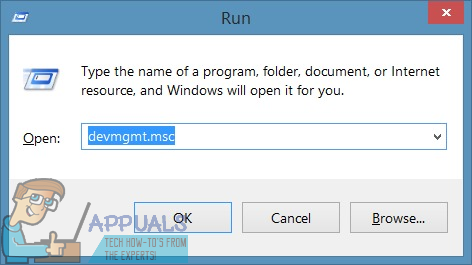
- Press the Windows Logo key + R to open a Run dialog.
- Type devmgmt.msc into the Run dialog to open the Device Manager.
- In the Device Manager, double-click on the Universal Serial Bus controllers section to expand it.
- Locate the listing for your external hard drive under the Universal Serial Bus controllers section and right-click on it.
- Click on Update Driver Software… in the resulting context menu.

- Click on Search automatically for updated driver software.
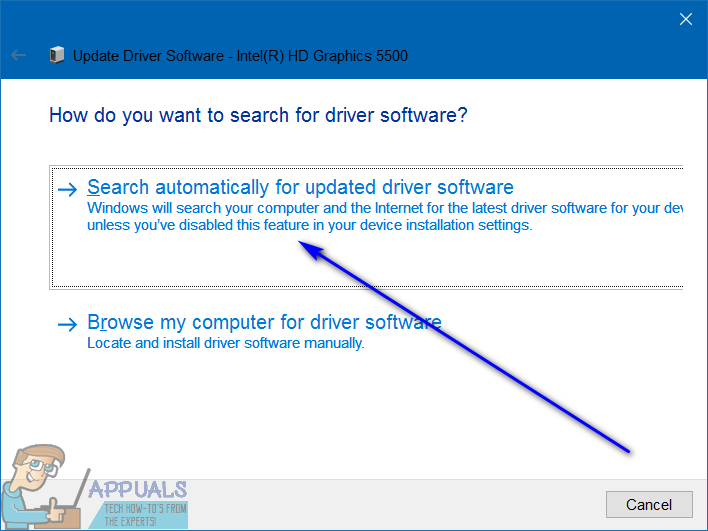
- Wait for Windows to automatically search for available updates for the external hard drive’s drivers.
- If Windows finds any available updates for the drivers, it will automatically download and install them – all you’ll have to do is wait for it to do so. If Windows does not find any available updated driver software, however, simply move on to a different solution.
- Once the drivers for the external hard drive have been updated, close the Device Manager and restart your computer.
- When the computer boots up, check to see if the problem has been resolved.
Solution 2: Uninstall and then reinstall the external hard drive
If updating the drivers for the external hard drive doesn’t work, you can also uninstall the external hard drive from your computer and then have Windows automatically reinstall it to clear up any hiccups with the installation of the device or its drivers. To uninstall and then reinstall the affected external hard drive, you are going to have to:
- Press the Windows Logo key + R to open a Run dialog.
- Type devmgmt.msc into the Run dialog to open the Device Manager.
- In the Device Manager, double-click on the Universal Serial Bus controllers section to expand it.
- Locate the listing for your external hard drive under the Universal Serial Bus controllers section and right-click on it.
- Click on Uninstall.
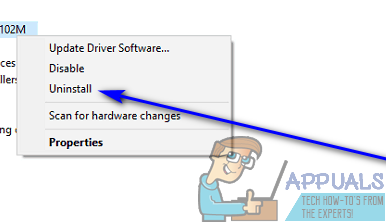
- Click on OK to confirm the action.
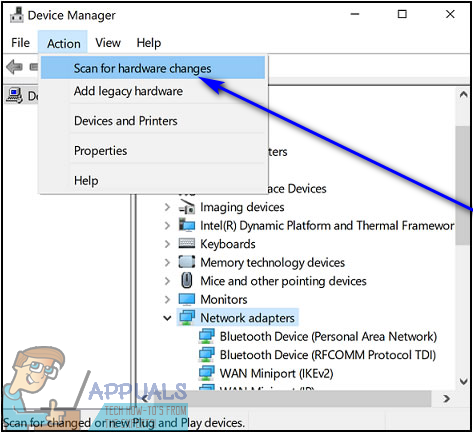
- Once the drivers have been uninstalled, click on Action > Scan for hardware changes. As soon as you do so, Windows will automatically detect the external hard drive and reinstall it.
- Once the hard drive has been reinstalled, see if Windows is now able to recognize and access it.
Solution 3: Delete certain UpperFilters and LowerFilters registry values from your computer
A specific set of UpperFilters and LowerFilters registry values have also been known to render Windows computers unable to access external hard drives and display their contents to the user. In fact, the presence of even one of these two registry values can, in many cases, cause this problem. To check for and delete these UpperFilters and LowerFilters registry values from your computer, you need to:
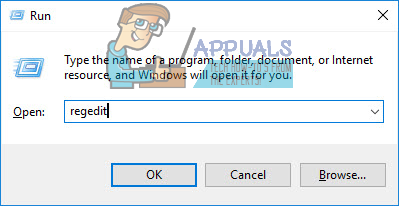
- Press the Windows Logo key + R to open a Run dialog.
- Type regedit into the Run dialog and press Enter to launch the Registry Editor.
- In the left pane of the Registry Editor, navigate to the following directory:
HKEY_LOCAL_MACHINE > SYSTEM > CurrentControlSet > Control > Class - In the left pane of the Registry Editor, click on the {36FC9E60-C465-11CF-8056-444553540000} sub-key under the Class key to have its contents displayed in the right pane.
- In the right pane of the Registry Editor, look for registry values titled UpperFilters and LowerFilters.
- If you find one or both of these registry values, right-click on them and click on Delete.
- Confirm the action in the resulting popup.
- Close the Registry Editor and restart your computer.
- When the computer boots up, check to see whether or not the problem still persists.
Solution 4: Uninstall and then reinstall all of your computer’s Universal Serial Bus controllers
- Press the Windows Logo key + R to open a Run dialog.
- Type devmgmt.msc into the Run dialog to open the Device Manager.
- In the Device Manager, double-click on the Universal Serial Bus controllers section to expand it.
- One by one, right-click on every single device under the Universal Serial Bus controllers section, click on Uninstall and click on OK in the resulting popup.
- Once all of your computer’s Universal Serial Bus controllers have been uninstalled, restart it.
- When the computer boots up, all of its Universal Serial Bus controllers will be automatically detected and reinstalled.
- Wait for the Universal Serial Bus controllers to be reinstalled and then check to see if the issue has been fixed.
Solution 5: Initialize the external hard drive
If all else fails, you might just have to go ahead and initialize the hard drive so that Windows is able to successfully access it again. Initializing a hard drive should not at all be taken lightly – doing so will erase any and all data stored on the drive. That being the case, you might want to contract professional data recovery experts to see if they can salvage any data you don’t want to lose from the affected external hard drive before you actually initialize and then format it. Professional data recovery certainly costs a pretty penny, but it’s your best shot if you want to rescue at least some of the data that’s stored on the external hard drive.