Fix: MSI Gaming App Not Opening
MSI Gaming App is a useful tool for MSI users which you can use to improve your gaming performance and quality by tweaking certain settings. However, various users have reported that a recent Windows 10 update or other similar cause has somehow broken the app as it now fails to launch properly at all.
Several different methods have been suggested on various forums over the recent times but we have decided to include only the helpful methods here in our article. Make sure you follow the instructions carefully and hopefully you will resolve this issue!
What Causes the MSI Gaming App to Fail to Open?
Here is a list of possible causes for the MSI Gaming App which is refusing to launch properly:
- A new version of the tool was launched which fixes the problem but the tool fails to update automatically and you will have to do it manually starting off by uninstalling the current version and locating the appropriate version for your setup.
- You have updated your operating system and various incompatibility problems started to occur.
- There are issues with permissions and you might want to provide administrator access.
- The app might suggest a driver in need of update in an error message so make sure you listen to it!
Solution 1: Install the Latest Version of the App
After the problematic Windows 10 update was released, there were plenty of new versions of the tool available. Since the tool has malfunctioned and it won’t even launch properly, the best thing you can do is to actually install the latest version manually by uninstalling it from your computer and installing the latest version from the site!
- Click on the Start menu and open Control Panel by searching for it. Alternatively, you can click on the gear icon in order to open settings if you are using Windows 10.
- In Control Panel, select to View as: Category at the top right corner and click on Uninstall a Program under the Programs section.
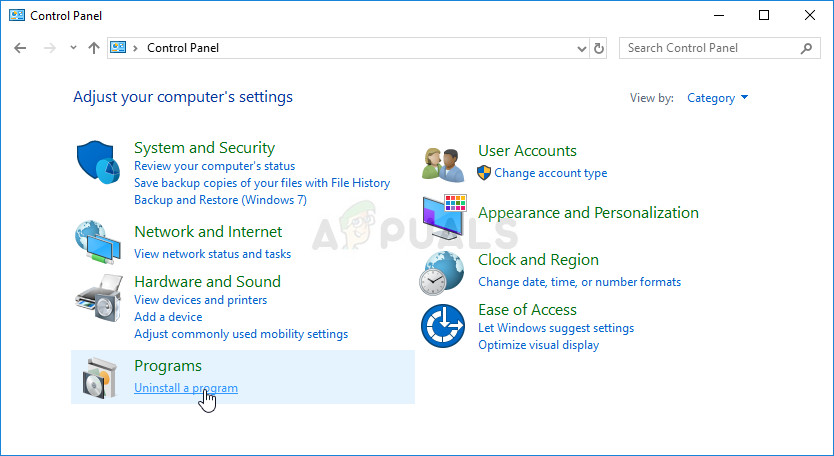
- If you are using the Settings app, clicking on Apps should immediately open a list of all installed programs on your PC.
- Locate MSI Gaming Center tool in Control Panel or Settings and click on Uninstall.
- Its uninstall wizard should open so follow the instructions to uninstall it.
- Click Finish when the uninstaller completes the process and restart your computer in order to continue to install the latest version. Visit this link and navigate under the Select Your Product screen in order to search for your laptop or Desktop computer.

Select Your Product on MSI’s official support site - Enter all relevant information about your setup until you reach the support page for your device. Click the Download button at the left-side menu and navigate to the Utility Scroll down until you reach the MSI Gaming App entry.

- Click the red download icon next to its name in order to initiate the downloading process. Locate the file in the Downloads folder, right-click on it, and choose to Extract Run the installer and follow the instructions on-screen. Check to see if the problem persists.
Solution 2: Run the Game as an Administrator
Some users have noticed that the app actually works whenever they logged in using their administrator account. This leads us to believe that the actual problem regarding the tool is the lack of proper permissions.
It’s not always the best idea to run random programs as an administrator, but MSI is a verified published and various users have reported that running MSI Gaming App as an administrator actually resolved the problem for them!
- Locate the MSI Gaming App and change its properties by right-clicking its entry either on the Desktop, the Start menu or the Search results window and choose Properties. Navigate to the Compatibility tab in the Properties window and check the box next to the Run this program as an administrator option before applying the changes.
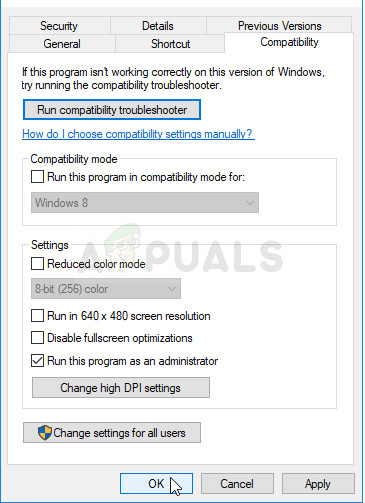
- Make sure you confirm any dialogs which may appear for you to confirm with admin privileges and MSI Gaming App should launch with admin privileges from now on. Open it by double-clicking its icon and try to see if the error still appears.
Solution 3: Reinstall Microsoft Visual C++ Redistributable
Since we can often blame Windows update for this problem, it’s quite possible that the version of Microsoft Visual C++ Redistributable installed alongside the game is simply not valid and you may want to actually install it manually after uninstalling the MSI Gaming App. Perform the steps in Solution 1 in order to uninstall it and follow the instructions below!
- Click the Start menu button and open Control Panel by searching for right there. Also, you can click on the gear-shaped icon in order to open the Settings app if your OS is Windows 10
- In Control Panel, switch the View as option to Category at the top right corner and click on Uninstall a Program under the Programs section at the bottom of the Control panel window.

- If you are using the Settings app on Windows 10, just clicking on Apps should immediately open a list of all installed programs on your PC.
- Locate Microsoft Visual C++ Redistributable Package in Control Panel or Settings and click on Uninstall after clicking it once. You might notice that there are several different versions of the utility. You will need to make note of them and repeat the uninstalling process for each one of them.
- You may need to confirm some dialog boxes and follow the instructions which will appear along with the uninstallation wizard.
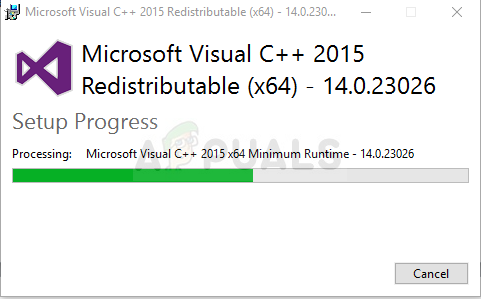
- Click Finish when the uninstaller finishes with the process and repeat the uninstalling process for all versions of the Visual C++ Package. Now, you will need to reinstall Visual C++ by locating it here. Select the version you want to download and choose the download according to your processor (32-bit or 64-bit).
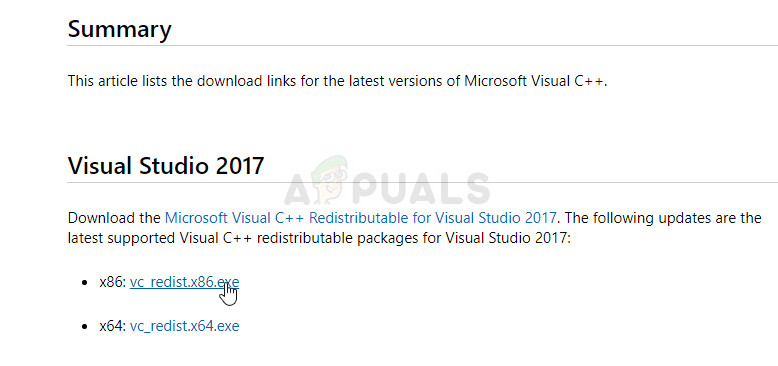
- Locate the file you just downloaded in the Windows folder, run it, and follow the instructions on-screen in order to install the Microsoft Visual C++ Redistributable Package. Follow the instructions from Solution 1 to reinstall MSI Gaming App and check to see if the issue is resolved.
Solution 4: Install the Required Driver
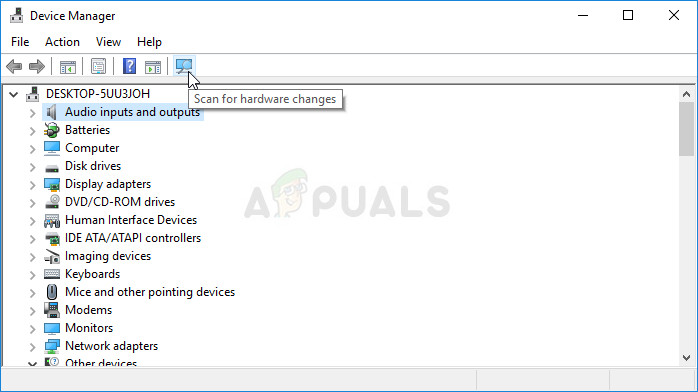
This final method is super useful for people who encounter the “Please install or update _____ driver” message after trying to launch the app. Simply locate the device in Device Manager and update the driver!
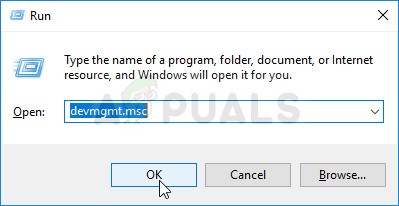
- Click Start and type Run. Select Run, A Run dialog box will appear.
- Type “devmgmt.msc” in the run dialog box and click the OK button. This opens Device Manager immediately.
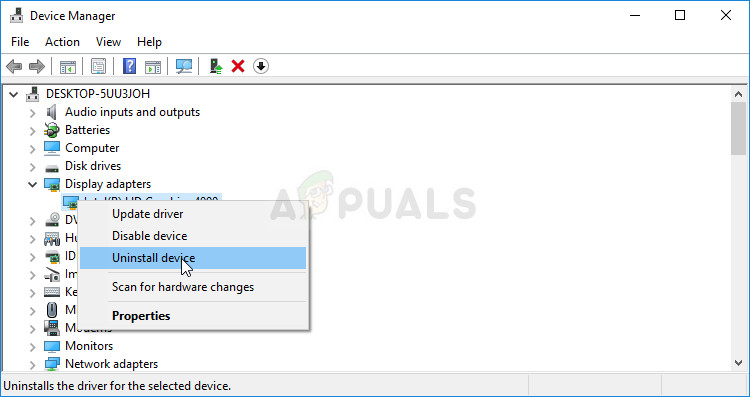
- In Device Manager, expand the category where you think the driver or device that is causing the issue is located. Make sure you have noted down the name of the driver which is missing. There should be no doubt as you don’t want to end up uninstalling the wrong device.
- When you locate the device, right-click on it and choose the Uninstall device option from the context menu.
- You may be required to confirm the uninstallation process. Check the box next to “Delete the driver software for this device” option and click the OK button.
- Restart your computer for the change to take effect. After restarting, Windows will attempt to reinstall the driver and replacing it with the manufacturer’s driver.
- If Windows doesn’t replace the driver automatically, open Device Manager again, select the Action menu and click on the Scan for hardware changes. On newest versions of Windows 10, it will be the left-most blue button under the Menu bar. Check to see if the error message still appears.
