[FIX] Microsoft Teams Keeps Restarting
With the recent bump in its popularity, Microsoft Teams is widely being used for education and business purposes. While many people rely on the app for their day to day jobs these days, it can be really annoying if the app does not function as it is supposed to. One of the issues that Microsoft Teams has been reportedly facing is the crash issue. As it turns out, the application crashes suddenly after a while without any error messages and then launches again. This can be very tedious if you are trying to work or attend online classes with the app.

Now, this can be caused due to some known reasons that we will be going through in more detail down below. Often, this can be caused due to the cache generated by the application that is stored in your AppData directory. Applications make use of the cache to store your preferences and other user settings so that it can improve the overall experience of the users. The cache is generated automatically so you can safely delete it. However, there are some other reasons as well due to which the issue can emerge. Let us go through them in more detail.
- Outdated Office 365 — As the Microsoft Teams is now part of the Office 365 subscription, the issue can often be caused if you have an outdated Office 365. The crashing of MS Teams was a known bug a few months ago. Thus, it was fixed in one of the consequent updates released by the developers. Therefore, if you have an obsolete installation of Office 365 on your system, that may be causing the issue.
- Corrupt Installation — As it turns out, in some cases the issue can also be triggered by damaged installation files of the app. In such a scenario, what you will have to do is uninstall Office 365 with the help of the uninstall tool provided by Microsoft. It can be reinstalled after that so as to start fresh.
- MS Teams Cache Files — Finally, as we have mentioned previously, the issue can also be triggered by the cache files that are generated by the app. Deleting the cache files is pretty safe as they are auto-generated and can often fix several issues.
Now that we have gone through the possible causes of the issue, let us go through the different methods that you can use to get this issue resolved. So, with that said, let us get started.
Method 1: Remove Cache Files
One of the ways that you can fix the crashing problem of Microsoft Teams is to clear out the cache files that are created by the application. Now, the cache files are stored in multiple folders that contain different information. Thus, you will have to go through several folders to clear out the cache completely. You can either choose to do that manually or have a script clear all the cache files automatically. All it will require is for you to run the script as an administrator.
However, if you do not trust any third-party scripts, then that is fine as you can always choose the manual way. We’ll be covering both so just follow through. To do this, follow the steps down below:
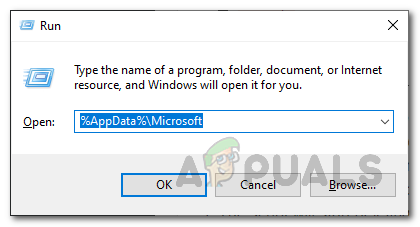
- First of all, open up the Run dialog box by pressing the Windows key + R.
- Then, in the dialog box, type %AppData%\Microsoft and press Enter.
- In the Microsoft directory, locate and open up the teams folder.
Run Dialog Box - There, you will have to go the following folders one by one and delete the cache files:
application cache\cache
blob_storage
databases
cache
gpucache
Indexeddb
Local
Storage
tmp
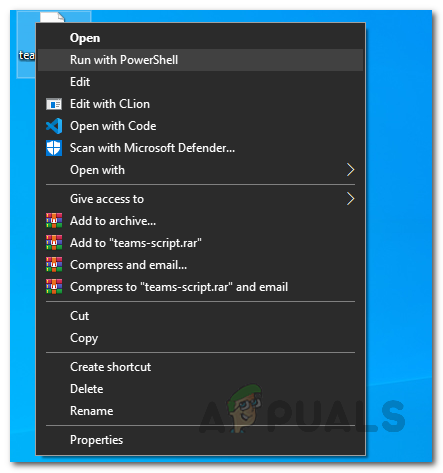
- You can do this manually or just download this script.
- Once downloaded, right-click on the script and choose Run with PowerShell from the drop-down menu.
Running Script with Powershell - If you get a prompt regarding Execution Policy Change, press A.
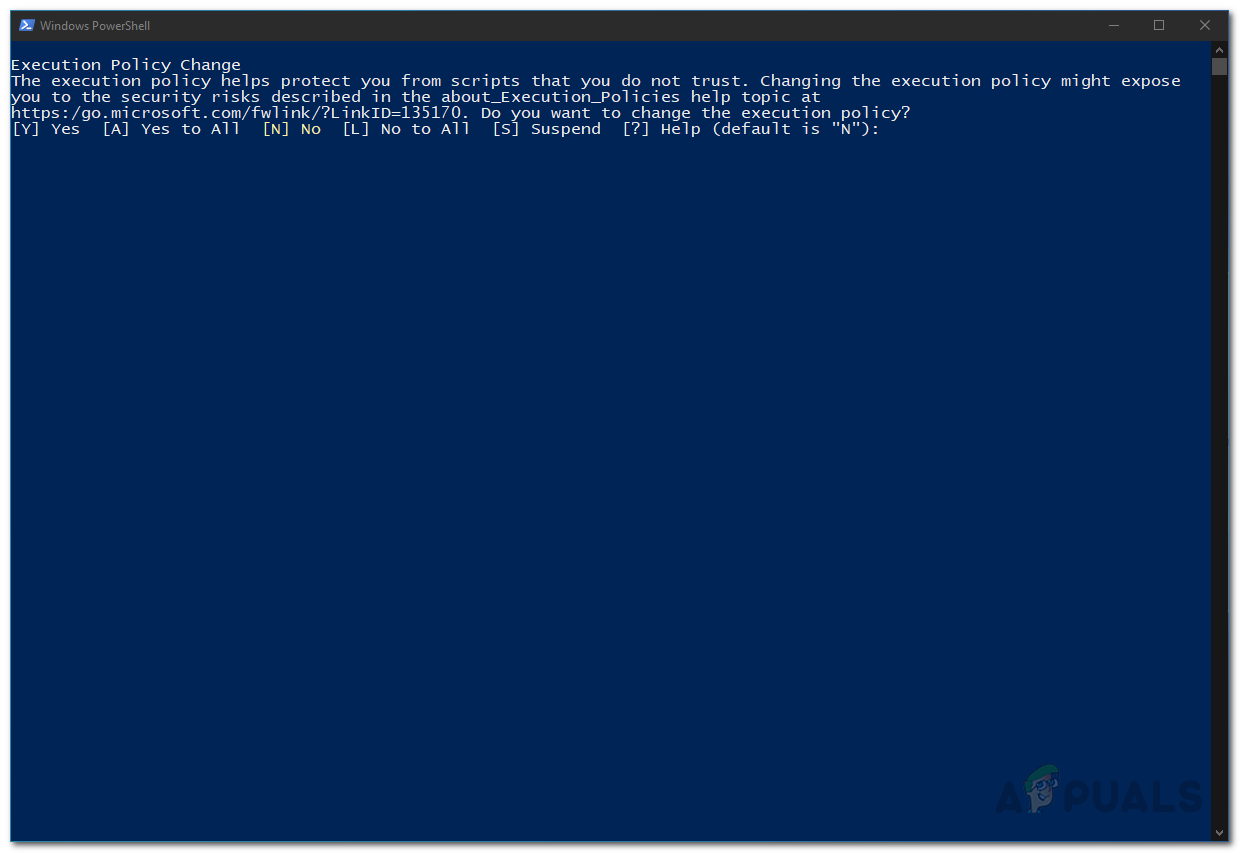
Execution Policy Change - When prompted to delete cache files, press Y and hit Enter to execute the script.
- The script will start deleting the cache files. Once it is done, open up Microsoft Teams again to see if the issue persists.
Method 2: Update Office 365
Another way that you can resolve the issue is to update your Office 365 installation. This can be really helpful if you are running an obsolete version of Office 365. As it turns out, the crashing problem was a known problem and it was addressed in one of the updates that were released. Therefore, if your issue is being caused by an outdated installation, installing Office 365 is the best way to resolve the issue. You can update Office really easily, just follow the instructions down below to do so.
- To update Office 365, you will first have to launch an Office application such as the Word Document.
- Then, create a new document in the Word Document.
- Once you have done that, go to the File menu located at the top-left corner.
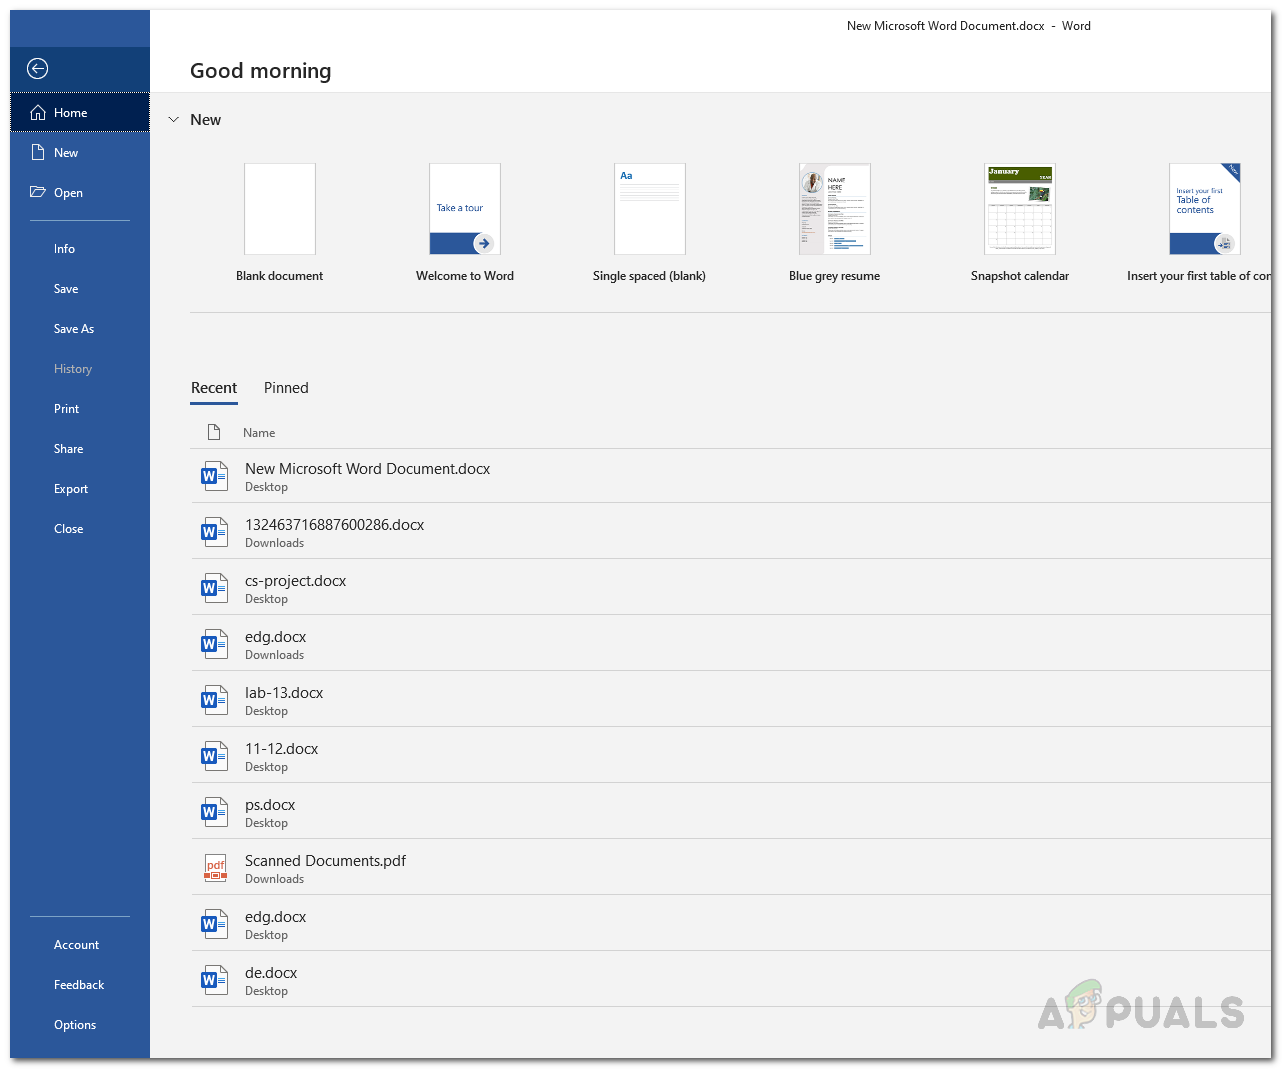
Word File Menu - There, switch to the Account or Office Account tab.
- After that, under Product Information, click on the Update Options drop-down menu and then choose Update Now.
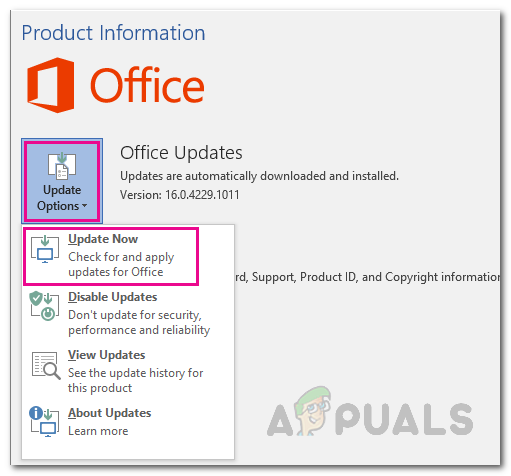
Updating Office - If there are any updates available, they will be downloaded and installed.
- See if that fixes your issue.
Method 3: Reinstall Office 365
Finally, if the above solutions do not work out for you, it is very likely that your issue is being caused by damaged installation files of the Teams application. In such a case, you will have to uninstall the app and then reinstall it. Since the Microsoft Teams is now part of the Office 365 subscription and comes alongside it, that means you will have to uninstall Office 365 and then install it. Doing this is very easy as Microsoft provides an uninstall tool that can be used when you want to uninstall Office. To do this, follow the instructions down below:
-
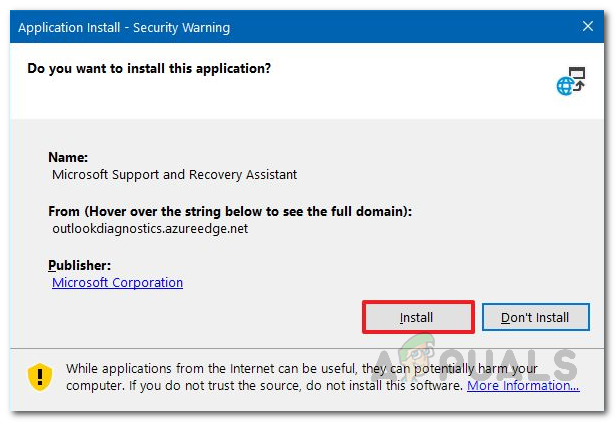
- First of all, download the uninstall support tool from here.
- Once it is downloaded, launch the tool.
- When prompted, click the Install button.
Running Office Uninstall Tool - After that, you will have to select the version of Office you wish to uninstall.
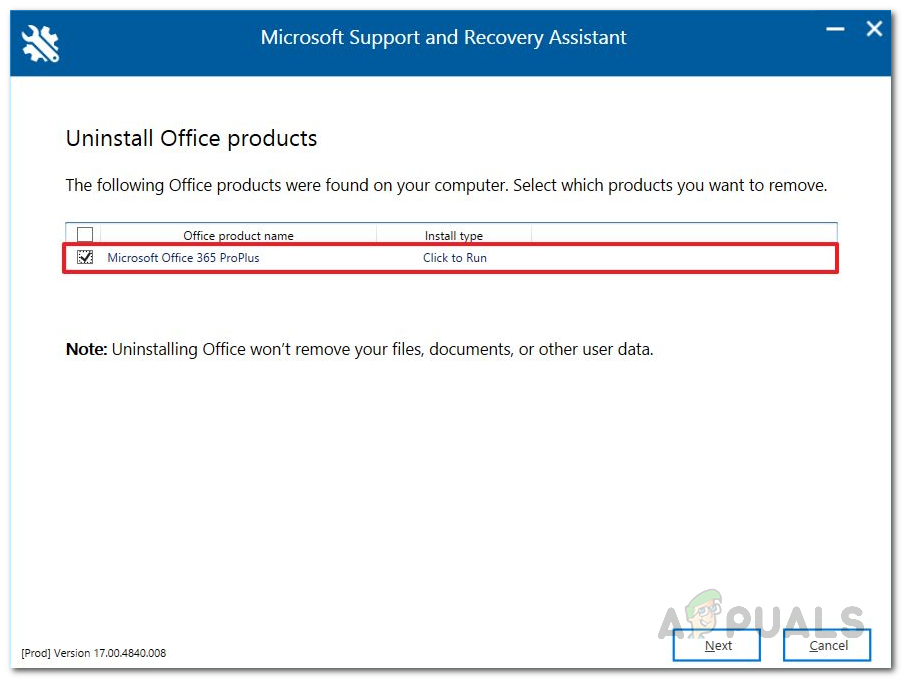
Choosing Office Version - Click the Next button and follow through the prompts.
- On the Confirm Uninstall screen, check the provided option and click Next.
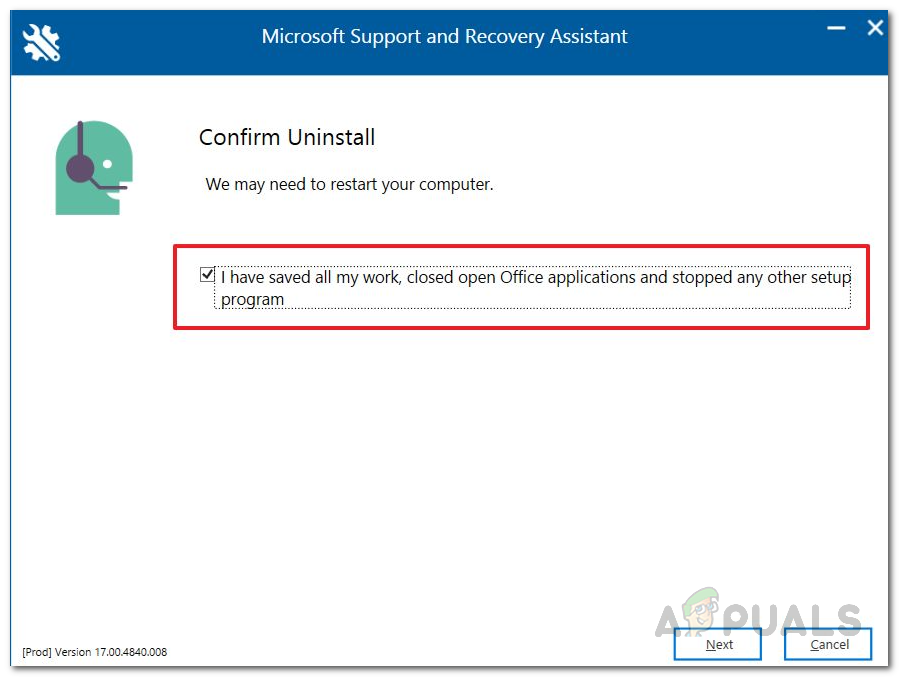
Confirming Office Uninstall - Finally, go through the prompts to uninstall Office 365.
- Once you have uninstalled Office, restart your PC.
- After that, install Office 365 again to see if the issue has been resolved.


