Fix: Make Sure the File is an NTFS Volume and isn’t in a Compressed Folder or Volume
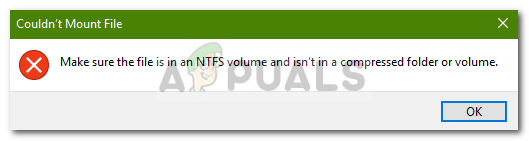
There have been users reports stating that they aren’t able to mount ISO files using the Windows Explorer. The error ‘Make Sure the File is an NTFS Volume and isn’t in a Compressed Folder or Volume’ was mainly caused after a certain Windows security update. According to the user reports, whenever they tried to mount an ISO file via the Windows Explorer, they were prompted with the error that is given down below.
Windows 10 and 8 have the ability to mount ISO files without having to use a third-party application. Conventionally, users had to download a third-party application like PowerISO or Daemon Tools to mount their ISO files, nonetheless, with the release of Windows 8 and then later on 10, this was made a lot easier. However, this new feature does have its issues alongside. In this article, we will help you solve one of the most common error that users encounter while mounting their ISO files using the Windows Explorer.
What causes the ‘Make Sure the File is an NTFS Volume and isn’t in a Compressed Folder or Volume’ Error on Windows 10?
This error is not something new, however, there was a certain thing that made it trigger the most. Following are the factors that usually cause it —
- Windows 10 security update. For most of the users, the error came into being after the release of KB4019472 Windows 10 update which happened to be a security update. This update made the error emerge for most of the users.
- Location of ISO file. In some cases, the error can be due to the location or path of the downloaded ISO file. In such a scenario, you will have to change the location.
You can isolate your issue by following the solutions down below. As always, please follow the given solutions in the same order as provided to get your error resolved quickly.
Solution 1: Change the Location of the ISO File
The first thing you should do to isolate the error is to change the path of the downloaded ISO file. Sometimes, the error is triggered by the address of the ISO file for some reason in which case moving the file to another drive solves the problem. Therefore, try changing the volume in which the ISO file is stored to fix your error.
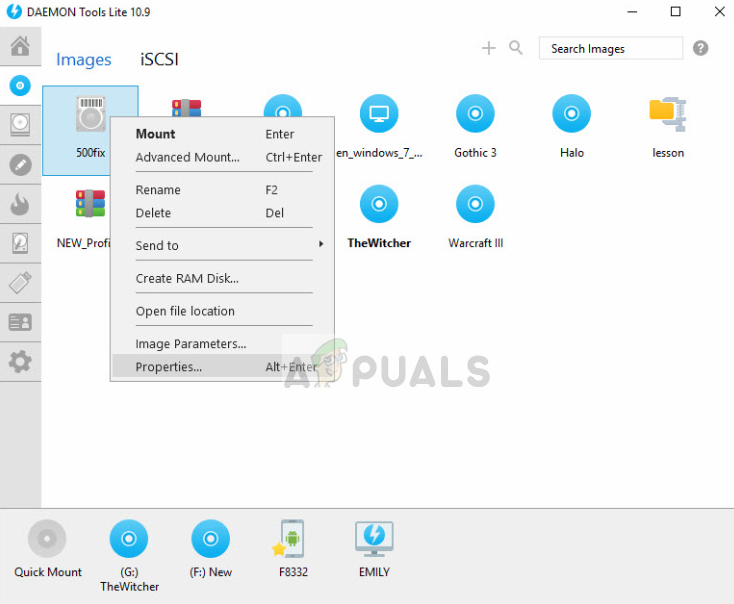
Solution 2: Use Third-Party Applications
In some cases, the mount feature might be malfunctioning due to which the error is occurring. In such an event, you can use third-party software in order to mount your file. There are a ton of third-party applications that you can use, however, we would recommend using either the PowerISO software or Daemon tools. These two applications were used most commonly and are still being utilized by many users. Therefore, install one of the applications and try mounting the file using it to see if it gets you around the error.
Solution 3: Using the Windows Powershell
If you are still facing the error even after moving the file to another drive, you can try to fix your error by removing the sparse flag using the Windows Powershell. Here’s how to do it:
- Go to the Start Menu, type in Windows Powershell, right-click on it and run it as an administrator.
- Enter the following command:
fsutil sparse setflag "C:\FilePath\FileName.iso" 0
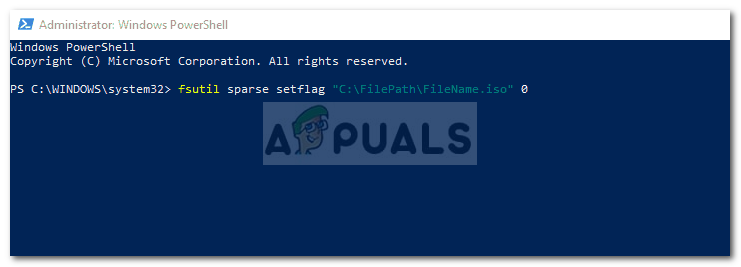
Removing Sparse Attribute Using Windows Powershell - Afterward, try mounting the file again.
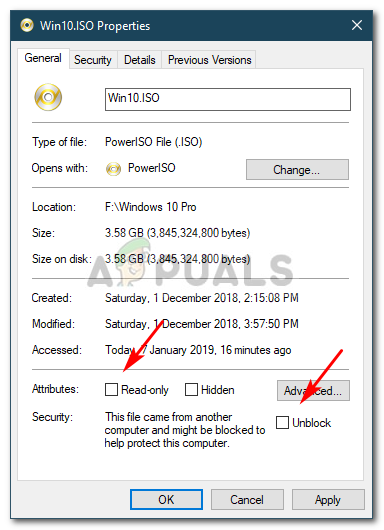
If you receive an ‘Access Denied’ message after entering the command, you can fix this by removing the Read-only attribute of the ISO file through its properties. Also, make sure that the ‘This file came from another computer and might be blocked to help protect this computer’ option is unchecked. Thereupon, enter the command in the Windows Powershell again.
Solution 4: Removing the Windows Update
If none of the above-given solutions work out for you, you will have to remove the security update to solve this error. Here’s how to do it:
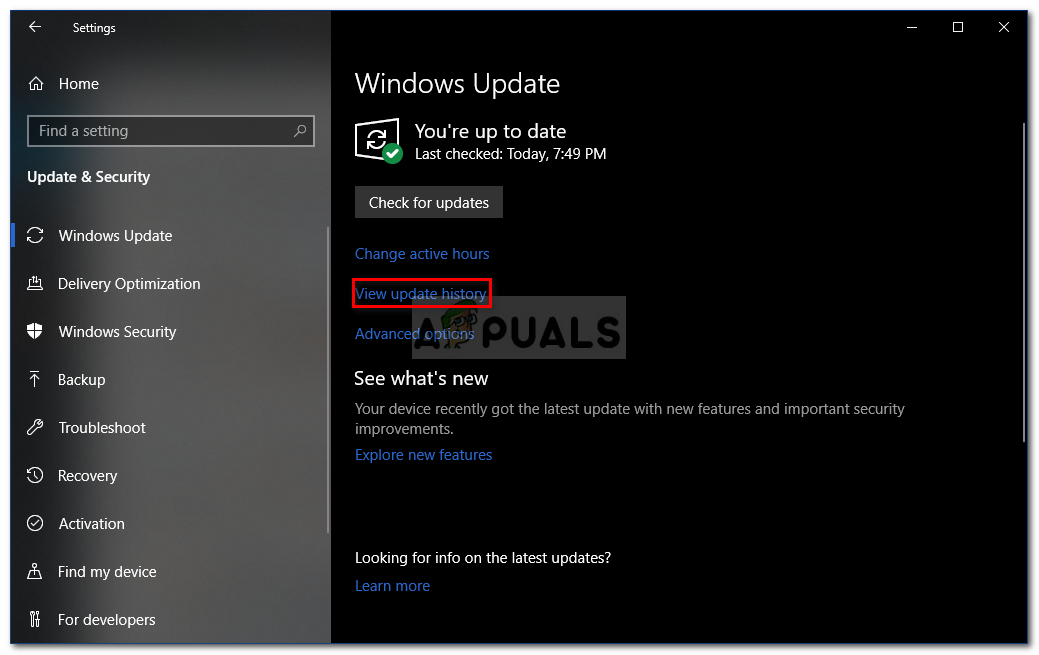
- Press Windows Key + I to open Settings.
- Go to Update and security.
- Click on View Update History and then select Uninstall updates.
Windows 10 Update Settings - Search for the KB4019472 update.
- Double-click it to uninstall the update.
- Restart your system and then try mounting the file.


Simply install daemon tool lite final with free licence problme will be solved …