Fix: Logitech Unifying Receiver not Working
When the Logitech Unifying Receiver stops working, wireless devices like keyboards and mice won’t respond, causing inconvenience. This happens because the receiver can’t connect to the devices. The usual cause is outdated, missing, or corrupt drivers.

Other causes include USB port problems, interference from other devices, or hardware issues.
In this article, we will discuss different ways to solve this error.
1. Install Unifying Software
Logitech’s Unifying Software helps connect your devices to the receiver, making sure they work smoothly. Installing this software lets you pair or re-pair your wireless devices, often fixing connection issues caused by wrong settings or missing drivers.
- Go to the official Logitech Unifying Software website and download the application to an easy-to-access location on your Windows computer.

Unifying Software - Install the downloaded executable on your computer.
- After installation, restart your computer. Once it’s back on, right-click the software icon and select Run as administrator.
2. Copy the Driver File
Copying the driver file manually makes sure the system can talk to the Logitech Unifying Receiver. By placing the driver in the right folder, you fix issues like missing or broken files that might stop the receiver from working correctly. This step helps reconnect your system to your wireless devices.
- Press Windows + E and go to the folder path:
C:\Windows\INF
- Look for these two driver files on your computer:
usb.inf


usb.PNF

USB Drivers – Windows OS If these files are present, continue troubleshooting. If they’re missing or you think they might be corrupt, cut and paste them to a safe location, then download new drivers from (here).
- Restart your computer after installing the drivers and check if the issue is resolved.
3. Uninstall Problematic Software
Some software, like conflicting drivers, security tools, or customization apps, can block the Logitech Unifying Receiver from connecting to your devices. Uninstalling these troublesome programs can stop the interference, letting the receiver work properly.
- Press Windows + R, type “appwiz.cpl” in the dialog box, and hit Enter.
- In the application manager, right-click on the software you think is conflicting and select Uninstall.

Uninstalling Conflicting Software - Restart your computer and see if the issue is resolved.
- If not, remove the driver files of the conflicting apps. Here’s how to uninstall drivers for MotionInJoy:
- Press the Windows key and type Device Manager, then click on it.
- Identify all MotioninJoy-related devices, right-click each, and choose Uninstall.
- Select Delete the driver software for this device when uninstalling, then click Uninstall.
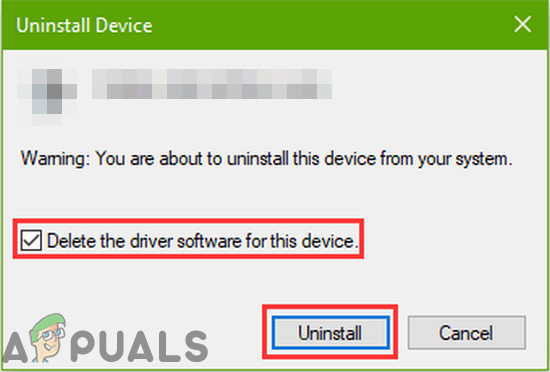
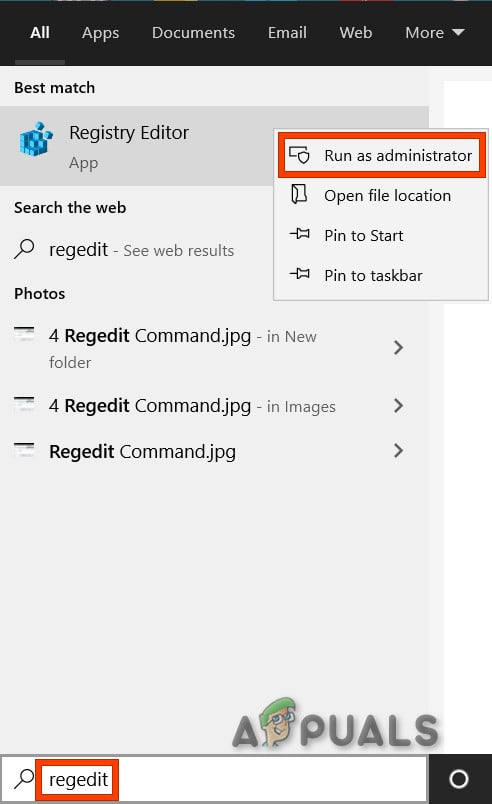
Select Delete the Driver Software For This Device and Click on Uninstall - Press the Windows key and type Regedit. Right-click on Registry Editor in the results and select Run as Administrator.
Open Registry Editor as Administrator - In the registry editor, go to the Edit menu and select Find.

Find in Registry Editor - Search for DS3 in the registry editor.
- Right-click each DS3 file and select Delete.
- Unplug the Logitech dongle and restart your system.
- After restarting, plug in the Logitech dongle and check if it works properly.
4. Use SetPoint
SetPoint is Logitech’s software that helps you set up and manage your wireless devices. Installing SetPoint can ensure the right drivers and settings are applied, which may fix connection problems between the Unifying Receiver and your devices. It also helps solve specific device issues by allowing firmware updates and custom settings.
- Go to the official Logitech SetPoint website and download the application.

Downloading SetPoint - Install the application and restart your computer. Right-click the SetPoint icon and choose Run as administrator. You should hear a sound indicating new devices are connected, and follow the on-screen instructions to toggle the mouse on and off.
5. Power Cycle your Computer
Restarting your computer can fix temporary issues that stop the Logitech Unifying Receiver from working. Turning it off and on resets the USB ports and drivers, helping the receiver connect properly with your devices.
- Shut down your computer.
- Disconnect all peripherals, including USB hubs.
- Unplug the power cable, and press the power button for 30 seconds. If you’re using a laptop, remove the battery instead.
- After 5–10 minutes, reconnect everything and see if the issue is resolved.
6. Uninstall Problematic Windows Update
Some Windows updates can cause issues with devices like the Logitech Unifying Receiver. By uninstalling a problematic update, you remove the changes causing the problem, allowing the system to work properly with the receiver again. This ensures the update doesn’t interfere with driver functions or USB device detection.
- Press Windows + R, type “appwiz.cpl” in the dialog box, and hit Enter.
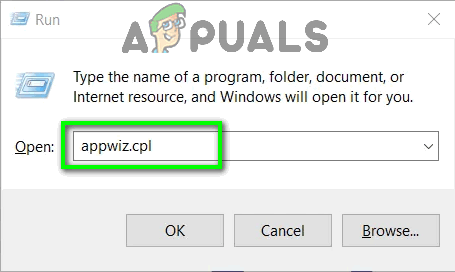
Type “appwiz.cpl” into the Run dialog and press Enter - In the application manager, select View installed updates on the left side.

View installed updates – Application Manager - Look for the update named KB4074588 in your list.
KB4074588
If you see the update, right-click on it and select Uninstall.

After uninstalling the update, restart your computer properly. Check if you can use your Unifying device. If you can, visit Microsoft’s official website and download a hotfix to prevent driver updates from reinstalling. Ensure you run the hotfix with administrator privileges.
7. Disable Power Saving for USB
Power-saving settings for USB ports can accidentally turn off the Logitech Unifying Receiver when not in use, disrupting the connection to your devices. Turning off this feature keeps the USB port active, ensuring a steady connection between the receiver and your devices.
- Press Windows + X and select “Device Manager”.
- Locate your Logitech driver in the USB section.
- Right-click the driver and select “Properties”.
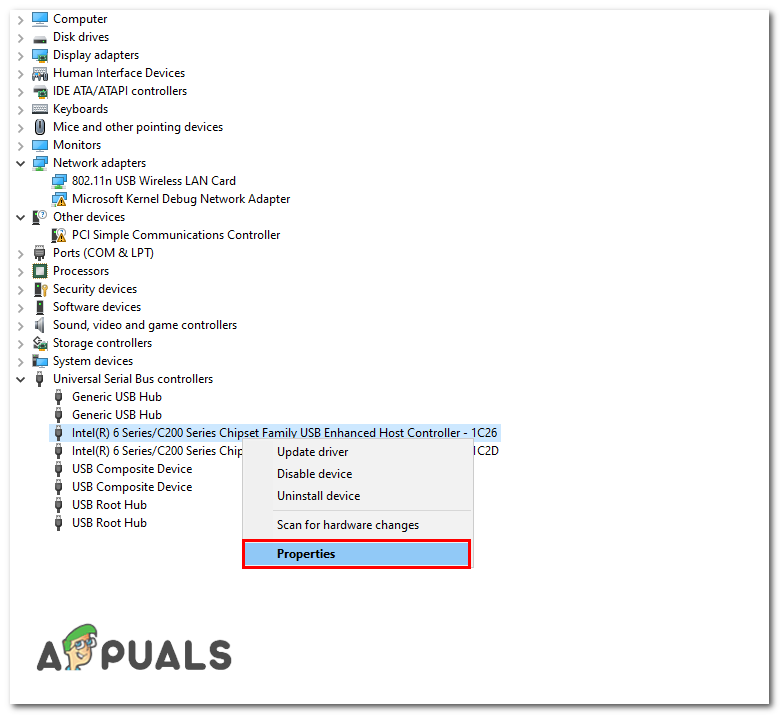
- Go to the “Power Management” tab and uncheck all options.
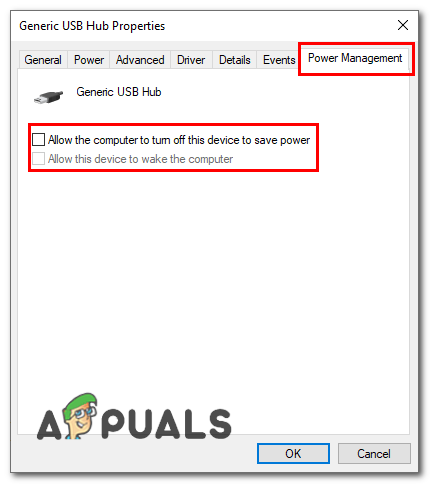
Disabling Power Saving - Restart your computer and see if the issue is resolved.


