Fix: Local Disk E Full on Windows
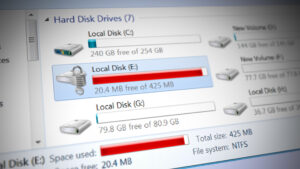
Quite recently, there have been reports that a new partition has appeared in the Windows Explorer. The letter of the local disk can differ in different cases from D: to E:. This was due to a recent update pushed by Microsoft which removed the entry to overlook drive full message on system restore volume. Users have reported that they are prompted with a drive full message, however, when they open the volume for investigating, it has no files in it.
Well, this is because the drive you are trying to view is a system restore partition, which by default is hidden, due to which you cannot see the contents of the partition. Therefore, this is nothing to be concerned about as the required fix is quite easy and simple. You can find the workarounds for this issue below.

What causes a new partition to appear in Windows Explorer on Windows 10?
As we mentioned, this is due to a single factor which is —
- A recent Windows 10 update. This issue is known to be caused by the Windows 10 v1803 update released by Microsoft in April which assigned a letter to the system restore partition. Hence, if you are seeing a new partition in your Windows Explorer, it is probably due to this and not malware.
You can fix the issue by removing the assigned letter to the partition which will hide it again and you will not have to deal with the drive full message. To hide the partition, use the following methods.
Method 1: Using the Command Prompt
You can remove the letter assigned to the partition by using the command prompt. However, performing such action will require administrative privileges. Therefore, make sure you are using an administrator account. Here’s how to remove the letter of the partition:
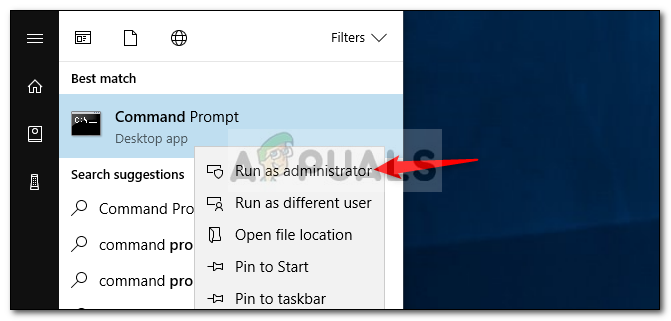
- Go to Start Menu, type in ‘cmd’, right-click the ‘Command Prompt’ and select ‘Run as an administrator’. Alternatively, you can press Windows Key + X and select ‘Command Prompt (Admin)’ from the list.

Opening an Elevated Command Prompt - Once the elevated command prompt opens, type in the following command:
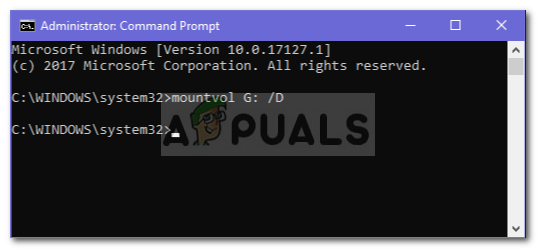
Mountvol [drive letter] /d

Hiding the Partition - Replace ‘[drive letter]’ with the new partition which can differ in different cases.
- After entering the command, the volume will no longer appear in Windows Explorer and you will not be presented with the drive full message again.
Method 2: Using DiskPart
Another way of hiding the system restore partition would be to use the DiskPart utility. DiskPart is a utility that you can use to manage your system’s drives/partitions. Hence, making use of this utility, you can easily remove the assigned letter. Here’s how:
- Open an elevated command prompt as shown in the instructions of method 1.
- Once you have opened up an elevated command prompt, type in diskpart.
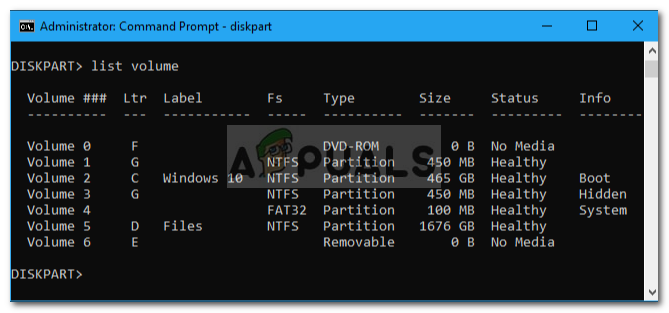
- Then, type in ‘list volume’.

List of Volumes - Note the volume number of the volume that has newly appeared in Windows Explorer.
- Type in ‘select volume [volume number]’.

Selecting the Recovery Volume - Afterward, type in ‘remove letter=[drive letter]’.

Removing the Assigned Letter - Replace ‘[drive letter]’ with the local disk letter that you want to remove which in this case would be the newly appeared partition in Windows Explorer.
- Once done, the drive letter will be removed and the volume will go back to the way it used to be i.e hidden.


