Fix: Laptop Speakers not Working
Switching between the audio jack and the internal speakers has always been seamless. You only need to plug in a jack pin and the internal speakers switch off and redirect the sound via the audio jack. However, you can sometimes get a problem where the laptop only plays sound via headphones and nothing plays through the internal speakers even when the audio jack has been removed. This article will give you the reasons why this happens and how you can troubleshoot and rectify the problem.
Why sound plays only through the headphones/audio jack
Narrowing down the problem will hasten finding the solution. There are three reasons as to why your audio jack gets you sound but your internal speakers don’t work when the jack is removed.
- If you are not getting sound on your speakers but sound comes on when you connect earphones or headphones or any other external audio device, then there might be a problem with the drivers you installed. However, this is less likely since part of the audio mechanism functions well. It is not uncommon though to have incompatible drivers that function partly. This is especially the case when you upgrade to a newer operating system (e.g. Window 7 to Windows 10). It is also likely that you might have used 64 bit drivers on a 32 bit computer.
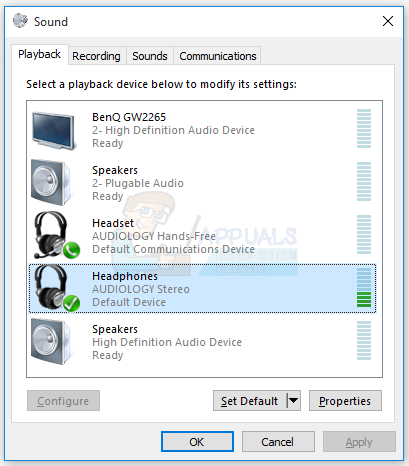
- If your problem developed suddenly, then it is highly likely that the audio jack port is acting up. There is usually a spring-mechanism sensor on the audio jack that detects when an audio jack has been inserted and when none is present. If the sensor does not reset when you take out the audio jack then your computer while think an audio jack is still inserted and not play any sound through the internal speakers. You will also see from your volume control centre that your computer is stuck on headset mode like shown below (headphones do not show up in windows 7).
- The other reason you might not be getting audio from your internal speakers is more electrical. There is a possibility that the connection between your audio board and the internal speakers has been severed. The cables connecting the speakers might be broken or ejected from their connector due to mechanical impact. It is also likely that the audio board is partially fried hence connection to the speakers cannot be reached.
Troubleshooting the problem
To troubleshoot and narrow down the problem, you can use of the audio test utility in Windows. Right click on the speaker icon on the right bottom of the task bar > choose ‘playback devices’ choose a playback device e.g. the speakers and double click on it. Go to the advanced tab and play the test sound. The selected device should play the sound. Since Windows 7 cannot separate the headphones from the speakers, this method of troubleshooting might not work.

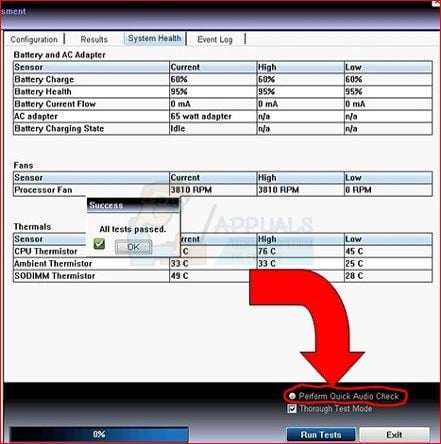
Another way to troubleshoot your sound is to use the system Pre-boot Assessment Tests (PSA or ePSA). This is a set of ROM-based diagnostics that resides in a BIOS chip on the motherboard. The tests main audio function is to tell you if your speakers are working or not. In a case where there is no audio through the speakers but there is audio through the headphone jack, you can use the test to determine whether or not the speakers are dead. The diagnostic tool might be available in some computers (e.g. dell) and might be missing in others. Re-start the computer and tap the F12 on booting > Select ‘Diagnostics’ from the boot menu press the Enter key to either the ePSA or the PSA tests will open — it depends on the model of your laptop > look for a “Perform Quick Audio Check” button on the bottom right side of the ePSA main menu screen, press the button and listen for the beep tones from the speakers.
If no sound plays in the ePSA/PSA environment, then your speakers might be dead or your audio board might be fried. If it does play a sound, then the problem is caused by the audio jack or by bad drivers. Below are the solutions to the problem you might be experiencing.
Method 1: Dislodge the stuck audio sensor
If the audio port sensor is stuck on the ‘audio jack inserted’ position, then dislodging it will get things back on track. You must do this carefully though. Here are some of the ways to get it dislodged.
- Insert your audio jack in quickly and pull it out quickly.
- Insert a Q-Tip (ear cotton bud) into the audio jack port and gently move it/wiggle it around
- Insert a toothpick/pin into the audio jack port and gently move it/wiggle it around. Be careful not to break it inside the port.
Method 2: Uninstall and install your audio drivers
Windows usually has a repository of drivers for audio devices. If your drivers are the problem, the generic Windows High Definition Audio drivers usually work. To get them, follow these steps:
- Press Windows Key + R to open Run
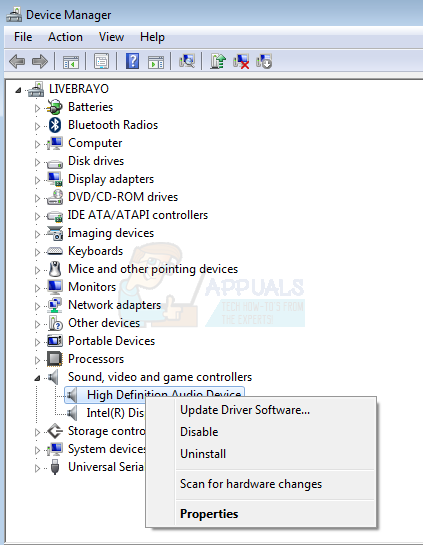
- Type devmgmt.msc and hit enter to open the device manager
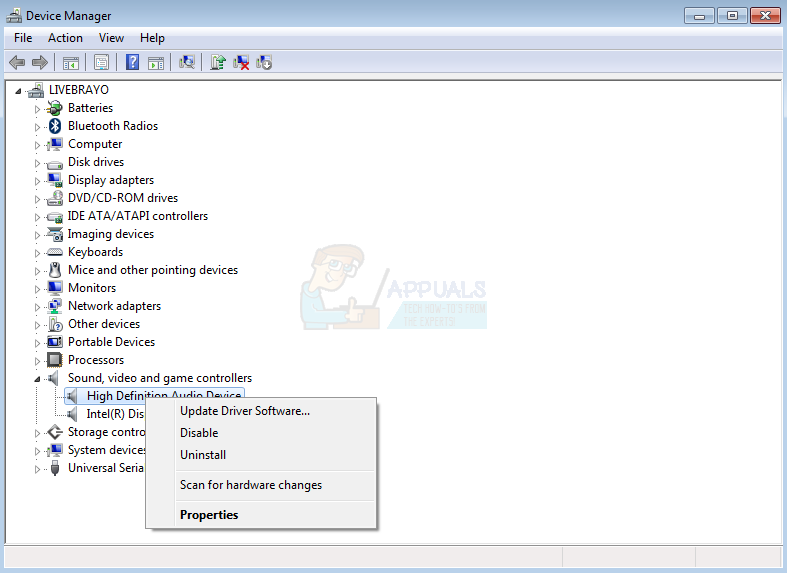
- Go to the ‘Sound, Video and Game Controllers’ section and expand it
- Right click on all your audio devices (one by one) and select ‘Uninstall’
- Click ‘OK’ on the warning and uninstall your device
- Your drivers should reinstall automatically. If they do not, restart your PC and they will reinstall on booting. These drivers should work correctly with your internal speakers.
Method 3: Install the updated audio drivers for your device
If your drivers are out of date, or are not compatible, finding the correct drivers is paramount. You can do this in two ways. The first is to update your drivers from the device manager, and the other is to download the latest drivers from your manufacturer’s website.
- Press Windows Key + R to open Run
- Type devmgmt.msc and hit enter to open the device manager

- Go to the ‘Sound, Video and Game Controllers’ section and expand it
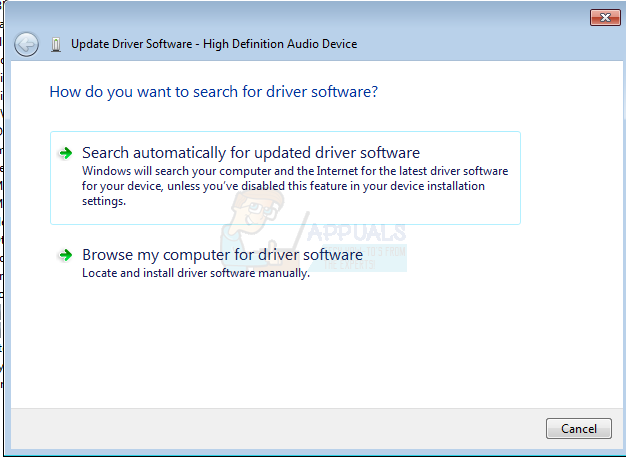
- Right click on your audio device and select ‘Update Driver Software…”
- Click ‘Search automatically for updated driver software’ to update your drivers over an internet connection.
- The most common audio device is made by Realtek Audio. Keep in mind that computer manufacturers can add some features to the audio devices and drivers from your laptop manufacturer’s website will unlock these features for you.
Method 4: Replace the audio jack port or audio board
If using method 1 does not work and the problem is narrowed down to the audio jack, then it would be wise to replace the audio jack. Make sure that you do not void your warranty doing this. You can get your audio jack replaced at a repair shop.
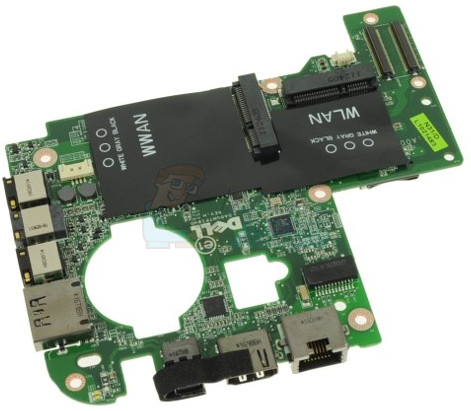
If your audio board is fried and your diagnosis has ascertained that the audio board is dead, you might have to replace the whole board. The audio mechanism might be housed on a daughter board as seen in some laptops e.g. the Dell XPS L701x model has a replaceable jack circuit board sold as a WLAN/Audio daughter board (available here). If your dead audio device is embedded onto the motherboard, it might be necessary to replace the whole motherboard if repairs are impossible. An inexpensive workaround is to used USB Bluetooth speakers.