How to Fix Laptop Speakers Crackling?
When laptop speakers start crackling, the sound becomes distorted, making it difficult to listen to audio. This issue often occurs during music, games, or video playback and may get worse over time. Crackling usually points to a hardware or software problem.
The most common cause is outdated or broken audio drivers, often linked to Realtek drivers. Hardware issues like worn-out speakers or dust build-up can also cause problems.
Additionally, turning on certain audio enhancements or having different sample rates between the laptop and audio files can lead to this crackling sound.
In this article, we will discuss different solutions to solve this problem.
1. Check Audio Format
Before complex troubleshooting, try adjusting the audio format, as this can often fix crackling issues. Sometimes, the sample rate or bit depth on your laptop doesn’t match the audio, causing noise. Switching to a stable format, like 16-bit, 44100 Hz (CD Quality), can help eliminate these problems. This ensures smoother sound processing and reduces crackling.
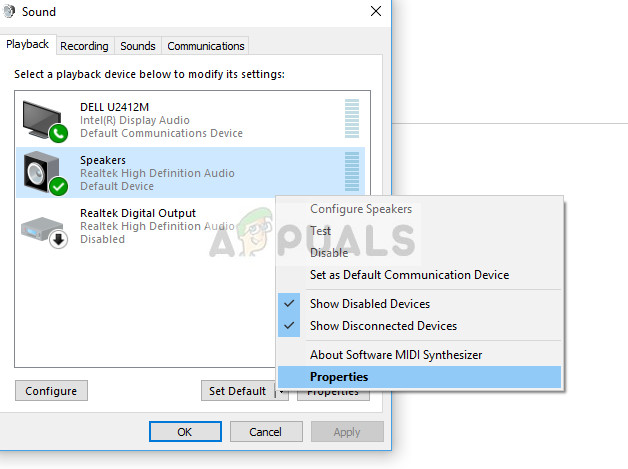
- Right-click the sound icon in the taskbar and select Playback devices.
- In the Playback tab, right-click your audio device and select Properties.
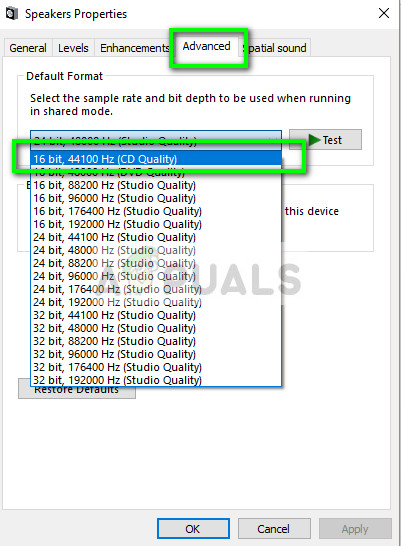
- Go to the Advanced tab at the top. In the “Default Format” section, click to open the drop-down menu.
- Select CD quality (16-bit, 44100 Hz) and save your changes.
- Restart your computer if necessary, or check immediately to see if the issue is resolved.
2. Disable Audio Enhancements and Exclusive Mode
Some sound drivers use enhancements to improve quality, but if they’re incompatible or the CPU is overloaded, they can cause crackling. Disabling these enhancements can fix the issue. Sometimes labeled differently, like “sound blaster,” turning off all audio effects can also ensure smoother sound output.
- Right-click the sound icon in the taskbar and select Playback devices.
- In the Playback tab, right-click your audio device and choose Properties.
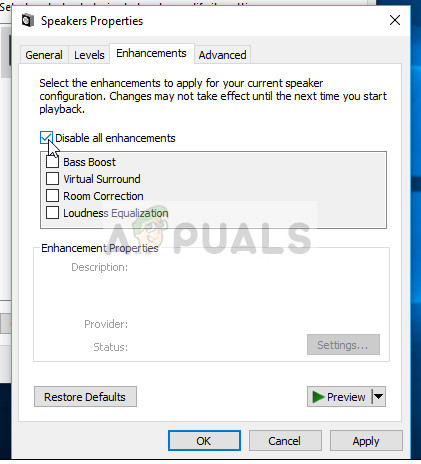
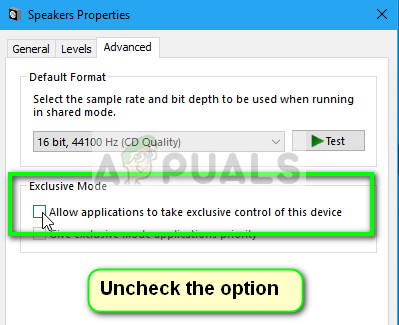
- Go to the Enhancements tab and uncheck all enhancements or check “Disable all enhancements.”
- Select the Advanced tab and uncheck the exclusive mode options. Save your changes and exit.
- Play any sound and check if the problem is resolved.
3. Check DPC Latency
Audio crackling often stems from system latency issues. Checking DPC Latency reveals delays in audio processing. High DPC latency indicates slow task processing, causing crackling. Using tools like DPC Latency Checker helps identify problematic drivers or processes, improving audio performance and ensuring smooth audio streaming.
If the latency is in green or yellow bars, it likely means there isn’t a latency problem. However, if the latency is in red, it indicates some drivers aren’t working as required.
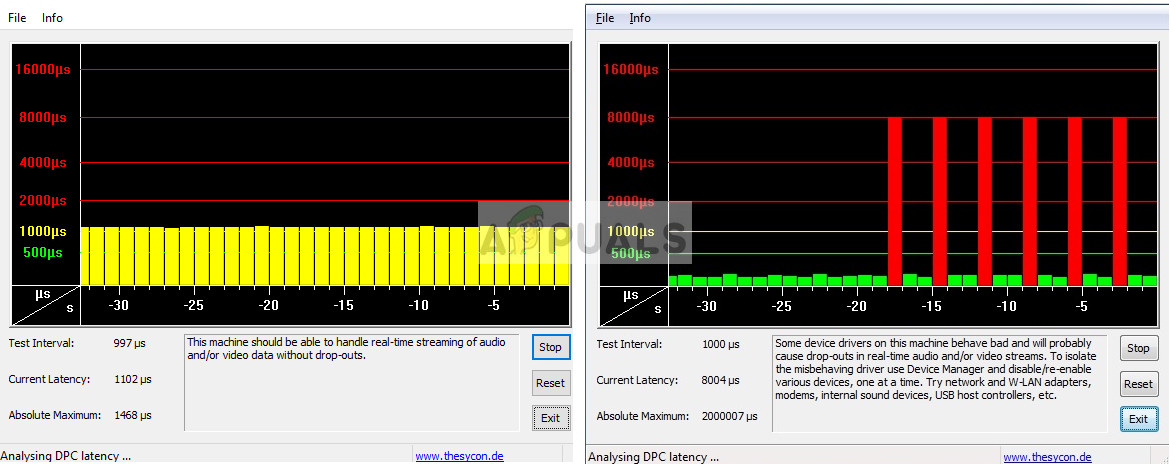
In the example showing on the left side, there’s a driver causing high latency about every three seconds. If this is the case, you have to troubleshoot yourself, enabling and disabling each driver one at a time to identify the issue.
4. Disable Third-Party Programs
Sometimes, unexpected software causes audio issues. Third-party programs, especially those managing audio or optimizing performance, can disrupt sound settings. They add processing layers that conflict with default drivers, leading to crackling. Disabling these programs lets your system’s built-in audio features work smoothly, resolving the issue.
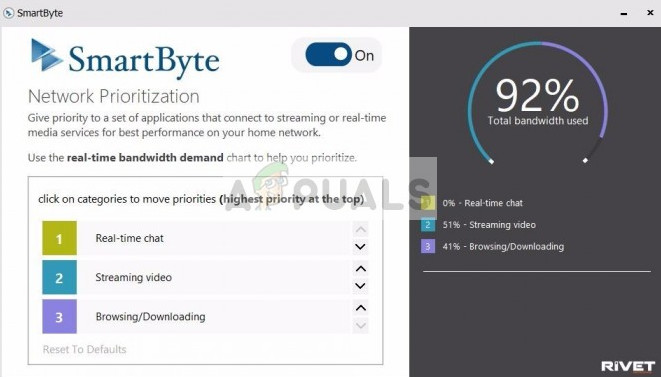
Check your computer for any third-party sound programs like Sonicmaster, Smartbyte, etc., and disable these applications. If there are too many applications, you can boot your computer in safe mode and troubleshoot there (all third-party applications are disabled by default in Safe Mode).
5. Install High Definition Audio Device
Switching to the “High Definition Audio Device” driver can resolve crackling issues by bypassing the complexities of specialized drivers like Realtek. Unlike Realtek, which may cause conflicts with audio enhancements, the basic Microsoft driver delivers clean sound without added features that can lead to distortion. This simpler, more stable alternative often eliminates audio glitches.
- Right-click the Start button and select Device Manager.
- Expand the Sound, video and game controllers category.
- Right-click your sound device and select Update Driver.
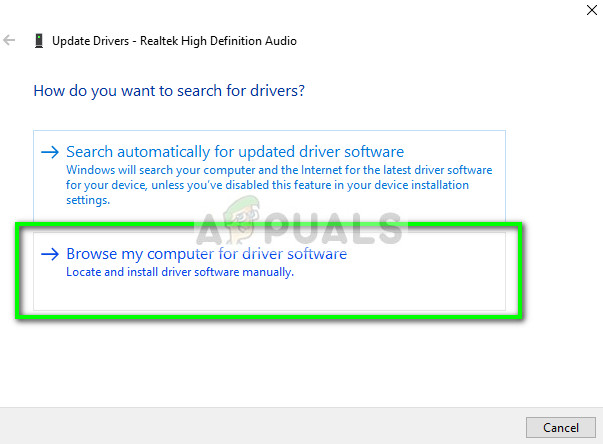
- Choose Let me pick from a list of available drivers on my computer.
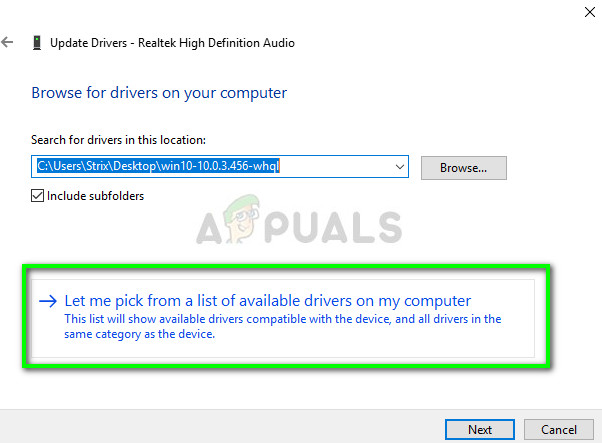
- Uncheck Show compatible hardware, select High Definition Audio Device under Microsoft, and click Next.
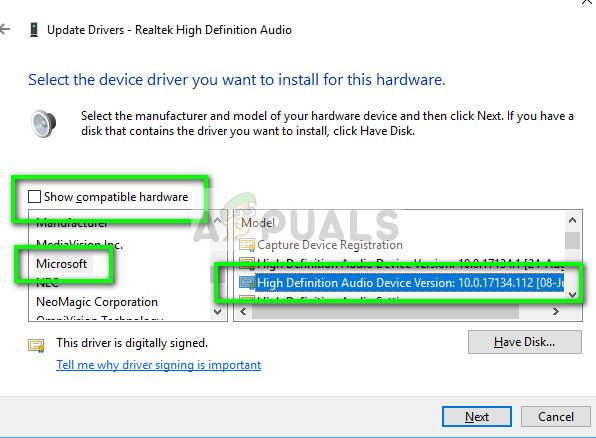
- Complete the installation and restart your computer. Check if the issue is resolved.
Note: Also, try disabling the Intel SpeedStep Technology from the BIOS. If this doesn’t work, try downloading drivers from your manufacturer’s website and install them using the method above. In most cases, this also resolves the problem.


Using the Microsoft driver instead of the Realtek one solved the problem for my XPS 15 2-in-1 (9575).