Fix: Kernel-Power EventID 41 Task 63
This is one of the most exotic Windows errors which can occur on your computer and they usually have a reputation of being the most dangerous ones. One of such errors is definitely the Kernel-Power EventID 41 Task 63 error which usually appears when users are performing some high-resource demanding action such as gaming.
There are quite a few methods which can be used to fix this error and most of them include some more advanced troubleshooting. We advise you to be careful while conducting these fixes and good luck on solving your problem.
Solution 1: Setting the Maximum Processing Power Lower
Sometimes the error occurs randomly when your computer processing power is being used more than it’s okay to. This can hardly be controlled by the user but there is a universal setting which can allow you to set the maximum percentage of the processor power that is to be used in the battery plan you have active.
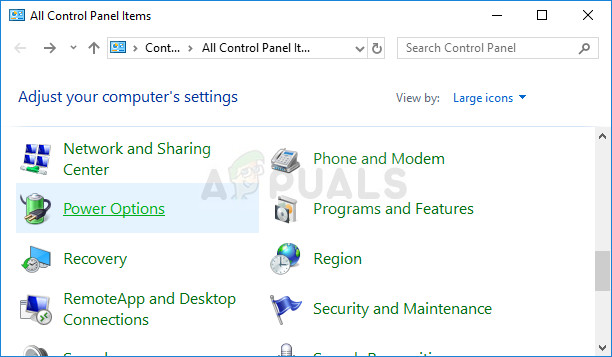
- Right-click on the battery icon located in the system tray and click on Power Options. If you are not using Windows 10, click on the Start menu and search for Control Panel. Change the View by option to Large icons and click on the Power Options button.
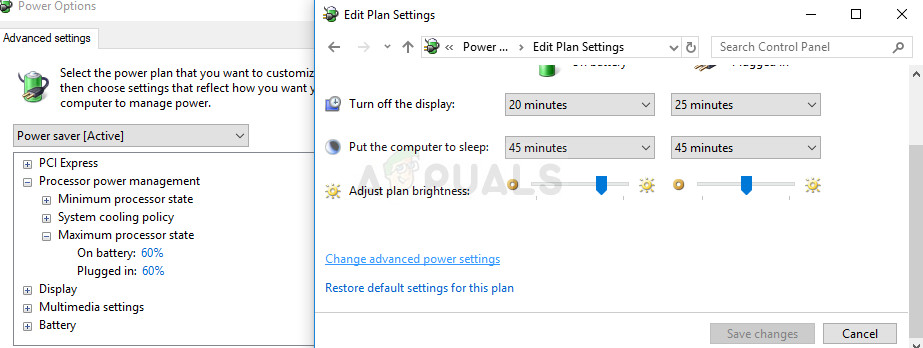
- Choose the power plan you are currently using (usually Balanced or Power saver) and click on the Change plan settings option. In the new window which opens, click on Change advanced power settings.
- In this window, click the small plus button next to the Processor power management entry on the list and do the same for the Maximum processor state entry. Change both the On battery and Plugged in options to something slightly less than the previous setting (10-20% lower) and apply the changes.
- Do the same for all active battery plans since your computer will sometimes switch between them automatically. Check to see if the problem still appears on your computer.
Solution 2: Update Your Drivers
It’s always possible to analyze dump files which are the files created as soon as a Blue Screen of Death such as this one occurs. These files usually contain plenty of information regarding the error such as what caused it, how it occurred, and sometimes even tips on how to fix it. When the Kernel-Power EventID 41 Task 63 is analyzed in such a manner, it’s found that it’s often one of the drivers on your computer so follow the steps below in order to isolate this problem.
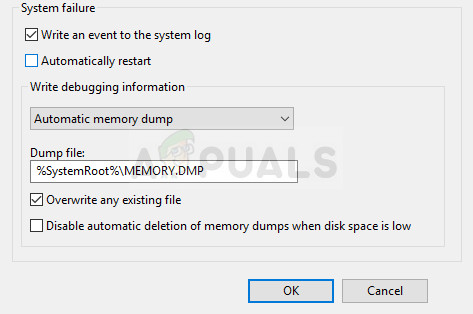
- Right-click on This PC, and then click the Properties option. Click on the Advanced tab, and then under Startup and Recovery, navigate to Settings (or Startup and Recovery).
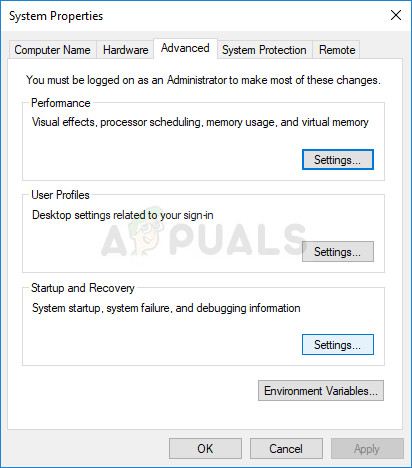
Under System Failure, click to select the check boxes for the actions that you want Windows to perform if a system error occurs:
- The Write an event to the System log feature specifies that event information is recorded in the System log file. By default, this option is turned on. To turn off this option by modifying the registry, type the following information at a command prompt, and then press the Enter key:
wmic recoveros set WriteToSystemLog = False
- The Automatically restart feature specifies that Windows automatically restarts your computer. By default, this option is turned on. To turn off this option by modifying the registry, type the following info at an administrative command prompt, and then press the Enter key:
wmic recoveros set AutoReboot = False
Under the Write Debugging Information, select the type of info that you want Windows to record in a memory dump file if the computer stops unexpectedly:
- The Small Memory Dump option records the smallest amount of information to help analyze the issue. To specify that you want to use this dump file by modifying the registry, type the following information at a command prompt and make sure you tap the Enter key:
wmic recoveros set DebugInfoType = 3
- To accept that you want to use the D:\Minidump folder as your Small Dump Directory by changing the registry, set the MinidumpDir Expandable String Value to D:\Minidump. For example, copy and paste the following information at a command prompt, and click Enter.
wmic recoveros set MiniDumpDirectory = D:\Minidump
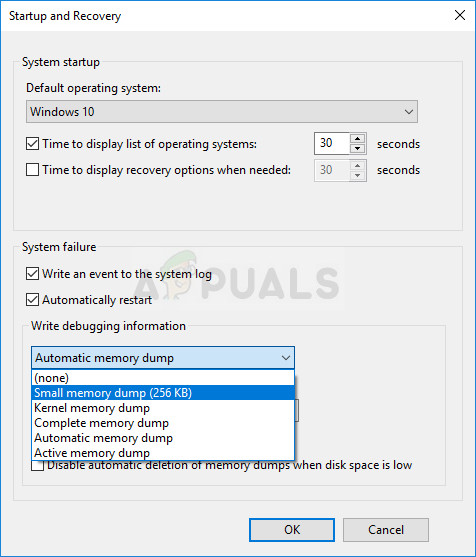
There are other options as well but we recommend you use the Small Memory Dump option as it’s small in size but it still contains enough information for you to solve your issue. Additionally, you will need to use this option in order to read and open the minidump file properly.
Let’s find out just how to open and read the minidump file. You will need to download a certain tool made available by Microsoft. Firstly, it was a part of the Debugging Tools for Windows but Microsoft decided to create a standalone package.
- Visit this website in order to download Windows Driver Kit. You can also download WinDbg as a standalone package which is actually the only tool you will need.
- Download the installer and follow the instructions on screen in order to install it properly.

- Click Start, click Run, type cmd, and then click OK. Change to the Debugging Tools for Windows folder. To do this, type the following at the command prompt, and then press ENTER:
cd c:\program files\debugging tools for windows
- To load the dump file into a debugger, type one of the following commands, and then press ENTER:
windbg -y SymbolPath -i ImagePath -z DumpFilePath
kd -y SymbolPath -i ImagePath -z DumpFilePath
- If you decided to save the file in the C:\windows\minidump\minidump.dmp folder, you can use the following sample command:
windbg -y srv*c:\symbols*http://msdl.microsoft.com/download/symbols -i c:\windows\i386 -z c:\windows\minidump\minidump.dmp
- Check the file for any errors and bugs related to system files and make sure you google each file next to the error message to make sure it’s a driver or a part of a certain third-party app.
If you actually find out that you are struggling with a specific driver, you may need to uninstall or update the certain driver, no matter what its purpose is on your computer, as long as you want to stop seeing the BSOD. Follow the steps below in order to do so.
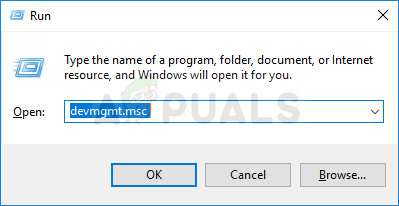
- Click Start and type Run. Select Run, A Run dialog box will appear.
- Type “devmgmt.msc” in the run dialog box and click the OK button. This opens Device Manager immediately.
- In Device Manager, expand the category where you think the driver or device that is causing the issue is located. Make sure you perform a Google search of the problematic file in the Minidump which will probably show the exact name of the device. When you locate the device, right-click on it and choose the Uninstall device option from the context menu.
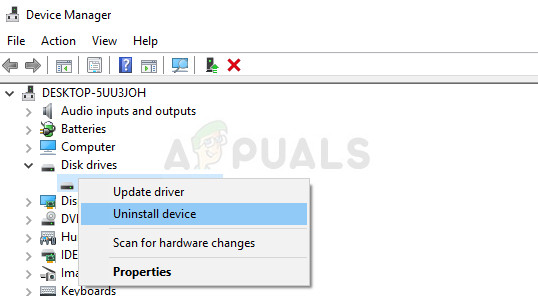
- You may be required to confirm the uninstallation process. Check the box next to “Delete the driver software for this device” option and click the OK button.
- Restart your computer for the change to take effect. After restarting, Windows will attempt to reinstall the driver and replacing it with the manufacturer’s driver.
- If Windows doesn’t replace the driver automatically, open Device Manager again, select the Action menu and click on the Scan for hardware changes option.
Solution 3: Change Certain Power Settings in BIOS and Your PC
This problem is common among laptops and plenty of experienced IT experts have concluded that changing certain sleep modes in BIOS and in the Windows OS as well can help while troubleshooting the problem. Follow the steps below in order to do so:
- Turn off your computer by going to the Start Menu >> Power Button >> Shut down.
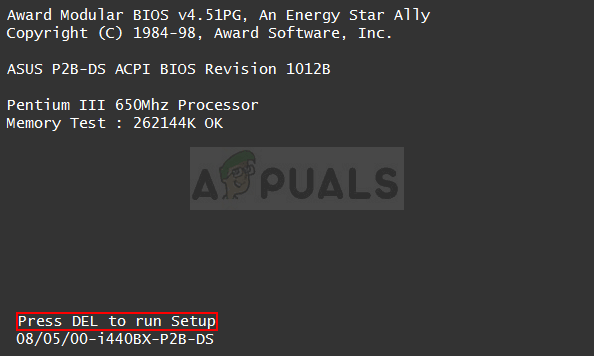
- Turn your PC on again and enter BIOS by pressing the BIOS key while the system starts. The BIOS key is typically displayed on the boot screen, saying “Press ___ to enter Setup.” Common BIOS keys are F1, F2, Del, Esc and F10. Note that you will have to be quick about it as the message disappears pretty fast.
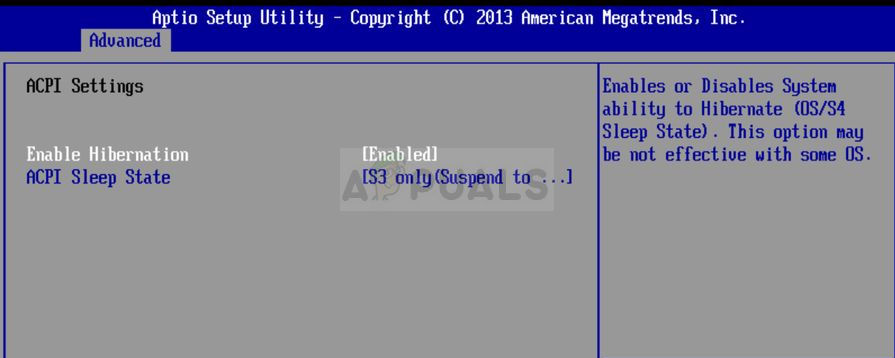
- The Power option which you will need to change is located under different tabs on BIOS firmware tools made by different manufacturers and there is no unique way to find it. It’s usually located under Power options or anything named similar to that and the usual name for it is ACPI Settings.
- Locate the Enable Hibernation option or the ACPI Function options and make sure they are set to Enabled. Below the, you should be able to see either the ACPI Sleep State or ACPI Standby State options so make sure you change them from S1 to S3.
- Navigate to the Exit section and choose to Exit Saving Changes. This will proceed with the boot so check to see if the error still appears.
After this, some users claim that the perfect combination was following the steps above and an extra pair of steps we are going to show below:
- Type “Device Manager” into the search field to open the device manager console. You can also use the Windows Key + R key combination in order to bring up the Run dialog box. Type in devmgmt.msc in the box and click OK or Enter key.
- Expand the Sound, video and game controllers section and only leave one audio driver. Disable the other by right-clicking on it and choosing the Disable device option. If you notice various problems on your computer, simply enable it and disable the other one.
- Right-click on This PC in File Explorer and choose Properties >> Advanced System Settings >> Startup and recovery settings and disable the Automatically restart option under System failure.
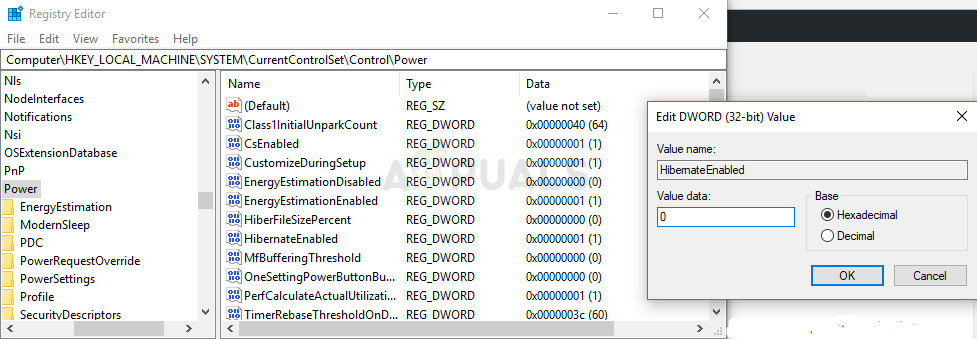
- Open the Registry Editor by typing “regedit” in either the search bar or the Run dialog box. Navigate to the following key in Registry Editor:
HKEY_LOCAL_MACHINE >> SYSTEM >> CurrentControlSet >> Control >> Power
- Locate the REG_DWORD called “HibernateEnabled” at the right side of the window, right-click on it and choose Modify. Change its value to 0.
- Check to see if your problem is solved.


Some new troubleshooting tips for me to try thank you. I have been having event error 41 section 63 for six months now and I have a 15 month old PC. I have changed everything except a motherboard and gpu’s but my nvidia 1080ti are pretty new and lightly used and my mobo is dell special crap because they are dumb for putting these unique boards in area 51 R2 alienware PC’s. I only get this error once or twice a month and sometimes happens while gaming and or while system is idle in youtube. New psu didnt fix it but I have added a few pcie components like usb card and nvme card plus a couple hard drives but the PC is meant for this and has the slots. I will just keep trying stuff. I think its a windows thing myself but I am no expert. Everythings updated and tests come back fine except for the gpu’s I have some kind of weird error but it still tests ok just sends a flag up. Ram tests fine. Its either to small of psu which I find hard to believe or a faulty mobo or windows 10..