Fix: Kernel Auto Boost Lock Acquisition with Raised IRQL
Some users report frequently receiving a frequent BSOD crash with the message Kernel Auto Boost Lock Acquisition with Raised IRQL that makes their computer completely unusable. Most affected users report that the BSOD crash typically occurs immediately after they begin using the touchpad or click a mouse button. For some users, the error is occurring when they reconnect their Bluetooth headphones after they have fallen asleep.

Whenever this BSOD crash occurs, the computer needs to be restarted. But sadly, most affected users report that the same error promptly returns after a couple of hours or so.
What is causing the Kernel Auto Boost lock acquisition with raised IRQL
We investigated this particular issue by looking at various user reports. From what we gathered based on their provided details and resolutions, there are several potential culprits that will lead to a Kernel Auto Boost lock acquisition with raised IRQL BSOD crash:
- External hard drive driver is causing the crash – Several users have identified the culprit to be an external hard drive. Apparently, this can occur if the external drive is in the process of being a bag. Users in a similar situation have resolved the BSOD crash by disconnecting the external hard drive from the PC and uninstalling its driver.
- Bluetooth driver is causing the crash – There are several reports that point towards the Bluetooth driver as being responsible for the BSOD crash. As it turns out, some users have managed to get past the startup error by disabling the Bluetooth function from Bluetooth.
- BSOD crash is occurring when user pairs computer with a smartphone via Bluetooth – Several users have reported that this error occurs whenever they try to pair their Android or Windows mobile phones with the PC.
- Wireless adapter driver is causing the crash – As some users have pointed out, the issue can also occur if the wireless adapter driver you’re PC is currently using is not compatible with the Windows build. Some users have managed to get this fixed by uninstalling the driver and letting Windows reinstall the appropriate one.
- Bluetooth mouse driver is causing the crash – Several users that connected their mouse directly through Bluetooth (not with a USB dongle) reported that the issue was fixed after they reverted the mouse driver to an older version.
- Corrupted BCD – Another popular issue that is causing this BSOD crash is a corrupted Boot Configuration Data. Several affected users have managed to get the issue resolved by rebuilding the BCD database from a Command Prompt window.
If you’re struggling with this particular issue, this article will provide you with a collection of troubleshooting steps. Below you have a collection of methods that other users in a similar situation have used to get the issue resolved.
Since we’re dealing with a BSOD crash, some of the methods below will not be applicable (because in some cases the error occurs at startup). With this in mind, follow the methods presented below in order (while skipping inapplicable methods) until you encounter a fix that is effective in resolving the issue for your particular scenario.
Method 1: Removing external hard drive + driver (if applicable)
Several users have managed to confirm that in their case, the culprit causing the Kernel Auto Boost lock acquisition with raised IRQL BSOD crash was an external hard drive that they had connected to the machine.
Upon removing the external hard drive, they reported that the machine started working flawlessly without any additional BSOD crashes. Although this is just user speculating, it is widely believed that this issue occurs whenever the external driver is in the process of going bad.
Note: This method is only applicable if you have an external hard drive connected to your PC.
If this scenario is applicable to you (you have an external hard drive connected to your PC), disconnect it from your computer while the machine is turned off. Then, see if the BSOD returns at the next startup. If your computer manages to start without triggering the Kernel Auto Boost lock acquisition with raised IRQL BSOD crash, you’ve just identified the culprit.
You can then use Device Manager to uninstall the driver associated with the external hard drive, just to ensure that it doesn’t cause any further problems.
If this method isn’t applicable or you’ve confirmed that your external hard drive is not to blame for the BSOD crash, move down to the next method below.
Method 2: Disable Bluetooth from BIOS (if applicable)
Some users encountering the same startup error have managed to get the issue resolved by disabling the Bluetooth settings from BIOS. Based on their reports, this enabled them to get past the loading screen and reinstall the driver which enabled the machine to run with normally (even with Bluetooth enabled).
Note: This method is only applicable if your computer has built-in Bluetooth functionality.
In order to disable Bluetooth, you’ll need to enter your BIOS settings during the beginning of the startup process. But to do this, you’ll need to press the BIOS key assigned by your motherboard manufacturer. If you don’t know your BIOS key, search online or try pressing the F keys (F1 to F12) repeatedly during the initial startup screen, the Esc key or the Del key – you should be able to enter your BIOS settings eventually.
Once you get in the BIOS settings, start looking for a Bluetooth setting. Now, keep in mind that the BIOS menu will be different according to your motherboard manufacturer, but you can typically find the option to disable the Bluetooth function under Security > I/O Port Access.
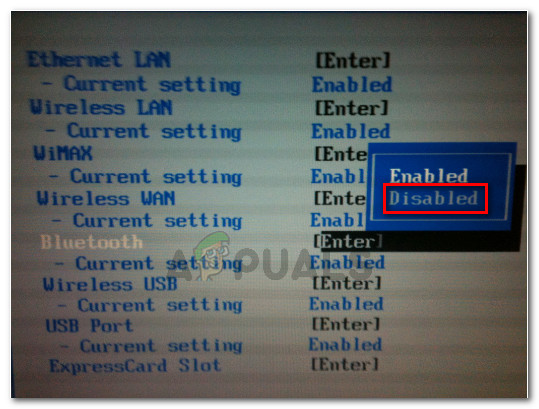
Once you manage to Disable the Bluetooth function, save your BIOS configuration and see if your computer is capable of booting up normally. If you’re still getting the Kernel Auto Boost lock acquisition with raised IRQL BSOD crash, move to the next method below.
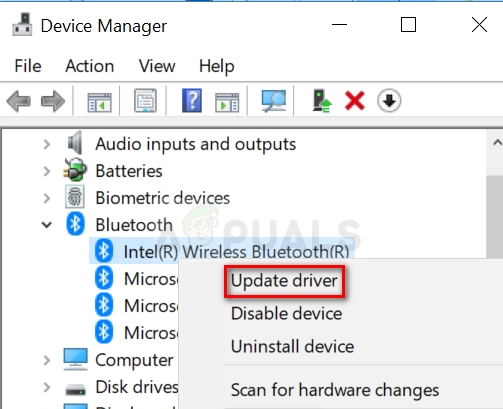
If you are able to boot up without the BSOD crash occurring, open Device Manager ( Windows key + R and type “devmgmt“), right-click on your Bluetooth driver (most likely Microsoft Wireless Driver or Intel Wireless Driver) and choose Update Driver. Then, follow the on-screen prompts to update the driver to the latest version.
Once you do it, you can return to your BIOS settings and re-enable the Bluetooth function. You shouldn’t experience any more BSOD crashes with the Kernel Auto Boost lock acquisition with raised IRQL error code after this.
On the other hand, if the error is still occurring, move down to the next method below.
Method 3: Rolling back Bluetooth mice driver to the previous version (if applicable)
As some users have pointed out, the issue can also be caused by a Bluetooth-powered mouse. If you’re using a mouse that works through Bluetooth directly (not through a USB dongle), this might be your culprit.
Some users have reported that the issue was fixed after they rolled back their mouse Bluetooth driver from Device Manager. Here’s a quick guide on how to do this:
- Press Windows key + R to open up a Run dialog box. Then, type “devmgmt.msc” and press Enter to open Device Manager.

Run dialog: devmgmt.msc - In Device Manager, open the drop-down menu associated with Mice and other pointing devices. Then, right-click on your Mouse Bluetooth driver (Synaptics, ELAN, etc.) and then choose Properties.
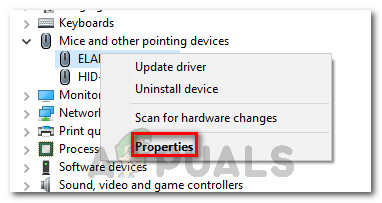
Right-click on Mouse Bluetooth driver and choose Properties - In the Properties screen of your Mouse Bluetooth driver, expand the Driver tab, then click on Update Driver.
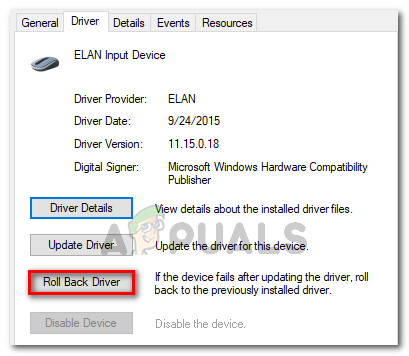
Go to Driver and click on Roll back driver - Follow the on-screen prompts to rever to the older driver version. Once the process is complete, restart your computer and see if the Kernel Auto Boost lock acquisition with raised IRQL error is resolved at the next startup.
If the method didn’t resolve the BSOD crash, move over to the next method below.
Method 4: Uninstall the wireless adapter driver from Device Manager
Although this might not seem to have anything to do with the error at hand, a lot of users have reported that the issue was fixed after they uninstalled their wireless network adapter driver. In most cases, users report Atheros AR928X Wireless network adapter as being responsible for the issue.
Update: It turns out that this scenario is frequently reported to occur after an upgrade to Windows 10 from an older Windows version. There’s speculation that the upgrading wizard mistakenly migrates the old wireless driver even if it’s no longer compatible with the new operating system. This is what is believed to be causing the crashes.
If you’ve tried the methods above without success and you’ve upgraded to Windows 10 from an older Windows version (you didn’t clean install Windows 10), forcing the OS to reinstall a compatible wireless adapter driver should resolve the issue.
But keep in mind that in order to do so, you’ll need to have a working ethernet connection to allow WU (Windows Update) to download the necessary driver. If you decide to follow this method, here’s what you need to do:
- Connect your computer to the internet via an Ethernet (wired) connection and make sure it’s working properly.
- Press Windows key + R to open up a Run dialog box. Next, type “devmgmt.msc” and press Enter to open up Device Manager.
Run dialog: devmgmt.msc - Inside Device Manager, expand the drop-down menu associated with Network adapters.
- Right-click on your Wireless Network adapter and click on Uninstall Device.
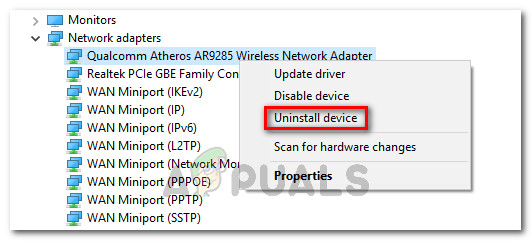
Uninstalling the Wireless adapter driver - Once the wireless network adapter driver has been uninstalled, restart your computer. At the next startup, the WU (Windows Update) component will automatically search for a compatible driver and install it on your system – as long as your ethernet connection is working properly.
If this method wasn’t effective in resolving the Kernel Auto Boost Lock Acquisition with Raised IRQL BSOD crash, move over to the next method below.
Method 5: Removing the NDAS device from your system (if applicable)
If you have an NDAS (Network Direct Attached Storage) device connected to your computer, you might want to disconnect it and see if the BSOD crashes with the Kernel Auto Boost lock acquisition with raised IRQL error stop.
A couple of users have reported that in their case, the crashes stopped entirely after they disconnected the NDAS system. Apparently, several NDAS manufacturers including Ximeta have still haven’t developed appropriate drivers for Windows 10, triggering the crash.
If this method isn’t applicable to your current situation, move down to the next method below.
Method 6: Rebuild the Boot Configuration Data
Another cause that is known to trigger the Kernel Auto Boost lock acquisition with raised IRQL error is a corrupted boot configuration data. Several users dealing with the same issue have reported that the issue was fixed after taking the appropriate steps to rebuild the BCD files with a series of commands.
Here’s what you need to do:
- Insert the installation media and press any key to enter the Windows installation wizard. Once you arrive at the first window, click on Repair your computer.
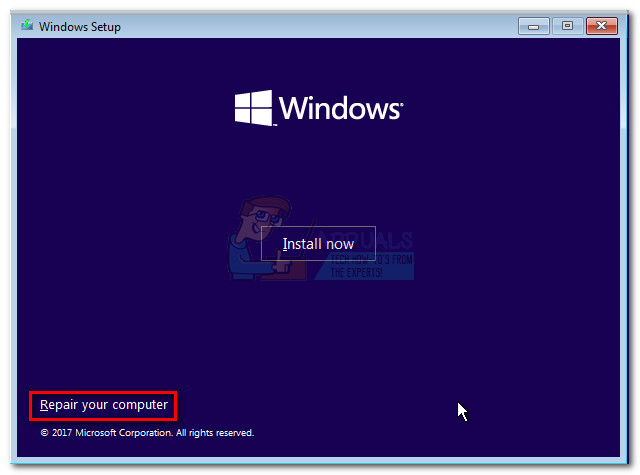
Click on Repair your Computer Note: You can also force your system to go into the repair menu without the installation media by forcing three unexpected shutdowns during the startup procedure.
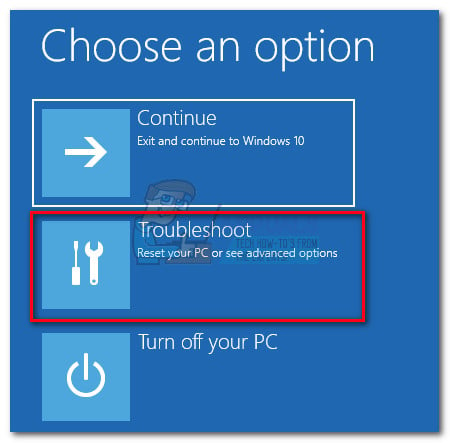
- At the first window, click on Troubleshoot, then click on Command Prompt.
- Once the Command Prompt window is opened, type the following command and press Enter to rebuild the boot configuration data:
Bootrec /RebuildBcd - Wait until the process is finished, then restart your computer to see if the issue is still occurring at the next startup.
If you’re still seeing the Kernel Auto Boost lock acquisition with raised IRQL error, move down to the next method below.
Method 7: Perform a System Restore
If you’ve come this far without a result, one of the last things you can try before performing a clean install is to use a healthy System Restore point and see if the symptoms improve.
Several users reported that they were able to successfully treat the BSOD by restoring their machine state to a previous point where the crash was not occurring. Here’s a quick guide on how to do this:
- Insert the installation media and press any key to enter the Windows installation wizard. Once you arrive at the first window, click on Repair your computer.
Click on Repair your Computer Note: If you don’t have the installation media, you can skip this step by forcing two or three consecutive unexpected shutdowns during the startup phase. The next restart will land you straight into the Repair menu.
- Next, click on Troubleshoot and then choose System Restore from the list.
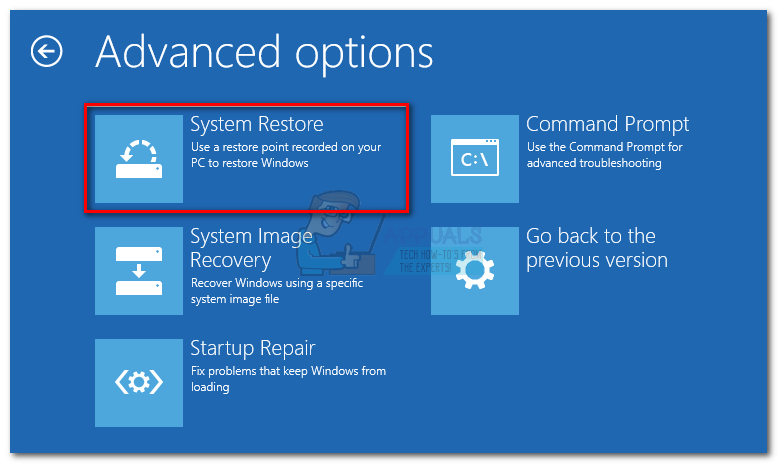
Access the System Restore menu - Once you arrive into the System Restore wizard, click Next at the first prompt. Then, from the next screen, select a system restore point from the list that is older than the apparition of the error and click Next again.

Choosing a system restore point from the list Note: Make sure to check the box associated with Show more restore points in order to see all the available system restore points.
- Click Finish and then Yes to confirm the restoring process. After a short while, your computer will restart and the old state will be restored.
If you didn’t have a system restore point that was old enough to circumvent the issue, move over to the final method below.
Method 8: Perform a repair install
If none of the methods above have helped you to resolve the issue, there’s one more fix that you can try without reinstalling your OS. Several users have reported that they were able to resolve the issue by performing a repair install.
A repair install will allow you to preserve all your personal data including all your applications and media – only Windows-related data will be replaced. If you decide to perform a repair install, follow this guide (here).


