Fix: Javac is not recognized on Windows
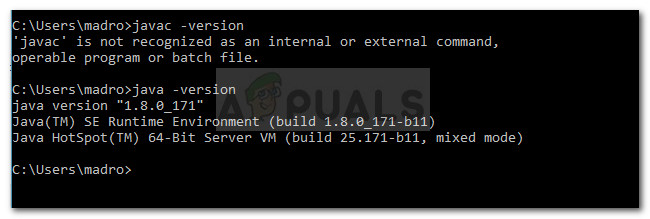
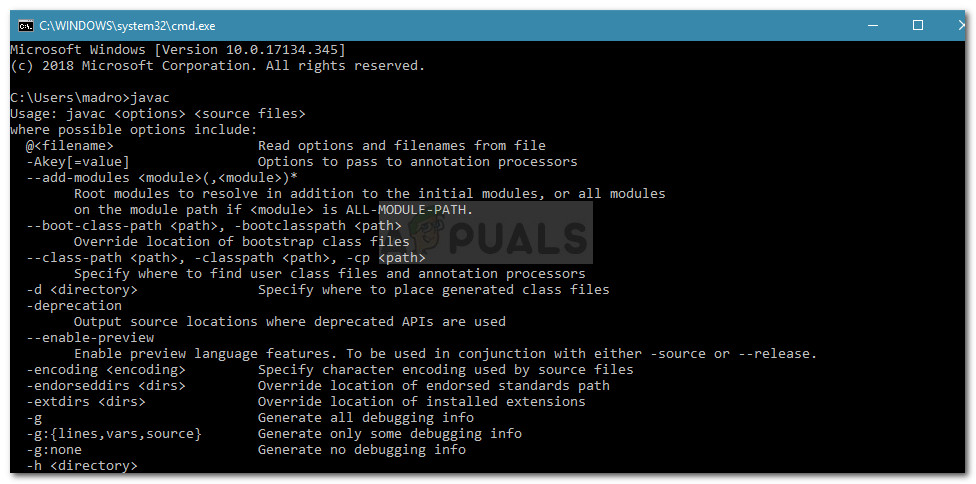
“Javac is not recognized as an internal or external command” is an error often encountered by people trying to compile Java programs on Windows using Command Prompt. It’s might also be encountered when users try to check the current version of the primary Java compiler.
What is JavaC?
Javac (pronounced “java-see”), is the main Java compiler included in the JDK (Java Development Kit) developed by Oracle Corporation. The compiler is designed to accept source code that is conforming with the Java Language specifications (JLs) and converts it into Java bytecode according to the JVMs (Java Virtual Machine Specification).
What causes the Javac is not recognized error
The “Javac is not recognized as an internal or external command” error is encountered when the Command Prompt is unable to find the Java PATH variable. This can happen for two reasons:
- The Java Development Kit (JDK) is missing from the machine – This typically happens because the user mistakenly assumes that the Java Compiler (javac) is installed along with the Java Runtime Environment.
- The path to Javac is not set or is incorrectly set – In order to compile from Command Prompt and to make sure that other app server tools function properly, the system needs to be aware of the location of Javac. If this is the case, you will need to set the path manually.
Step 1: Installing the Java Development Kit (JDK)
One of the main reasons why this error occurs is because users that are just starting to learn Java are confusing the Java Runtime Environment (JRE) with the Java Development Kit (JDK).
The JRE is part of the JDK, but most of the time is downloaded separately. A lot of programs that make use of the Java Runtime include it in their installation packages.
Because there are very few reasons why you’ll need the Java Development Kit (JDK) if you’re not interested in Java Development, you might have believed that Javac was already installed by JRE, but the truth is you’ll need to install the whole Java Development Kit.
If you think this scenario is applicable to your situation, here’s a quick guide on installing the Java Development Kit (JDK) in order to resolve the “javac is not recognized” error:
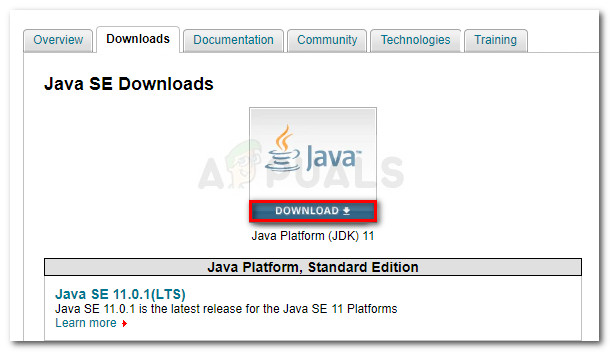
- Visit this link (here) and click the Download Icon above Java Platform (JDK). This will ensure that you install the latest available version of the Java Development Kit.
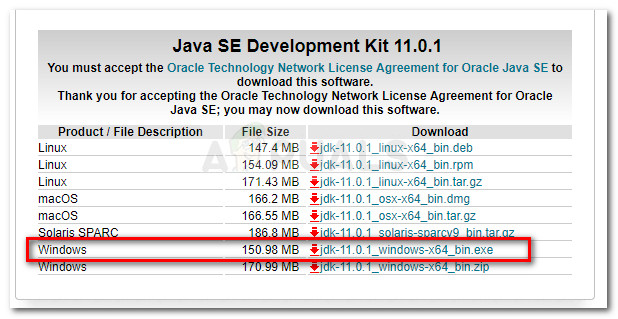
Downloading latest JDK - In the next screen, scroll down to Java SE Development Kit and make sure that you select the toggle associated with the Accept Licence agreement. Then, click on the download link associated with Windows. There are two options to choose from, but we recommend downloading the .exe file since it will spare you from extracting the contents when the download is complete.
Downloading the Java Development Kit - Once the download is complete, open the JDK installation executable and follow the on-screen prompts to complete the installation.

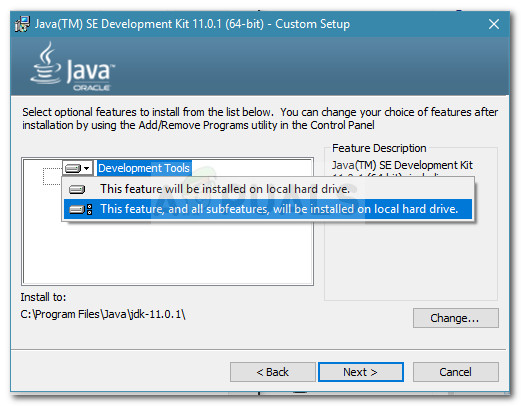
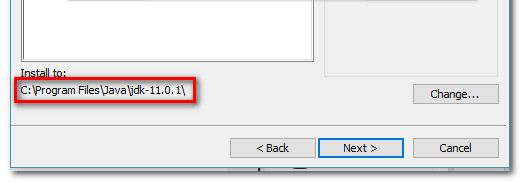
Installing the Java Development Kit - In the next screen, make sure that both Development Tools and Source Code are set to install on your local hard drive along with all their subfeatures. Furthermore, if possible, we encourage you to preserve the default installation path because Step 2 will be easier.
Install all components and subfeatures to your local hard drive Note: As an additional recommendation, note down the installation path under Install to, because you’ll need it in Step 2.
- Wait until the Java Development Kit is installed. When the process is complete, restart your computer manually if you’re not automatically prompted to do so.
Installing the Java Development Kit
Now that you’ve made sure that you have installed the correct package that installs JavaC, move down to Step 2 where we make sure that you set the path to JavaC correctly.
Step 2: Setting the Java environment variable & updating the system path
Before we start with this process, it’s important to understand that the following procedures are only applicable if you’ve made sure that the Java Development Kit is correctly installed (Step 1).
If you have installed the JDK and are still getting the “Javac is not recognized as an internal or external command“, you’ve just stumbled upon one of the most common technical issues that Java beginners face. In order to finalize the Java Development Kit on Windows, you’ll need to perform a series of manual steps. These steps should always follow the installation of JDK, even after you update the Java Development kit.
Here’s a quick guide on setting the correct Java environment variable and updating the system path:
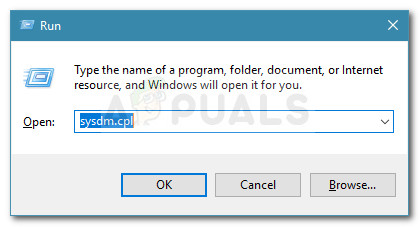
- Press Windows key + R to open up a Run dialog box. Then, type “sysdm.cpl” and press Enter to open the System Properties window.
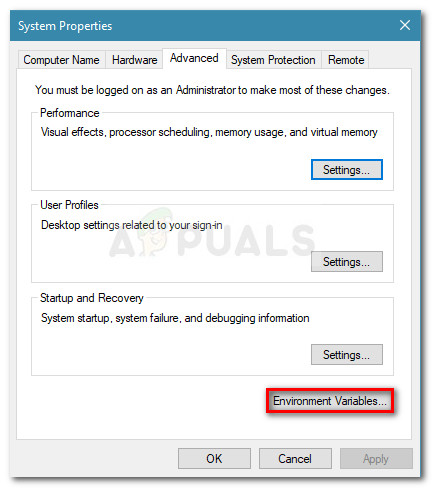
Run dialog: sysdm.cpl - Inside the System Properties window, go to the Advanced tab and click on Environment Variables.
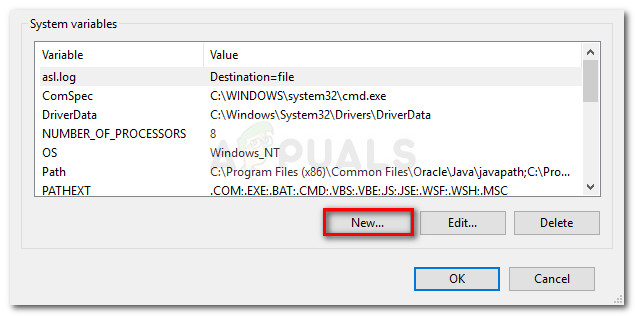
Go to the Advanced tab and click on Environment Variables - In the newly opened Environment Variable window, click the New button under System variable.
Adding a new System variable - In the New System Variable window, set the Variable name to JAVA_HOME and the Variable value to the path to your JDK directory. To save the changes, click OK.
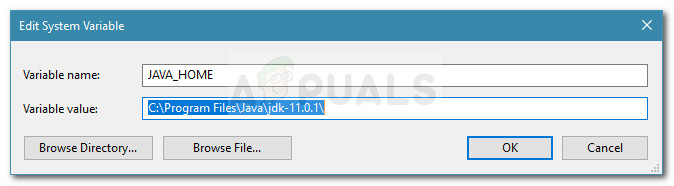
Configuring Variable name and Variable value Note: If you listened to our advice at Step 1 and noted down the installation path of the JDK, you can paste it directly in the Variable value.
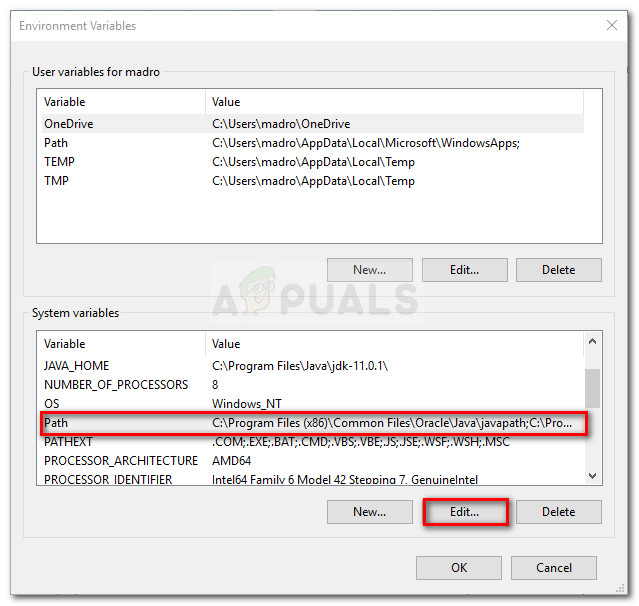
Installation path of the JDK - Now that you’ve returned to the Environment Variables window, look for a variable named path under System variables. With the Path variable selected, click the Edit button.
Select the Path variable (under System variables) and click the Edit button - In the Edit environment variable window, click on the New button.
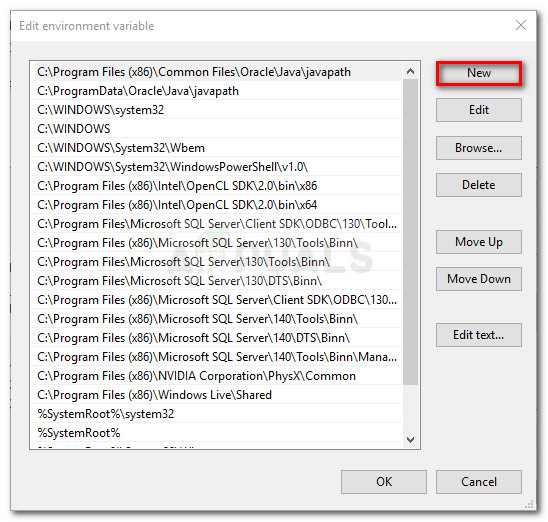
Click on the New button - Name the newly created environment variable %JAVA_HOME%\bin and press Enter. Then, click Ok to apply the changes.
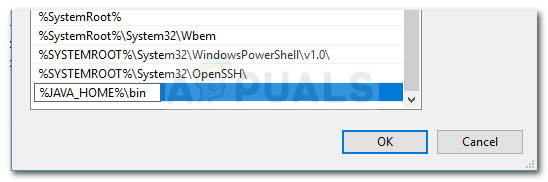
Create a new environment variable and name it %JAVA_HOME%\bin - With this last step, your Java environment should be configured. You will now be able to compile applications from CMD or check your Javac Version.
JavaC was configured successfully
Bonus step: Checking if the configuration was successful
There is one additional step that you can go through in Command Prompt in order to make sure that you’ve successfully configured the Java environment variable path. Follow the steps below to see if your configuration is working:
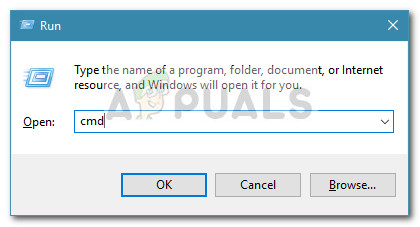
- Press Windows key + R to open up a Run dialog box. Next, type “cmd” and press Enter to open up a Command Prompt window.
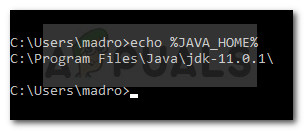
Run dialog: cmd - In the Command Prompt window, type echo %JAVA_HOME% and press Enter to see which return you get. If you see a print with the directory to the JDK, then Step 2 was successful and your JAVAC is working just fine. In the event that you see space instead of the JDK path, it means that you have failed in setting up the environment variable – in this case, revisit Step 1 and Step 2.
Verifying if the Java environment variable was set correctly


https://uploads.disquscdn.c…
Hi,I am getting the error of JAVAC is not Recognized as an internal or external command, operable program or batch file.and to solve this error i followed all instructions you have given but still getting error
as you can see i followed the last step too but also getting same issue, please help me out to solve the issue