How to Fix “Unfortunately, IMS Service Has Stopped” on Android
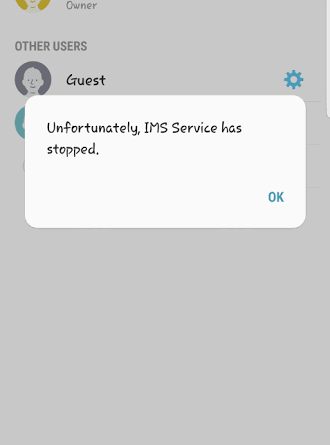
When the “Unfortunately, IMS Service has stopped” error appears on an Android device, it interrupts normal use by repeatedly showing a pop-up message, making the device almost unusable. This error means there is a problem with the IP Multimedia Subsystem (IMS) service, which is crucial for managing multimedia communication services like calls and SMS over internet networks.

The most common cause of this issue is a recent software update that conflicts with the IMS service, making it unstable. Other possible causes include corrupted app caches, outdated apps, or conflicts with third-party messaging apps.
Now that you know the causes, let’s discuss the solutions.
1. Check for Software Updates
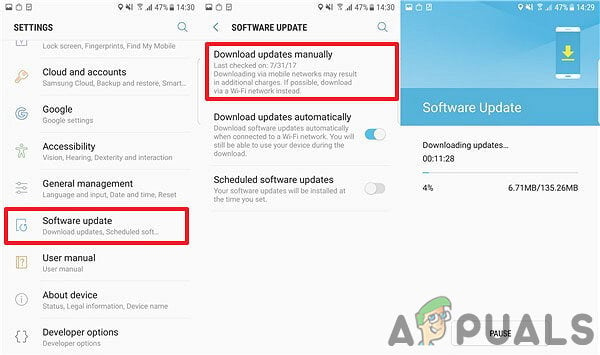
If your drivers or system software are outdated, it can cause problems with the IMS service. Updating your device makes sure everything works well together and can fix the error.
- Unlock your phone and go to Settings.
- Scroll down and tap “About Phone“.
- Tap “Software Updates” and select “Check for Updates“.
- If an update is available, tap “Download Now“.
- Once downloaded, confirm the installation by selecting “Yes“. The phone will restart.
- After installation, the phone will restart. Check if the issue persists.

2. Check for Application Updates
Keeping your apps updated ensures they work well with the latest Android updates. This can fix issues that make the IMS service crash. In particular, updating messaging and carrier-related apps can solve bugs or glitches causing this error.
- Unlock your phone and open the Google Play Store app.
- Tap the menu button in the top left corner and select “My Apps & Games“.
- Go to the “Updates” tab and hit the “Refresh” icon.
- Tap “Update All” and wait for the apps to update.
- Check if the issue persists.

3. Change Message Configurations
Changing message settings can help fix compatibility issues with the IMS service. Adjusting or resetting these settings can make sure the service works well with your network provider, possibly solving problems that cause the error.
For AT&T.
- Open the default messaging app.
- Tap the menu button in the top right corner and select “Settings“.
- Select “AT&T Messages Backup & Sync” and choose “Disable the Sync“.
- Restart your phone and check if the issue persists.
- Note: Ensure sync isn’t re-enabled after restarting. If it is, turn it off again and skip the restart.

For Rich Communications.
- Open the default messaging app and tap the menu button in the top right corner.
- Select “Settings” and then “Chat settings“.
- Tap “Rich Communications Settings” and uncheck “Rich Communications“.
- Restart your phone and check if the issue persists.

4. Launch in Safe Mode
Entering Safe Mode temporarily turns off third-party apps and services, letting the system run in its basic setup. This helps determine if a troublesome app or service is causing the IMS Service error, allowing you to troubleshoot without any interference.
- Press the power button and choose “Switch OFF“.
- When the device is completely off, turn it back on by holding the power button for 2 seconds.
- As soon as the Samsung animation logo appears, press and hold the “Volume Down” button.
- “Safe Mode” will appear in the lower left corner if the setup is successful.
- Check if the issue persists. If it’s resolved, uninstall one third-party app and see if the error message reappears.
- Repeat the uninstall process with other apps until the problem is fixed.

5. Delete Cache
Clearing the cache deletes temporary files that could be corrupted and causing problems with the IMS service. This step removes old or conflicting data, helping the service run smoothly.
- Turn off the phone by pressing the power button and selecting “Switch OFF“.
- Press and hold the Home and “Volume Up” buttons, then press the “Power” button until the Samsung logo appears.
- Release the “Power” button only.
- Once the Android logo appears, release all buttons.
- Navigate with “Volume Down” to highlight “Wipe Cache Partition“.
- Press “Power” to select and wait for the cache to clear.
- Use “Volume Down” to highlight “Reboot System Now” and press “Power” to restart.
- Check if the issue is resolved after rebooting.
- Note: Be cautious during this process to avoid bricking the phone.


