Fix: HyperX Cloud 2 Mic not Working
Headsets provide one of the popular ways of interacting with online audiences or other voice/audio perceiving and audio recording activities. HyperX provides this solution with its headset, HyperX Cloud (series I, II, Stinger, Revolver, or X among others), being very popular in the gaming community. Given its quality HyperX Cloud headset (complete with a microphone and headphones) can be used for more than just cloud/online gaming. However, several users including numerous gamers have complained that the microphone does not work at all when plugged in. The microphone is detected in some cases and in others, it doesn’t show up in the computer. This article explorers this issue and give you the solutions to a non-functional microphone in the HyperX Cloud Headset.
How to connect the HyperX Cloud Headset
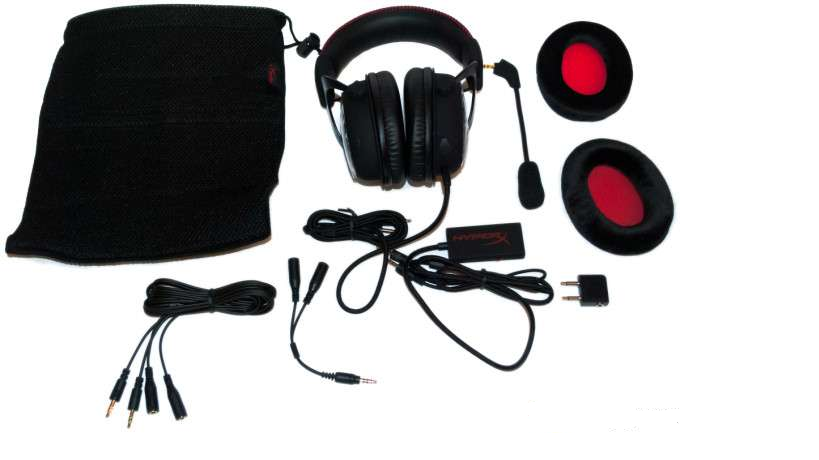
The HyperX Cloud headset consists of several detachable parts. The audio cable is a single detachable 3.5 mm jack. The single jack provides the speaker and microphone function. The Microphone is also detachable via a 3.5 mm port on the side of the headset. There are two ways to connect the headset to your computer. The first is the use of a splitter. The splitter ‘splits’ the single audio jack into two (the headphone and microphone) components. From there, you can connect it conventionally into the respective 3.5 mm headphone and microphone ports in your computer’s audio card. The second way is by use of a USB dongle that the HyperX Cloud Headset comes with. Connecting directly to the headset, the USB dongle provides a USB soundcard that interacts with your headset. The soundcard is not much different from the normal soundcard, so it will need drivers for it to function (they usually deploy automatically when you insert the USB dongle/soundcard).
If you are experiencing a non-functional microphone, the problem might be anywhere from your computer all the way to the microphone. Some of the common reasons include, a wrongly inserted audio jack (wrong port or not fully inserted) either at the computer’s end on at the detachable microphone end. It is also likely that the microphone function has been disabled in the computer’s settings. Hardware configurations might also cause such an issue e.g. the case where the microphone switch has been flipped to the off position on the HyperX soundcard USB dongle. Below are the solutions that might work for you. Keep in mind that the problem might also be a severed cable connection or bad splitter. This might need replacement. It is advised to try the headset on another computer/phone and check if the issue persists there. If it doesn’t then your PC is likely to be the issue; with the opposite being true.
Method 1: Enable the Microphone input in the sound settings and set it as the default recording device
Usually, the soundcard microphone is usually set as the default with the internal laptop microphone being always ‘ready’. In some cases, the external/soundcard microphone might be disabled and therefore you won’t be able to use your microphone. This can also be the case if you are using the HyperX USB dongle since the dongle is detected as a soundcard. To enable your microphone:
- Plug in your USB dongle if you are using one.
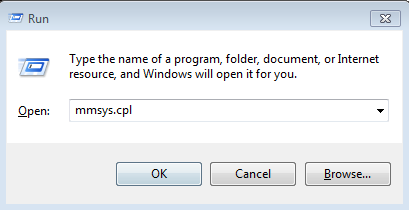
- Press Windows + R Key to open Run
- Type mmsys.cpl and hit enter to open the sound and audio device settings window.
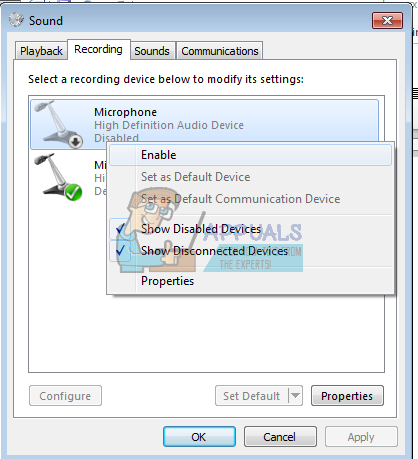
- Go to the recording tab. Right click anywhere on the list and make sure that the “Show Disabled Devices” and the “Show Disconnected Devices” options are checked.

- If there is any microphone device that is disabled, right click on it and select “Enable”
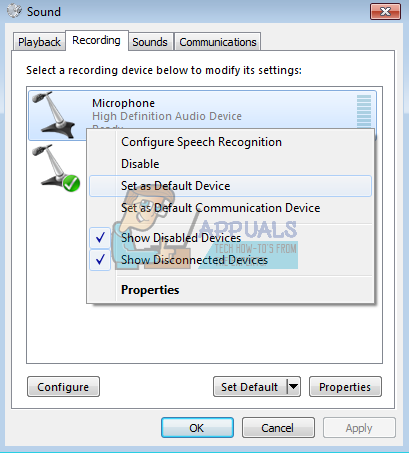
- Now right click on your HyperX microphone device or your soundcard microphone device and select “Set as default device” to bring it online whenever it is connected. You can also set it as a default communication device if you wish to use it to place and receive calls on your computer.
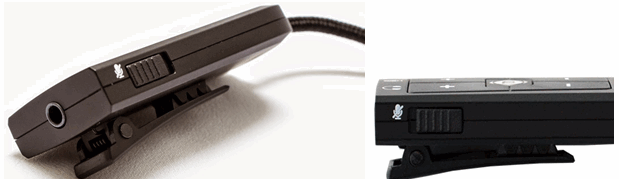
Method 2: Flip the HyperX Cloud microphone switch to on
If you are using the HyperX Cloud USB soundcard/dongle, there is a microphone switch at the side. Make sure it is flipped to the on position.
Method 3: Change your splitter or use the USB dongle
The audio splitter might be incompatible with the headset especially if you are not using the provided splitter. You will need another splitter. It needs to have 3 black bars/segments on the jack-plug pin (the end that goes into the headset) like the one shown below:
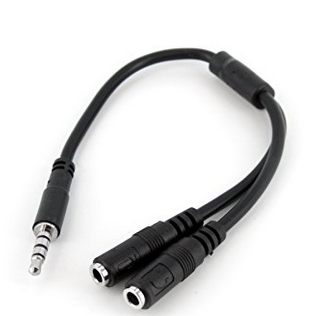
If you think the splitter is causing the problem, you can bypass it by using the USB dongle.
Make sure the 3.5 mm jacks are plugged in so you see none of the barrel. It may take some extra pressure. You might need a replacement of your cable in the case where it is broken.