Fix: High CPU & Memory Usage by ‘Inputpersonalization.exe’
As a Windows user, you might see inputpersonalization.exe or Input Personalization Server running in your Task Manager. This process will most probably take a lot of resources of your system hence slowing down your system’s performance. For some, it might appear in the task manager for a while and then go away while others might see it running for an extended period of time. Even if you end the process it will most likely come back again.
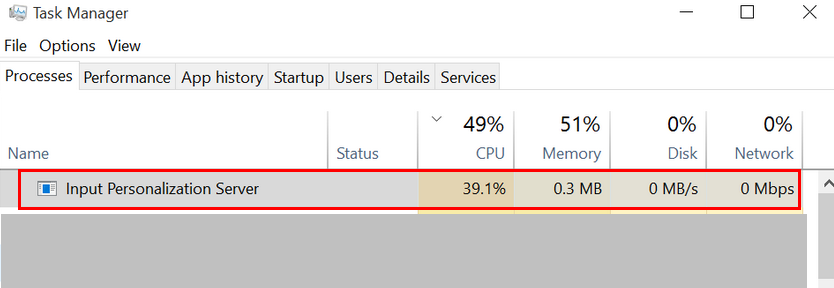
Input Personalization Server or inputpersonalization.exe are used on Tablet PCs. These processes are also known as the Handwriting Recognition Personalization Tool or Input Personalization. So, it is a legitimate Windows process that is essential for some input related programs. Also, it is pretty normal for these processes to take a certain amount of CPU percentage. Unless the process continuously runs in the background and takes up a considerable amount of resources, you shouldn’t worry about the process. However, if you are experiencing performance issues because of the high CPU usage by Input Personalization Server then there are a couple of ways to handle it. If you are wondering why it is causing a lot of CPU usage then the culprit behind it might be a corrupt user profile.
Method 1: Fix/Recreate Profile
Recreating your user profile has worked for a few users. This will solve the issue if the Input Personalization Server is misbehaving because of the corrupt user profile. Here are the steps for recreating your user profile
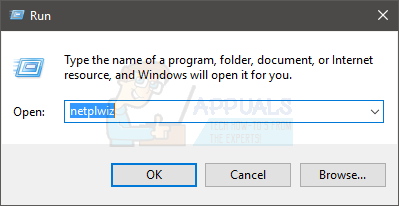
- Hold Windows key and press R
- Type netplwiz and press Enter
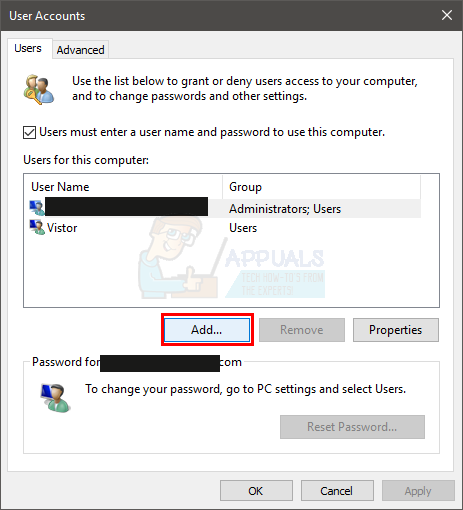
- Here, you will be able to see the user profiles on the computer. Click Add
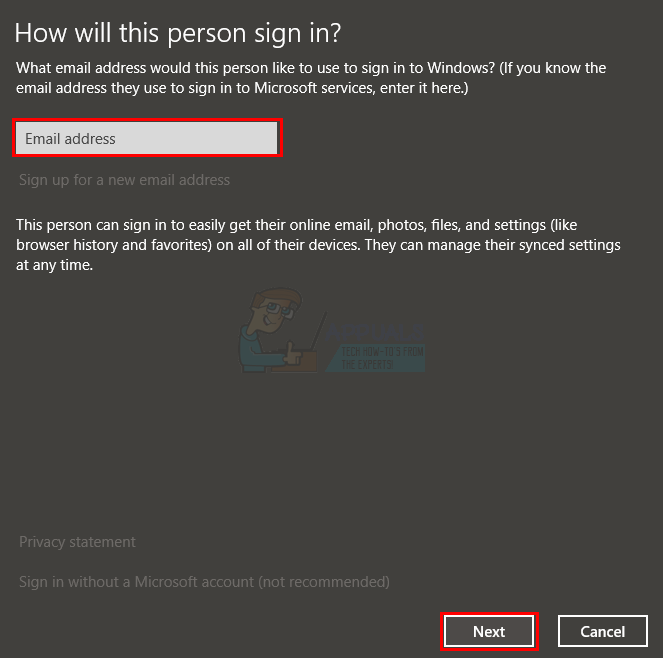
- Enter the email address and click Next. Follow the on-screen instructions to set up a new user profile
Once done, sign out and sign in with the newly created user profile and check if the problem is resolved or not. If the problem doesn’t happen in the newly created profile then it is clear that the issue is with your user profile. The best thing you can do here is to recreate or fix your user profile. Here are the steps for fixing your user profile
- Hold Windows key and press R
- Type regedit and press Enter
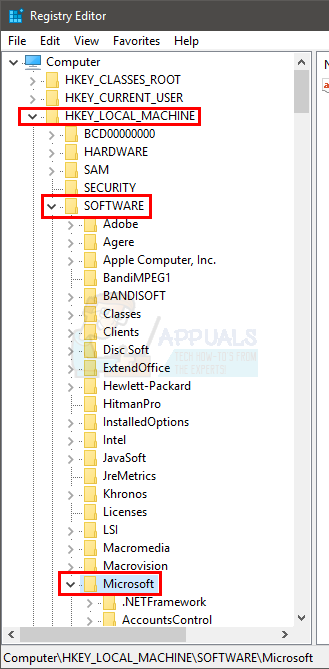
- Navigate to this address HKEY_LOCAL_MACHINE\SOFTWARE\Microsoft\Windows NT\CurrentVersion\ProfileList. If you don’t know how to navigate to this location then follow the steps given below
- Locate and double click HKEY_LOCAL_MACHINE from the left pane
- Locate and double click SOFTWARE from the left pane
- Locate and double click Microsoft from the left pane
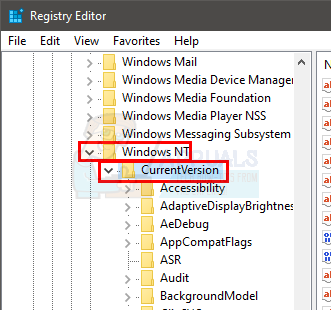
- Locate and double click Windows NT from the left pane
- Locate and double click CurrentVersion from the left pane
- Locate and double click ProfileList from the left pane
- Under the ProfileList (in the left pane) you will see multiple folders with names starting with S-1.
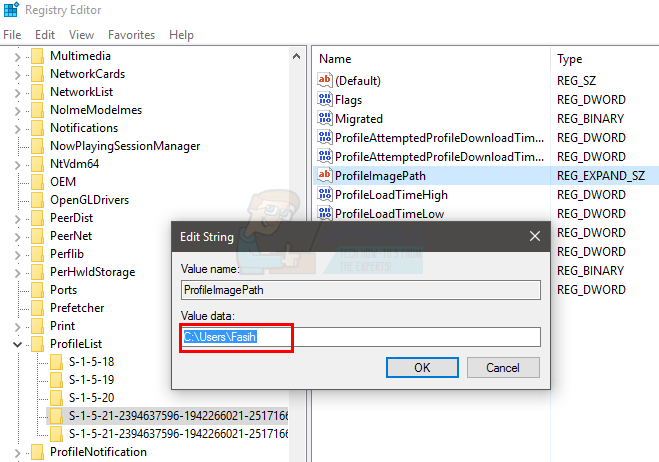
- Locate the folder that has the .bak extension at the end of the name and select it
- Double click ProfileImagePath from the right pane
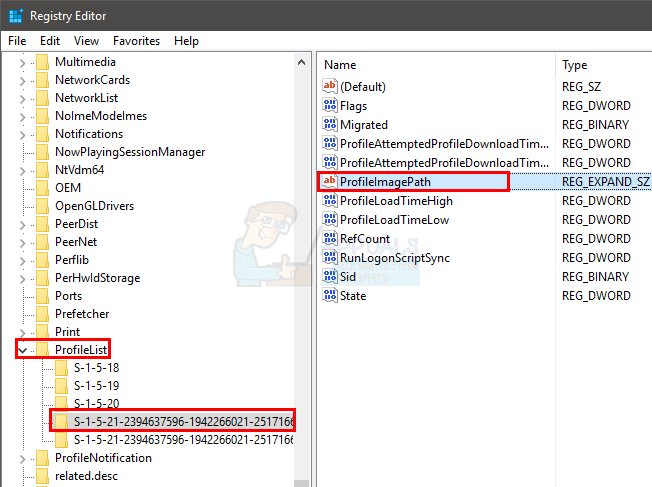
- The value of the ProfileImagePath should be something like C:\Users\USERNAME (where USERNAME will be the actual username of the profile)
- Now, you need to go the location of this account folder and make some changes.
- Hold Windows key and press R
- Type C:\Users and press Enter
- Now check if there is a folder with the same name as the one you found in the ProfileImagePath value (step 17)
- If the name of the folder is different (it should have a “2” at the end) then right click the folder and select Rename. Rename the folder to the name you found in the step 17
- Now, come back to the Registry Editor and look in the left pane. Look if there is a folder above the .bak extension folder with the same name (but without the .bak extension). For example, if the folder name was S-1-0-000.bak then the folder above it should have the name S-1-0-000. If there is a folder with the same name as the .bak version then do the following
- Right click the folder without the .bak extension and select Rename. Add .backup at the end of the folder name. For example, if the name was S-1-0-000 then it should be S-1-0-000.backup. Once you have renamed, press Enter
- Right click the folder with the .bak extension and select Rename. Remove .bak from the name of the folder. For example, if the name was S-1-0-000.bak then it should be S-1-0-000 Once you have renamed, press Enter
- Right click the folder with the .backup extension and select Rename. Add .bak at the end of the folder name instead of the .backup. For example, if the name was S-1-0-000.backup then it should be S-1-0-000.bak Once you have renamed, press Enter
- If you had only a single folder with that name (with the .bak extension) then do the following
- Right click the folder with the .bak extension and select Rename. Remove the .bak part of the name and press enter. For example, if the name was S-1-0-000.bak then it should be S-1-0-000 now
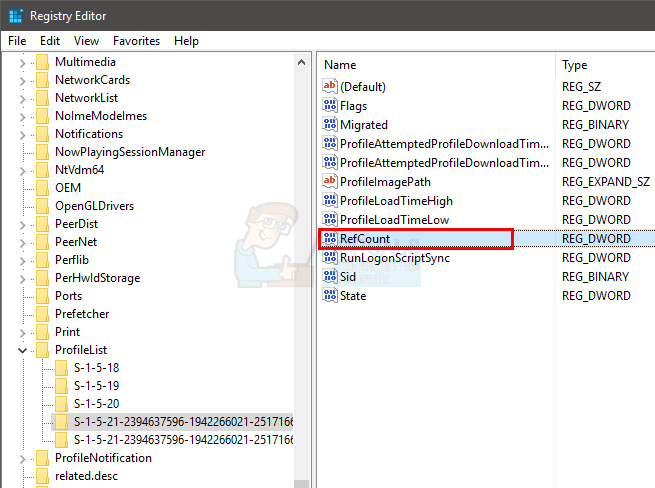
- Now, select the folder you just changed the name of (the folder without the .bak extension)
- Double click the RefCount entry from the right pane. If there isn’t a RefCount entry in the right pane then you will have to make it yourself. Simply right click on an empty space in the right pane and select New > DWORD (32 bit) Value and name it RefCount. Once done, press Enter to confirm
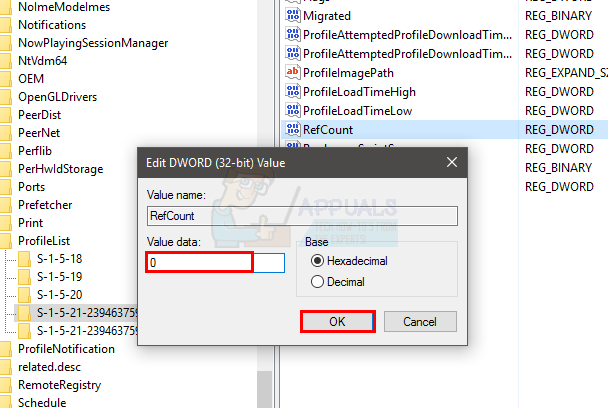
- Once you double click the RefCount, you should be able to see a new window with an option names Value data. Enter 0 in the Value data and press Ok
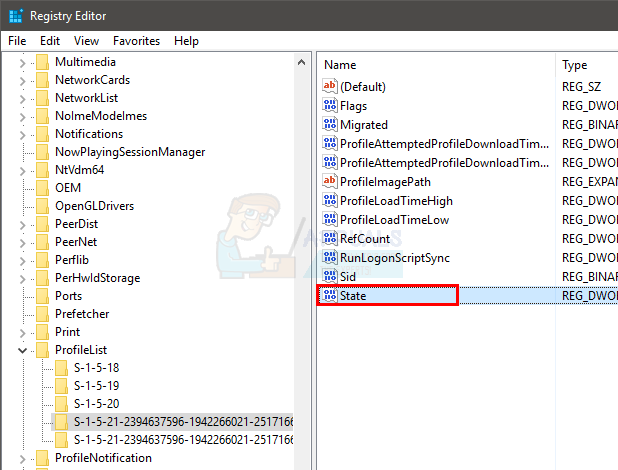
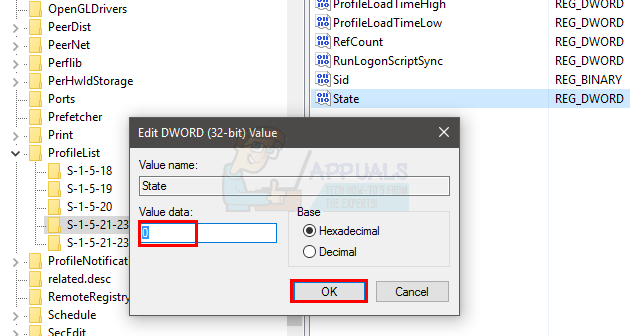
- Make sure the folder without the .bak extension is selected. Locate and double click the entry named State. If there isn’t a State entry in the right pane then you will have to make it yourself. Simply right click on an empty space in the right pane and select New > DWORD (32 bit) Value and name it State. Once done, press Enter to confirm
- Once you double click the State, you should be able to see a new window with an option names Value data. Enter 0 in the Value data section and click Ok
- Once done, close the Registry Editor and reboot.
You should be good to go now. Your profile should be fixed. Log in with your original account (the one you fixed) and check if the problem persists.
Method 2: Turn Off Tablet PC Components
Turning off the Table PC Features option from the Uninstall a program window has been fruitful in rectifying this problem. Here are the steps for turning this option off
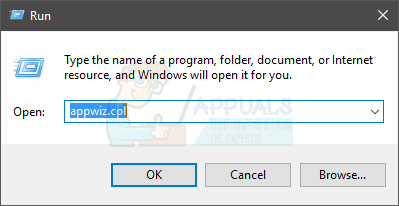
- Hold Windows key and press R
- Type appwiz.cpl and press Enter
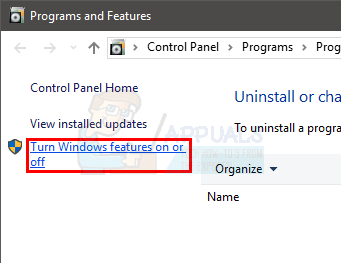
- Click Turn Windows feature on or off
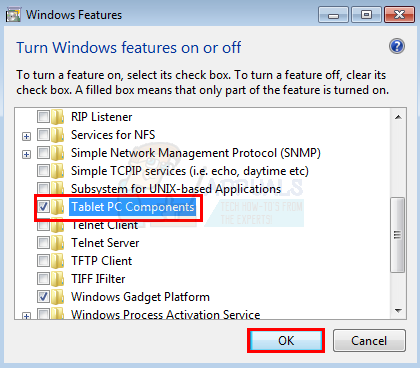
- Scroll down in the newly created window and uncheck the option Tablet PC Components
- Click Ok
The problem should be resolved now.