How to Stop GTA V from Crashing on PC When Starting Up?
The GTA V crashing on startup issue can be caused by several factors, including corrupted or missing files, outdated GPU drivers, and memory leaks.

This guide will assist you in pinpointing the exact cause behind the crashing issue so you can fix it with ease.
1. Verify the Integrity of Game Files
Game files may fail to install correctly or become corrupted during installation or an update. These corrupted or missing files can cause the game to crash on startup.
To fix this issue, verify the integrity of the game files; this will automatically repair any erroneous files.
For the Steam Version:
- Open Steam and navigate to your Library.
- Right-click on GTA V.
- Select Properties.
- Navigate to the Local Files tab and click on “Verify the integrity of game files.”
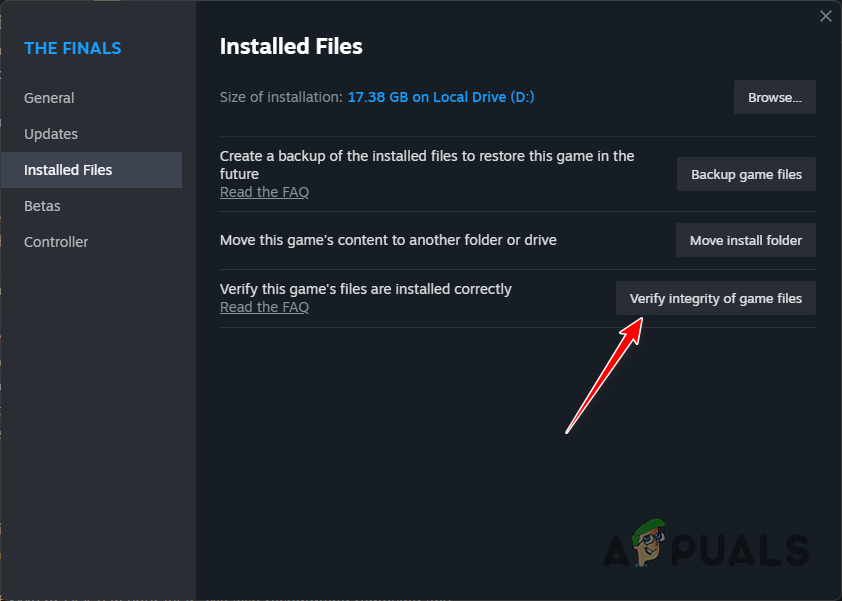
Repairing the game files - Wait for Steam to validate the files.
For Non-Steam Versions:
- Press Windows Key + R simultaneously to open the Run dialog box.
- Type cmd and press Enter.

Opening Command Prompt Using the Run Dialog Box - Type “cd” followed by your game directory and hit Enter, like this:
cd "C:\Program Files\Rockstar Games\Grand Theft Auto V"

Typing in the command - Type “GTAVLauncher.exe -verify” and hit Enter.
This command forces the game launcher to open and start verifying the game files. Launch the game once the files are validated.
2. Use your Dedicated Graphics Card (If Applicable)
The game may utilize the integrated GPU on your processor instead of your dedicated GPU. Because the iGPU is less powerful, it may cause the game to crash on startup.
- Press the Windows key, type Graphics Settings, and press Enter.
- Click the “Browse” button and add the GTA V executable file (.exe).

Adding GTA V to the list of Apps - Once added to the list, click on GTA V and select Options.
- Select High Performance and press Save.

Selecting High Performance Mode - Launch GTA V.
3. Delete Settings Folder
The “settings” file in the GTA V folder within your Documents stores various game settings, including display and graphics configurations. Erroneous settings may cause the game to crash.
To resolve this, delete this folder and launch the game. This will recreate the folder with default settings, fixing any errors within it.
Navigate to the following directory to find and delete the folder:
C:\Users\[Your Username]\Documents\Rockstar Games\GTA V\settings.xml
4. Update Graphics Card Drivers
Outdated graphics card drivers can cause issues, such as stuttering and crashes, with recent game updates. Thus, updating your GPU drivers is essential.
To update your GPU drivers, first identify your GPU through this guide. Uninstall your current GPU drivers using Display Driver Uninstaller (DDU) or AMD’s Cleanup Utility. It’s recommended to boot your system into Safe Mode beforehand.
Then, download the latest drivers from your GPU manufacturer’s website. If you need assistance with the installation process, consult our guide.

5. Close Background Processes and Increase Virtual Memory
Insufficient RAM can also cause GTA V to crash on startup. You can alleviate this issue by closing unnecessary background tasks and increasing your system’s Virtual Memory.
- Press Windows Key + X and select Task Manager.
- Under the Processes tab, find programs using a significant amount of RAM or CPU power.
- Right-click on these programs and select “End Task.”

Closing Unnecessary Background Applications
Then, increase your Virtual Memory with these steps:
- Press Windows Key + R, type systempropertiesadvanced, and press Enter.

Opening the System Properties Menu using the Run Dialog Box - Click the “Settings” button under Performance.

Opening the Performance Settings menu - Go to the Advanced tab and click “Change.”

Opening the Virtual Memory menu - Uncheck “Automatically manage paging file size for all drives.”
- Select “Custom size” and enter 4096 for the Initial size and 8192 for the Maximum size.

Increasing the size of the Virtual Memory - Click OK and then Apply.
- Restart your computer.
6. Reinstall the Game
If none of these solutions work, reinstalling the game is the final step. This will refresh all game files and eliminate any issues with configurations.
Uninstall the game through Steam, Epic, or the Rockstar Launcher, and then reinstall it from your library.


