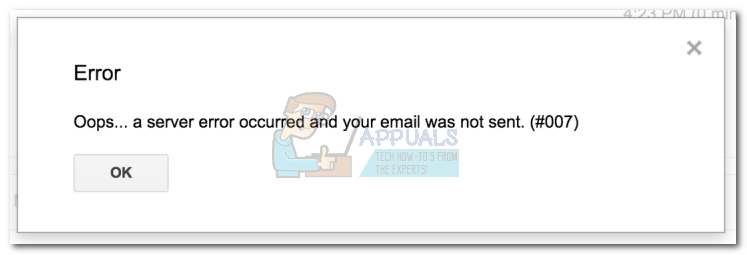
Fix: oops… a server error occurred and your email was not sent. (#007)
Some users have been reporting seeing the Gmail #007 error while attempting to send an outgoing email. The error code is preceded by the following text: “Oops… a server error occurred and your email was not sent”. From our investigations, the issue is only occurring in Firefox and a few other browsers, but not on Chrome.
If you’re currently struggling with this particular issue, the following methods might help. We have managed to identify a few workarounds that users in a similar situation have used in order to avoid the Gmail #007 error. Please follow whichever method seems more convenable to your preferences. Let’s begin!
Method 1: Disable Email Signature from Avast (or another antivirus)
If you’re using an external antivirus suite, the problem is most likely happening on your PC rather than on Gmail’s email servers. Avast, AVG, and McAfee are notoriously known for triggering this issue when they are not prevented from scanning the email signature of outgoing emails. In order to check if they are causing this issue, disable your antivirus and check if that helps and if it does, follow the guide below.
The most elegant way to solve this issue is to instruct your antivirus to avoid scanning the signatures of the emails you send. The steps are really specific to each security suite, but you can generally find this option listed as Scan Email Signature.
- In AVG, you can find this setting listed under Settings > General. Once you’re there, deactivate the checkbox associated with Email Signature and hit Save.
- In Avast, go to Settings > General and disable the checkbox next to Enable Avast email signature and hit Save.
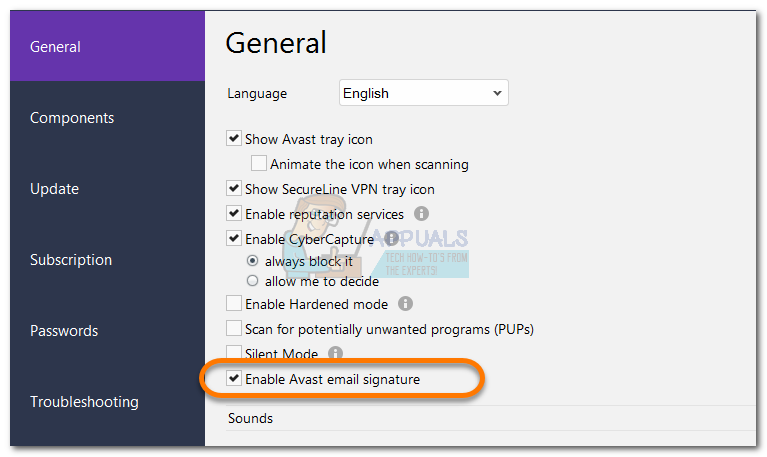
After you restart your browser, you should be able to send emails normally (without the Gmail error #007).
Note: If you’re not able to identify the setting that prevents your antivirus from checking the signature mail, you can also temporarily disable the security suite while you send your email. Of course, this is not ideal, but it will enable to get past the Gmail error #007. Additionally, consider using another security suite that is more relaxed with signature emails – the built-in Windows Defender will not cause any issues) with your outgoing email signatures.
In the event that you’re fond of your antivirus, move down to Method 2 for an alternative solution.
Method 2: Using a different browser
I know this method is not necessarily ideal, but if your antivirus doesn’t have a built-in setting that instructs it to avoid scanning the signature mail, you can try using a web browser other than Firefox in order to avoid the Gmail error #007. This method is generally to be preferred if you’re fond of your 3rd party antivirus solution.
With this in mind, consider using Chrome or Opera to send the same email that was previously failing using the Gmail web app. Your outgoing emails should arrive at their destination without issues.
Method 3: Disable Avast Email Shield
In some cases, the issues might be triggered due to the email virus protection feature of Avast due to which it scans and looks for viruses/malware in your email inbox/spam folder. Therefore, in this step, we will be disabling Avast’s email shield. For that:
- Open “Avast” from the system tray and select the “Settings” option from the lower left.
- Select the “Components” option from the left tab.
- Turn off the button toggle next to the “Mail Shield” option and click on the dropdown next to it.
- Select the “Stop Permanently” option.
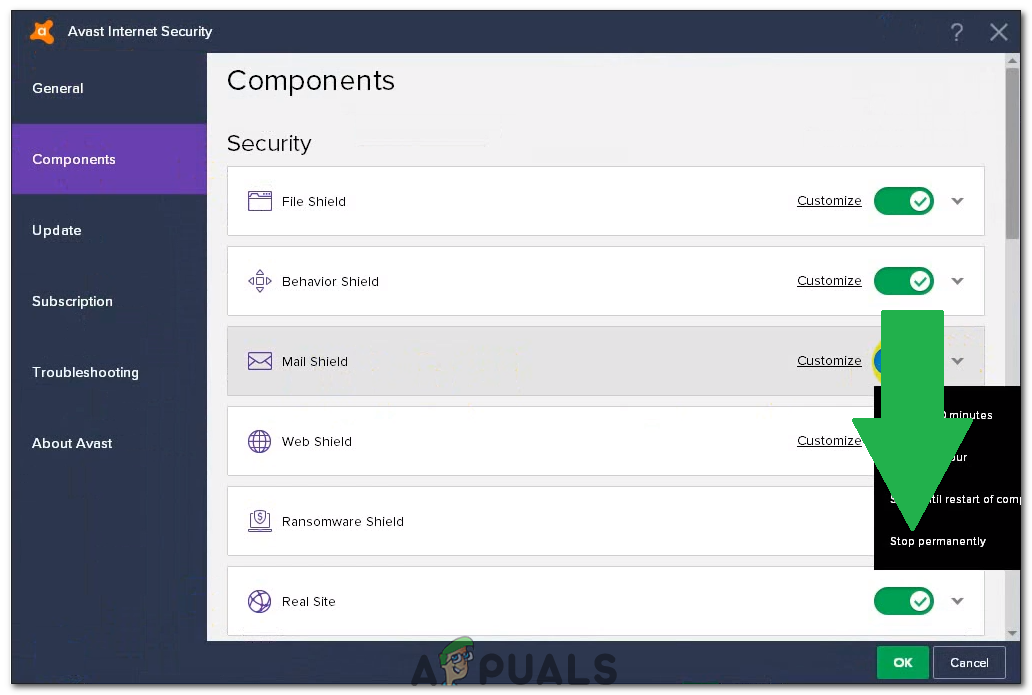
Clicking on the “Stop Permanently” option - Check to see if the issue persists.
Method 4: Clearing Web History
In certain cases, the web history that your browser records after every search and the cookies being stored by the browser to decrease loading times might have been corrupted due to which this error is being seen. Therefore, in this step, we will be clearing the web history. Follow the method for your respective browser.
For Chrome:
- Click on the “Menu” button on the top right side of the browser.

Clicking on the Menu Button. - Select “Settings” from the dropdown.
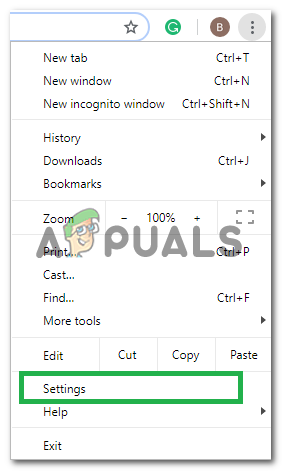
Clicking on “Settings” from the drop-down. - Scroll down and click on “Advanced“.
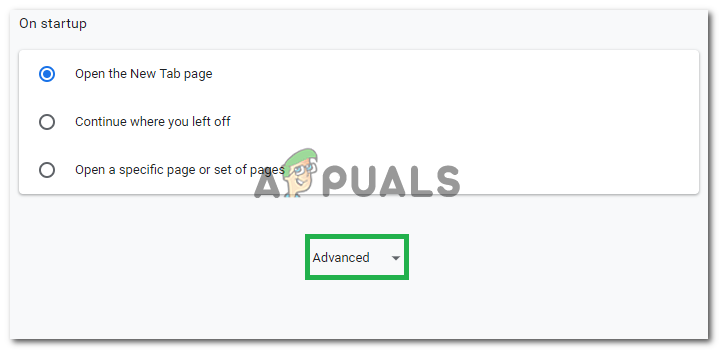
Clicking on “Advanced” - At the end of the “Privacy & Security” heading, click on the “Clear Browsing Data” option.
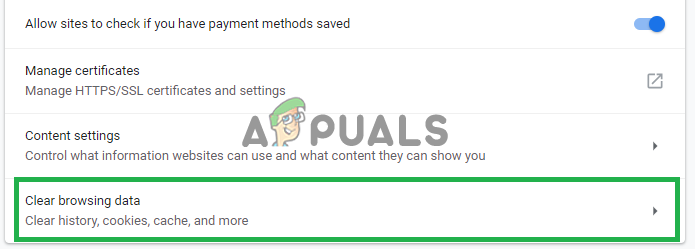
Clicking on “Clear Browsing Data”. - In the time range, select “All time“.
- Make sure that both the “Cookies and other site data” and “Caches image and files” options are checked.
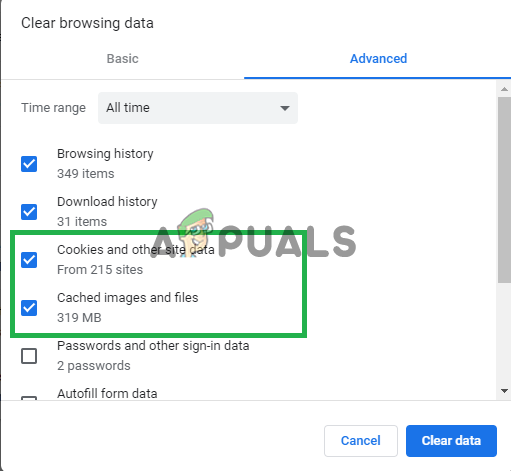
Checking both the options. - Now click on the “Clear data” option.
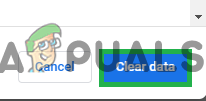
Selecting the “Clear Data” option. - This will now clear all the cookies and the cache, check to see if the problem persists.
For Firefox:
- Click on the “Menu” button on the top right corner.
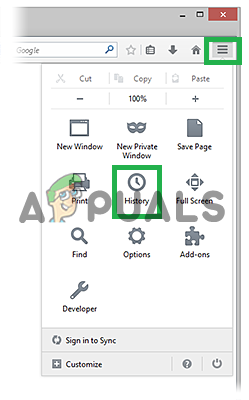
- In the History menu, select “Clear History”
Note: Press “alt” if the menu bar is hidden - In the “Time range to clear” dropdown menu, select “All time”
- Select all the options below.
- Click on “Clear Now” to clear your cookies and cache.
For Microsoft Edge:
- Click on the “Three Horizontal Lines” on the top right side.

Clicking on the “Three Horizontal Lines” button - Click on “history” on the right pane.
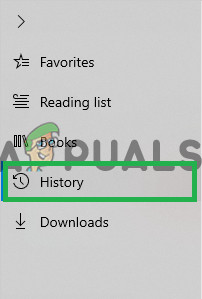
Clicking on history - Select the “Clear History” button on the top of the pane.

Clicking on Clear history - Check all the boxes and select “Clear”
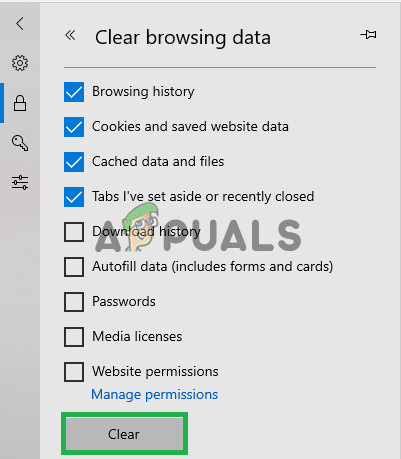
Checking all the boxes and clicking on “Clear”
Note: If you are using a different browser you can check this information on their support site.
If none of the methods shown above have helped you at all. You can try using another Gmail account if that works for you it’s possible that there is something wrong with your account. You can try to report the issue to Google and they should help you fix this issue. It’s also worth mentioning, some people reported that using Incognito mode to send email fixed the issue for them.
