Fix: GeForce Experience Game cannot be optimized
GeForce is a brand of graphics processing units (GPU’s) designed and marketed by Nvidia. They consist of high-end units made to deliver performance on any machine. There is an application named GeForce Experience which helps you optimize games, take recordings, and help you update the drivers whenever necessary.
Many users recently reported that they were unable to optimize their games using GeForce Experience. An error occurred whenever they navigated to the optimization menu. There are several causes of this; the most common one is the corruption of local files and Nvidia drivers.
Solution 1: Deleting User Configuration Files
The most effective solution for this problem is to delete all the user configuration files present on your machine. GeForce Experiences works after creating these configurations files in your C drive and uses these as a reference whenever it is operating. We can try deleting these files so when you run the application next time, it will automatically create new ones.
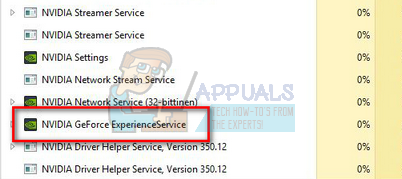
- Press Windows + R, type “taskmgr” and press Enter. Once in the task manager, look for all GeForce experience tasks and end them. Make sure that the application is not running before proceeding further.
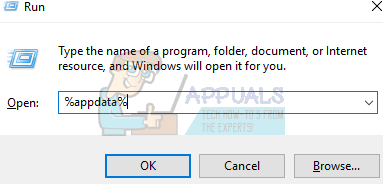
- Press Windows + R to launch the Run application. Type “%appdata%” in the dialogue box and press Enter.
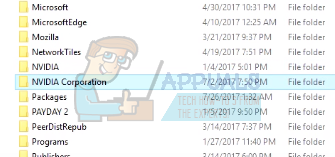
- Press AppData present at the address box present at the near top of the screen to be navigated to the previous page. Then open the folder “Local”.

- Open the folder named “NVIDIA Corporation”.
- Now navigate further to “GeForce Experience” and delete the “CefCache” folder permanently.
- Restart your computer and check if the problem got solved.
Solution 2: Reinstalling the GeForce Application
Another quick fix which worked for many users was uninstalling the GeForce application before reinstalling a fresh version downloaded from the official website. The GeForce application might not be up-to-date or the application might have configuration issues with your system.
- Press Windows + R, type “appwiz.cpl” in the dialogue box and press Enter.
- Once in Programs and Features window, navigate through all the applications until you find GeForce Experience. Right-click it and select “uninstall”.
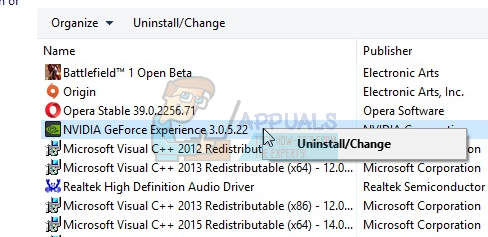
- After the uninstallation, download the latest version from Nvidia’s official website and install it accordingly.
- Restart your computer and check if the problem got solved. In some cases, you might need administrative privileges to install new applications on your computer.
Solution 3: Disabling Antivirus Software and Firewall
We can try disabling your Firewall and check if the problem gets solved. Windows Firewall monitors your incoming and outgoing internet data and packets. It also blocks some connections or some applications from installation if they don’t fulfill its criteria. You should also disable any antivirus software which is enabled on your computer.
- Press Windows + R button to bring up the Run application. In the dialogue box type “control panel”. This will open your computer’s control panel in front of you.
- In the top right there will be a dialogue box to search. Write firewall and click on the first option that comes as a result.
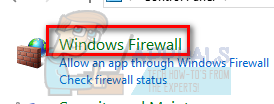
- Now at the left side, click the option which says “Turn Windows firewall on or off”. Through this, you can turn your firewall off easily.

- Select the option of “Turn off Windows Firewall” on both the tabs, Public and Private Networks. Save changes and exit. Restart your computer and check if the problem gets resolved.
Solution 4: Using Recommended Optimal Settings
It can also be the case that GeForce experience isn’t working as expected because you have changed some settings. When you ask Nvidia to optimize any game, it tends to look at several parameters before optimizing the game so it performs the best on your computer. We can enable the optimal settings using the application and check if this makes any difference.
- Open Nvidia GeForce Experience application. Navigate to “Preferences” tab and click on “Games” present at the left side of the window.

- Enable the checkbox named “Recommend optimal settings”.

- Restart your computer and check if the problem went away.
Solution 5: Updating Graphics Driver
If all the above solutions don’t work, we can try updating the graphics driver. It may be possible that your graphics driver is not properly configured or is outdated. We need to completely delete all driver files before we install the new driver, therefore, we need to use the utility Display Driver Uninstaller. You can download the utility over the internet easily.
- After installing Display Driver Uninstaller (DDU), launch your computer in safe mode. You can learn how to boot your computer into safe mode by reading our article on it.
- After booting your computer into safe mode, launch the application which was just installed. Choose the option Safe Mode.

- After launching the application, select the first option “Clean and restart”. The application will then automatically uninstall the installed drivers and restart your computer accordingly.

- Boot your computer into normal mode and launch the application. Open the “Drivers” tab and click the button “Driver Download”. Enter your specification on the right side of the screen and click “Start search” for the application to search for the optimal drivers for your computer.

- After the driver is updated, restart your computer and check if the problem got solved.
Note: Often there are some applications which might be interfering with the application. Make sure that there are no such applications running on your computer. Also, try logging into an administrator account and check if the games get optimized successfully there.