How to Fix File System Error 2147219196 When Opening Windows Apps
While attempting to open images using the Windows Photo App, you might encounter the File system error 2147219196. This error may also appear when launching other Windows apps such as Calculator, etc. File system error (-2147219196) can prevent the use of certain apps, most commonly the photo app, or a group of apps.

The 2147219196 error is known to be a result of a glitch in a Windows Update. A recent update introduced this bug into the Windows Photo App, affecting many users. While there’s no permanent fix available apart from a Windows update, there are several workarounds that you can try. Options include using the Windows Photo Viewer or opting for a third-party photo viewer. The solutions are outlined below. Start with Method 1 and proceed to the subsequent methods until your issue is resolved.
Tip
The Windows Photo Viewer is a classic photo viewer still available in Windows 10 and is often the best choice. It is easy to use, quick, and the safest solution. With other solutions, you might need to follow technical steps or use a third-party application, which could compromise safety. Plus, you won’t need to download anything else.
To use Windows Photo Viewer, simply right-click on a picture, select Open with, then choose Windows Photo Viewer.
Note: You can also download and use other photo viewers from the internet.
Method 1: Uninstall and Reinstall the Windows Photo App
Uninstalling and then reinstalling the Windows Photo App has helped a considerable number of users resolve their issues.
- First, let’s uninstall the Windows Photos App. Press the Windows key.
- Type powershell in the Windows Start search.
- Right-click on Windows PowerShell in the search results and select Run as administrator.

- Enter Get-AppxPackage Microsoft.Windows.Photos | Remove-AppxPackage and press Enter.


- Click here and download the PsTools package. Just click the Download PsTools link on the webpage.

- Right-click the downloaded zip file and select Extract files… Choose an appropriate location and extract the files.
- Press the Windows key.
- Type command prompt in the Windows Start search.
- Right-click on Command Prompt in the search results and choose Run as administrator.

- Type <PsExec location address>PsExec.exe -sid c:\windows\system32\cmd.exe and press Enter. Note: Substitute <PsExec location address> with the actual path where you extracted the PsTools. For instance, if you extracted to E:\PsTools, the input would be E:\PsTools\PsExec.exe -sid c:\windows\system32\cmd.exe

- Click Agree when prompted.

- A new command prompt will open after you press enter.

- Type rd /s ‘C:\Program Files\WindowsApps\Microsoft.Windows.Photos_2017.37071.16410.0_x64__8wekyb3d8bbwe’ and press Enter in the new Command Prompt. Note: The version number of the Windows Photos App may differ, and thus the folder name too. Here’s how to get the exact folder name:
- Press Windows key + R.
- Type the folder path in the Run dialog and let it auto-complete to the correct version.
- Once auto-completed, copy the path from the Run dialog and paste it into the Command Prompt.
- Note: You can also see the folder name in step 4 above and use that for guidance.
- Press Y when the system requests confirmation.

After completing these steps, you should be all set. Download the Photos App from the Microsoft Store and see if the issue has been resolved.
Method 2: Booting in Clean Boot
At times, third-party applications can interfere with the functionality of the Photo Viewer app, preventing it from working as intended. To address this, we will initiate a Clean Boot on your PC.
- Log in to the computer with an Administrator account.
- Press ‘Windows + R’ to open the ‘RUN’ prompt.
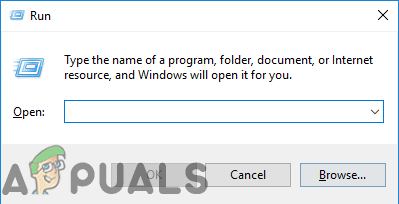
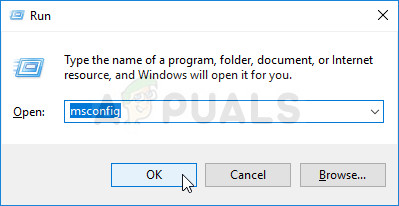
Opening the Run Prompt - Type ‘msconfig’ and press ‘Enter’.
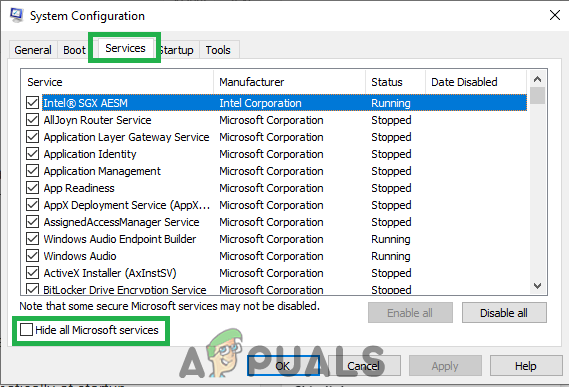
Running MSCONFIG - Click on the ‘Services’ tab and uncheck the ‘Hide all Microsoft Services’ checkbox.
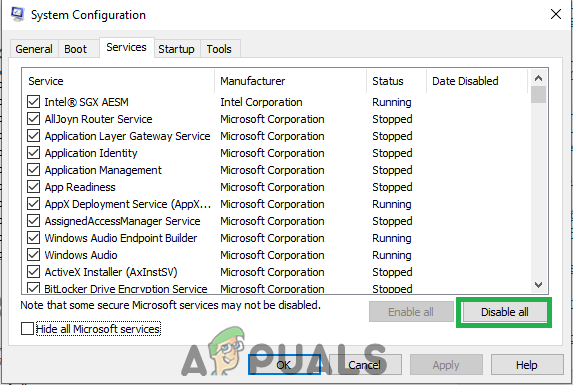
Clicking on the ‘Services’ tab and unchecking the ‘Hide all Microsoft Services’ option - Select ‘Disable All’ and then click ‘OK’.
Selecting the ‘Disable All’ option - Click on the ‘Startup’ tab and select ‘Open Task Manager’.
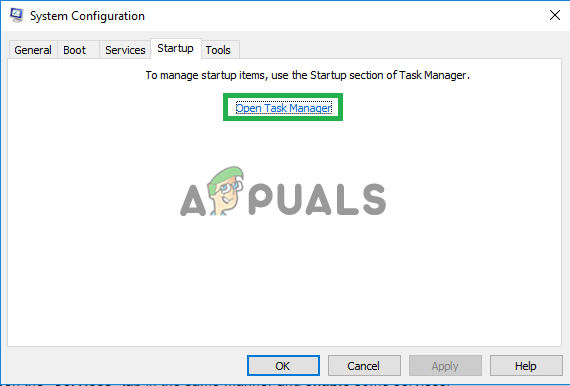
Opening Task Manager from the ‘Startup’ tab - In Task Manager, click on the ‘Startup’ tab.
- For each application with ‘Enabled’ status, select it and choose the ‘Disable’ option.
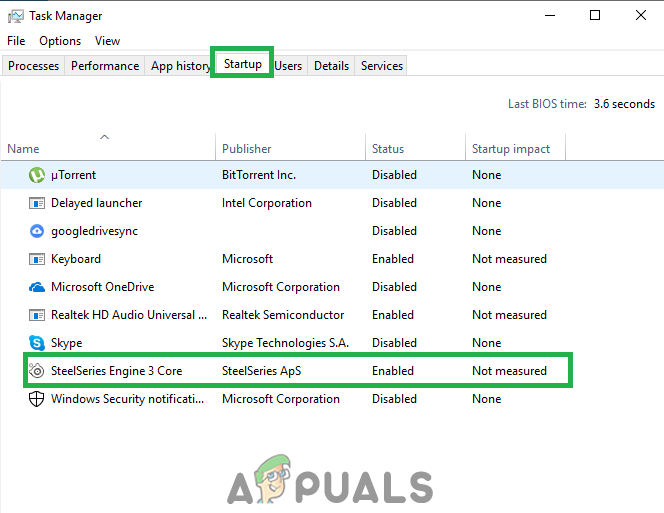
Disabling startup applications - Repeat this for all listed applications and restart your computer.
- With your computer now in a ‘Clean Boot’ state, open the Windows Photo Viewer app and check for the issue.
- If the issue is resolved, re-enable each service one by one to identify the culprit, then keep that particular service disabled.
Method 3: Run the Troubleshooter
The Windows Troubleshooter can automatically identify and resolve issues with default Windows applications. Hence, for problems with the Windows Photo Viewer application, we will run the troubleshooter:
- Press Windows + I simultaneously.
- Select Update & Security.
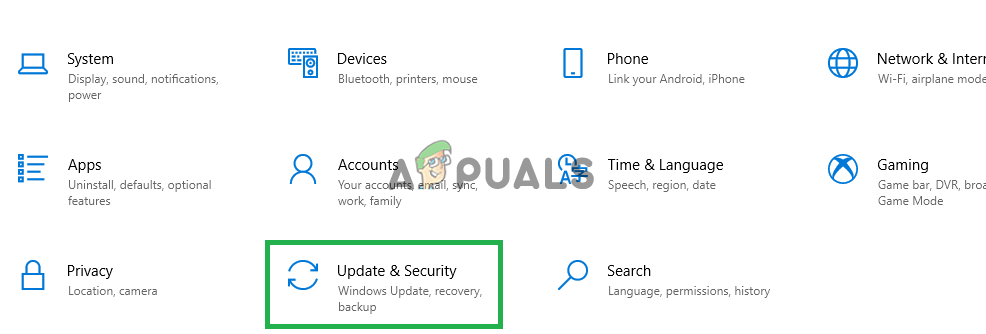
Accessing ‘Updates & Security’ - Choose Troubleshoot from the left pane.
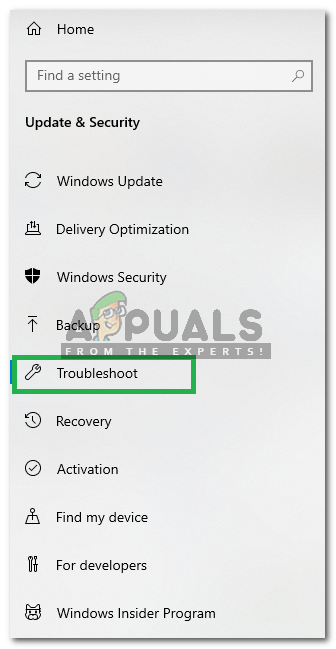
Selecting ‘Troubleshoot’ from the menu - Scroll down and select Windows Store Apps.
- Click Run the troubleshooter.
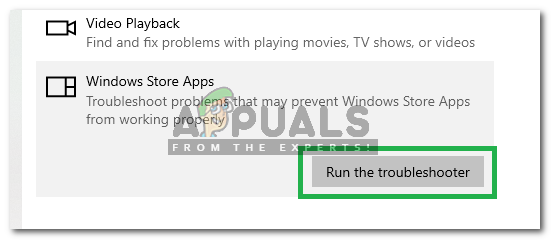
Running the Windows Store Apps troubleshooter - The troubleshooter will try to identify and solve the issue automatically.
Method 4: Fixing the Permissions of the Photo App Folder
If none of the aforementioned solutions worked, it could be due to incorrect permissions for the Photos app folder, which would need manual correction.
- Click on the search button, search for ‘Command Prompt’, and run it as administrator.
- Enter the following command to take ownership of the ‘WindowsApps’ folder.
TAKEOWN /F 'C:\Program Files\WindowsApps' /R /D Y
- After gaining ownership, open the ‘WindowsApps’ folder located at ‘C:\Program Files\WindowsApps’.
- If you cannot locate the folder, ensure that the ‘show hidden files’ option is checked.
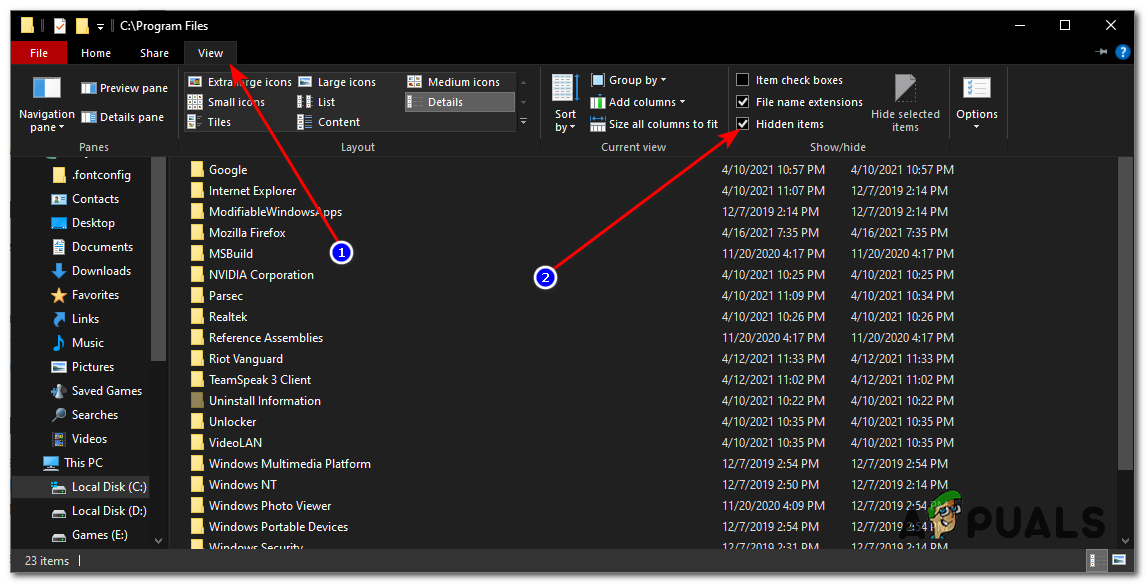
Showing Hidden Files - If prompted with ‘Permission Required’, click ‘Continue’.
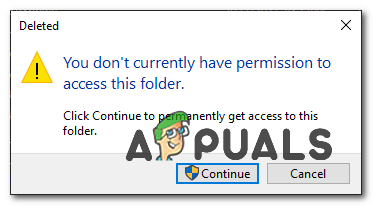
Granting permission to continue - Right-click and select properties on the Photos app folder, which will be named something like ‘Microsoft.Windows.Photos_2017.37071.16410.0_x64__8wekyb3d8bbwe’.
- Go to the ‘Security’ tab and select ‘Advanced’.
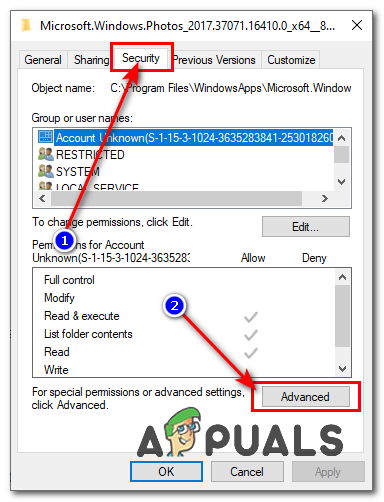
Changing permissions for the folder - In the Advanced permissions section, click ‘Change’ next to ‘Owner’.
- Enter ‘NT SERVICE\TrustedInstaller’ into the text box and press ‘OK’.
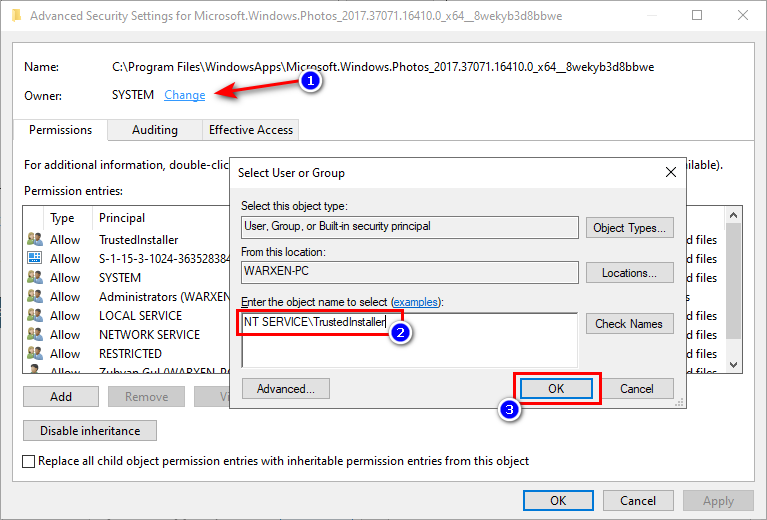
Assigning ownership to TrustedInstaller - Ensure ‘Replace Owner on subcontainers and objects” is checked.
- Click ‘Apply’, then ‘OK’.
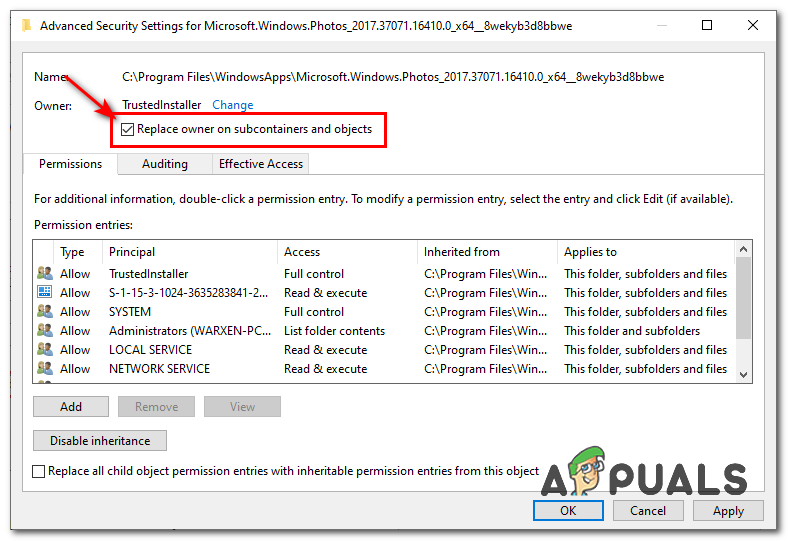
Finalizing permission changes - Click OK to confirm the changes.
- Search for PowerShell, run it as an administrator and execute the command below:
get-appxpackage *Microsoft.Windows.Photos* | remove-appxpackage
- Restart Windows after the command is finished.
- Launch PowerShell as an administrator again and enter the following command to reinstall the Windows Photos app:
Get-AppxPackage -allusers Microsoft.Windows.Photos | Foreach {Add-AppxPackage -DisableDevelopmentMode -Register '$($_.InstallLocation)\AppXManifest.xml'} - Upon completion, check if the issue remains.
Method 5: Windows Update
Given this is a widespread issue, it’s likely a fix will be included in future Windows Updates. If previous methods didn’t resolve your problem, stay updated with the latest releases:
- Press ‘Windows + I’ at the same time.
- Click on ‘Update & Security’.
- Select ‘Check for Updates’ and wait as Windows checks for new updates.
- Any updates found will be downloaded and installed automatically.
- Restart your computer to apply the updates.


