How to FIX The file is too large for the destination file system?
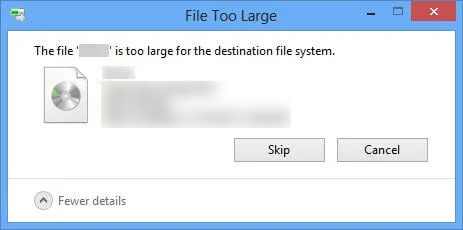
When you’re trying to transfer files to an external drive—like a portable disk or USB flash drive—and you encounter an error message stating “The file is too large for the destination file system”, it can be frustrating. If this happens even after you’ve made sure there’s enough free space on the drive, the issue might be related to its file system format.
The underlying problem is that the external drive could be formatted with the FAT32 or the older FAT16 file system, which come with inherent file size limitations.
Limitations of FAT32/16:
- FAT32: Supports a maximum individual file size of 4 GB minus 1 byte (4,294,967,295 bytes).
- FAT16: (also known as FAT16B in some systems): This older system commonly supports a maximum individual file size of up to 2 GB.
In contrast to FAT32/16, the NTFS and exFAT file systems offer support for larger file sizes:
- NTFS: Has a theoretical maximum file size limit of 16 EB (exabytes), although in practice, the file size limit is often constrained by the storage device and its architecture rather than the file system itself, allowing for very large file sizes well above the sizes commonly handled by individual users.
- exFAT: Designed for flash drives and external drives, it has a maximum file size that can technically go up to 16 EB, similar to NTFS. It’s widely compatible with different operating systems, making it a suitable choice for devices that will be used across Windows and Mac computers.
To address the file transfer issue with larger files (over 4 GB), follow these steps to format your external drive with NTFS or exFAT (Windows 10/11).
Method 1: Convert FAT32 to NTFS Without Data Loss
Before starting, ensure you have a backup of your data, even though this process should not cause data loss.
- Open the Command Prompt with administrator rights:
– Press `Windows + X` and select “Command Prompt (Admin)” or “Windows PowerShell (Admin)”. - Type the following command and press Enter, replacing “drive_letter” with the letter of your external drive:
convert drive_letter: /fs:ntf
Example: convert J: /fs:ntfs
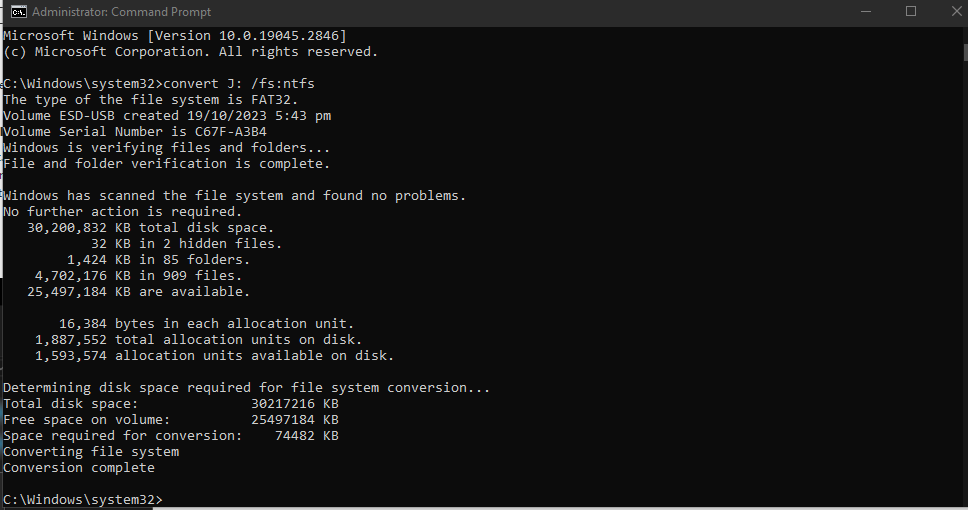
- The conversion process will start. Keep the Command Prompt open until the conversion is complete.
Method 2: Change the File System with Windows Formatting Feature
Important reminder: Formatting a drive will irretrievably erase all existing data on it. It is crucial to back up any files you wish to keep to another location before proceeding with the format. After ensuring you have a secure backup, you can safely format the drive and then transfer the files back onto it once the process is completed.
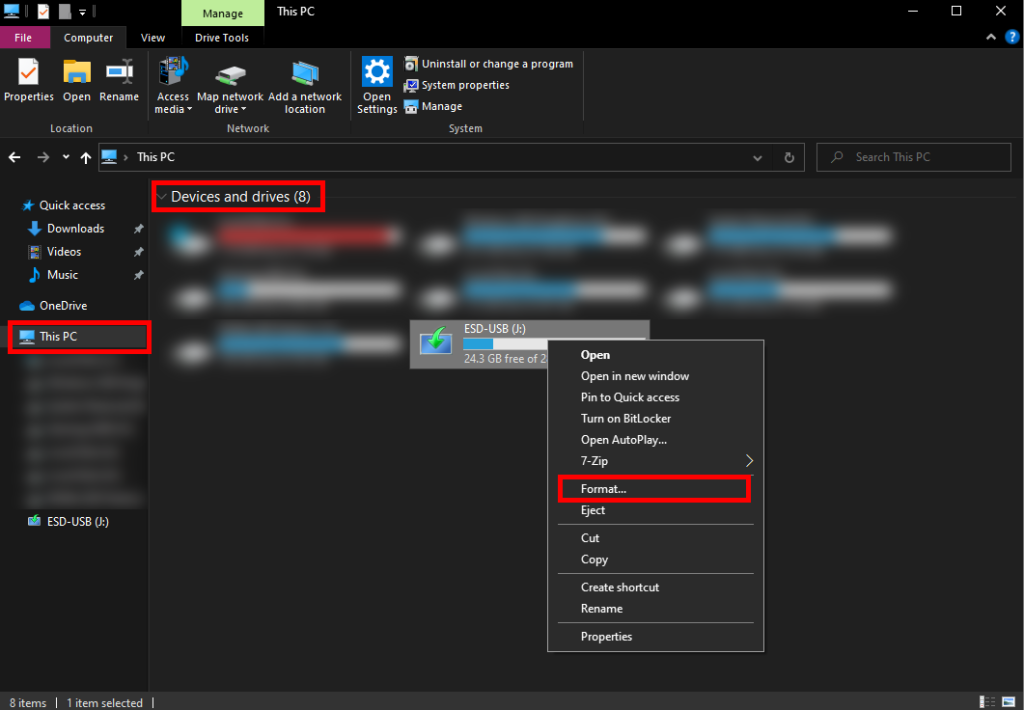
- Open the File Explorer and navigate to ‘This PC’
- Locate your external drive under ‘Devices and drives’.
- Right-click on the drive and select ‘Format’.
- In the Format window, select ‘NTFS’ or ‘exFAT’ from the ‘File system’ drop-down menu.
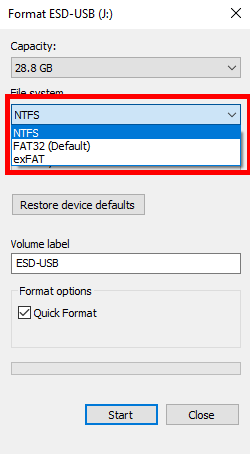
- If you’re in a hurry, you can select ‘Quick Format’, which is faster as it does not scan the disk for bad sectors. It simply removes the files from the file system’s tables. If you want to check the drive for bad sectors and ensure it is thoroughly formatted, leave ‘Quick Format’ unchecked to perform a full format.
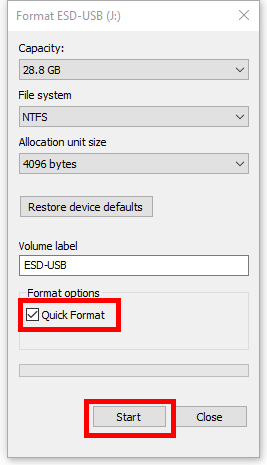
- Click ‘Start’ and wait for the formatting process to complete.
After formatting, you can transfer files over 4 GB to the external drive without encountering the previous error.
To format the drive on older Windows versions as NTFS, open My Computer -> Right-click the ‘drive letter’ (I have H: as mine, yours may be different). Select NTFS for the File System, then place a checkmark on Quick Format and click Start.
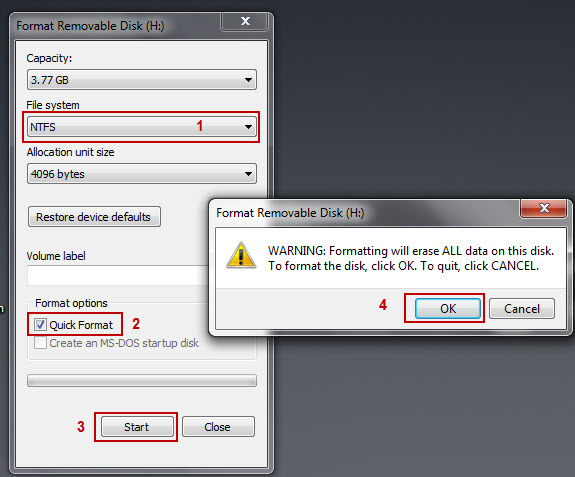
After it has been formatted as NTFS, you can start copying your files.
Please remember that formatting a drive will erase all existing data on it, so ensure you have backups before proceeding. Additionally, if you plan to use the external drive with non-Windows devices, consider formatting with exFAT for greater compatibility. NTFS is primarily used with Windows systems and might be read-only on macOS or require special configurations on Linux unless third-party drivers are installed.
Thank you so much!