Fix: Failed to Enumerate Objects in the Container
The error message “Failed to enumerate objects in the container” comes up when you are trying to change the permissions of a file or a folder. As it turns out, this can happen when the file or the folder is from external storage and you have recently moved/copied it. In addition to that, when a file/folder is shared across multiple local users, this issue can pop up in such cases as well. In this article, we are going to show you how to get rid of the error message in question so that you can change the permissions as per your requirements.
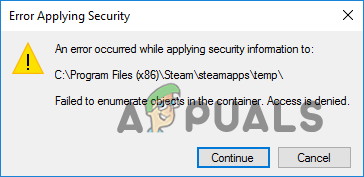
As it turns out, solving the error message in discussion is quite simple. Essentially, you need to add yourself as an administrator of the file or folder and you should be able to change the permissions after it. There are two ways you can go around that, and we are going to be covering both of them so you can follow whichever looks easy to you. With that said, let us get started and show you how to fix the error message in question.
Using Elevated Command Prompt
The first way that you can use to get rid of the issue mentioned above is by using an elevated command prompt. Since we are going to be using an elevated command prompt i.e. command prompt with administrator permissions, you are going to require an admin account. In case you are not logged in as an administrator, you will not be able to get through this.
Therefore, before starting, make sure that you are signed in as an administrator. Now, as apparent from the title, we are going to be using the command prompt to enter some commands in this method. However, if that is something that you are not comfortable with, you can jump to the next method down below which goes through a more user-friendly approach.
Using the command prompt window, we are going to be taking ownership of the file/folder and then assigning administrator permissions to ourselves over the file/folder. This is done through the takeown and icacls commands. Follow the instructions given down below to do this:
- First of all, open up the Start Menu and search for the command prompt. Right-click on the result shown and choose Run as administrator from the drop-down menu. Alternatively, you can click on the Run as administrator option given to the right-hand side to start the command prompt as an admin.
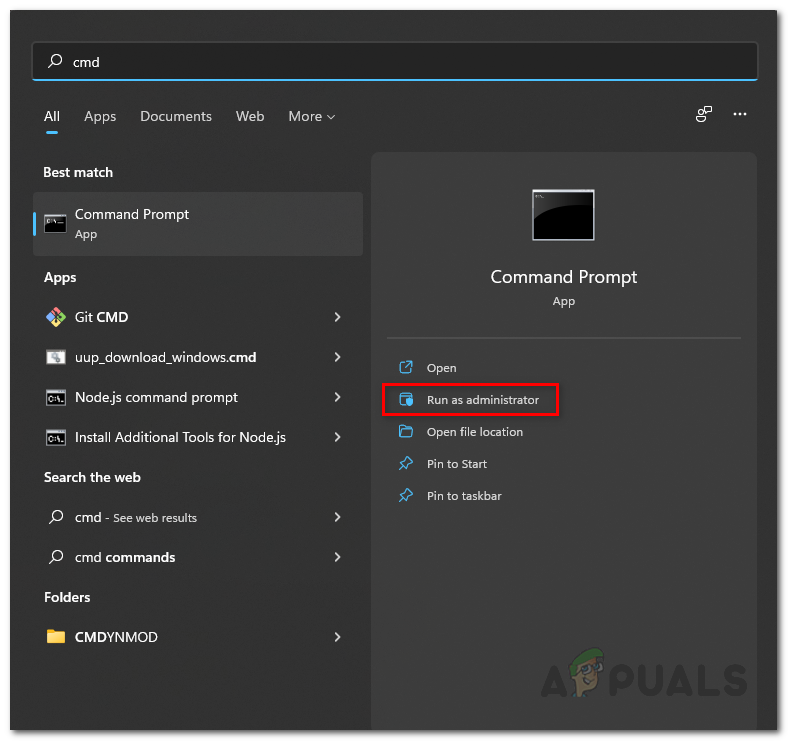
Running Command Prompt as an Admin - Once the command prompt window is open, type in the following commands one by one:
takeown /F X:\FULL_PATH_TO_FOLDER
takeown /F X:\FULL_PATH_TO_FOLDER /r /d y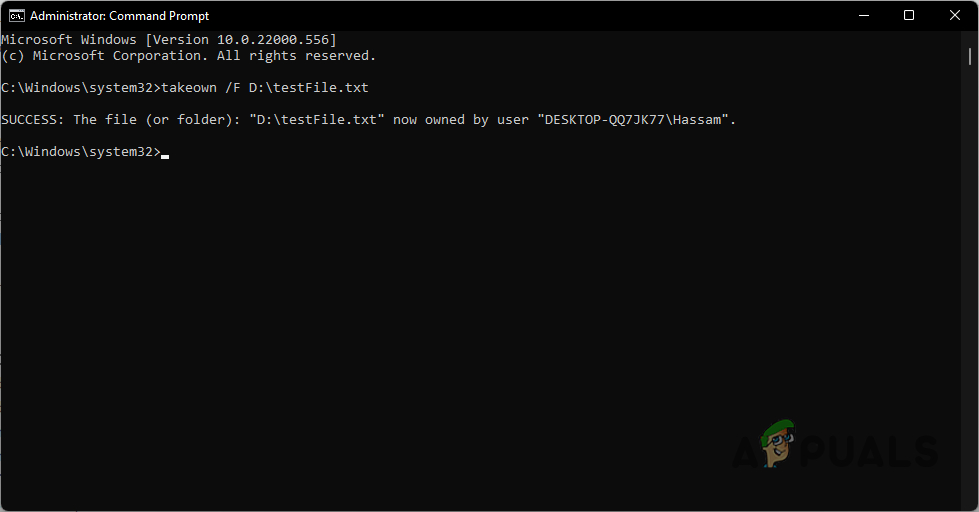
Taking Ownership of the File/Folder - Here, make sure to replace X:\FULL_PATH_TO_FOLDER with the correct address or path in your case. This will give you ownership of the folder/file specified.
- With that done, enter the following commands one by one:
icacls X:\FULL_PATH_TO_FOLDER /grant Administrators:F
icacls X:\FULL_PATH_TO_FOLDER /grant Administrators:F /t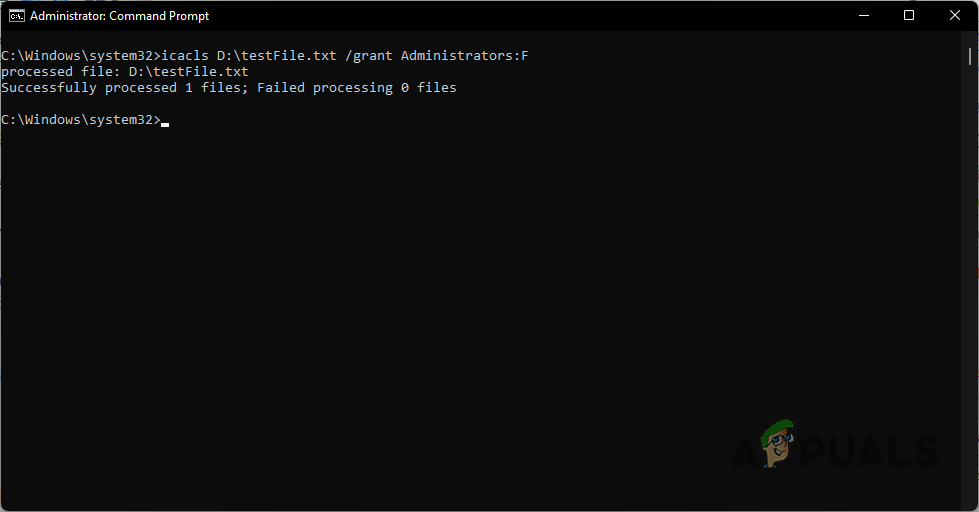
Granting Administrator Privileges - Again, make sure to replace X:\FULL_PATH_TO_FOLDER with the correct path in your case. These commands essentially grant your administrator privileges over the specified file/folder.
- Once you have done that, you can close out the command prompt window.
- Finally, see if the error message still appears.
Using File Explorer
As it turns out, the second method of taking ownership of the problematic file or folder is through the File Explorer window. This is more of a graphical approach and thus it is much more user-friendly. Therefore, if you are not tech-savvy and don’t want to get into the command prompt, this is just the method for you.
To take ownership of the file/folder, follow the instructions that have been provided down below:
- First of all, navigate to the location where the file/folder is located.
- Right-click on the file/folder and from the drop down menu, choose Properties.
- On the Properties window, navigate to the Security tab.
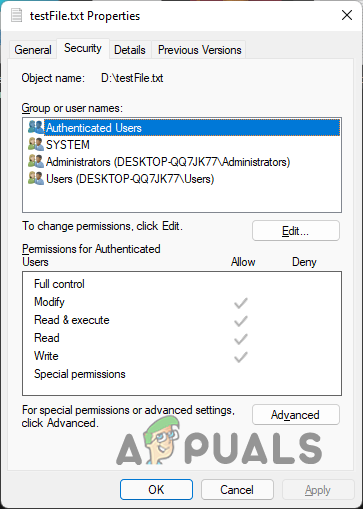
Security Tab - There, click on the Advanced option near the bottom right corner.
- After that, on the follow up window, click the Change option provided next to Owner.
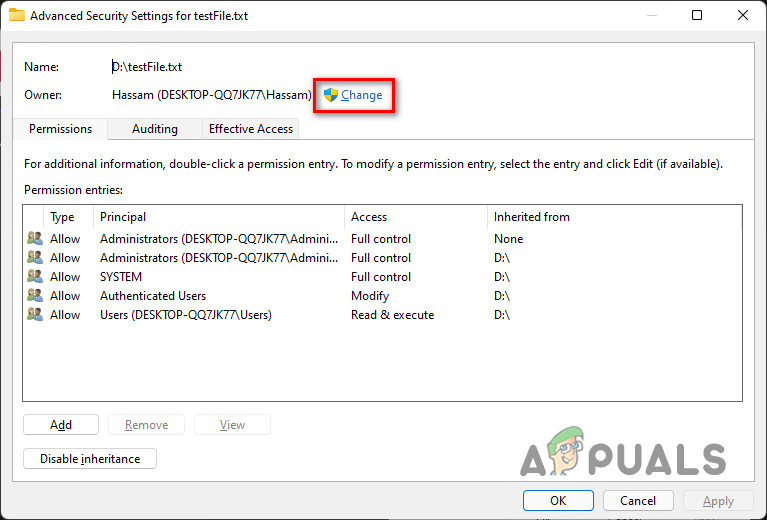
Changing Ownership - Then, enter your user account name in the empty space under the Enter the object name to select text.
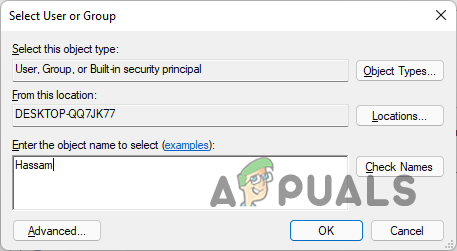
Selecting User - Once you have done that, click on the Check Names button. Windows will list your account at this point and you will be able to see an underline under your account name. Then, click OK.
- Now that you have done that, check the Replace owner on subcontainers and objects checkbox along with the Replace all child object permission entries with inheritable permission entries from this object checkbox at the bottom left corner.
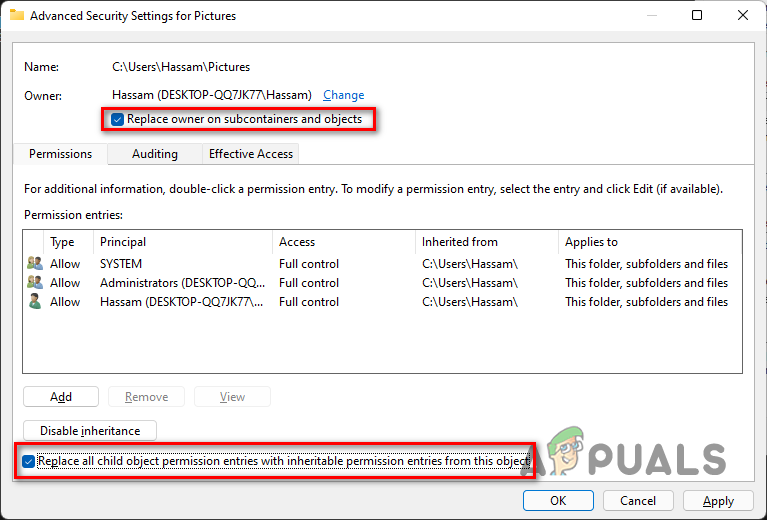
Taking Ownership of the File - Then, click Apply and then click OK.
- After that, on the Properties window, switch to the Security tab and click on the Advanced button again.
- Up next, click the Add button.
- Then, click on the Select a principal option provided. This will open up a similar window as in step number 6. Repeat step 6 and 7 at this point again.

Adding New Principal - After doing that, check all the checkboxes under Basic permissions and then click the OK button.
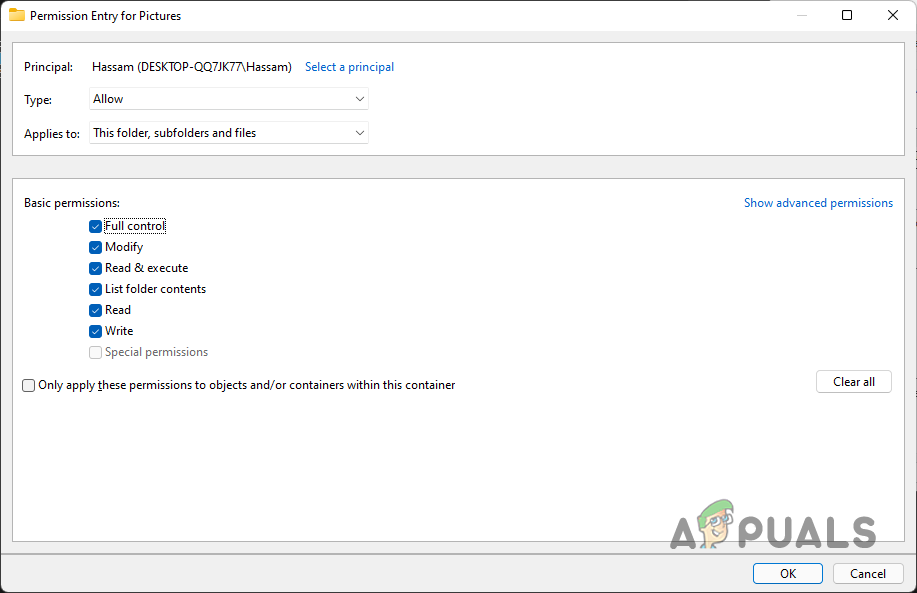
Giving Full Access to User Account - Finally, tick the Replace all child object permission entries with inheritable permission entries from this object checkbox again.
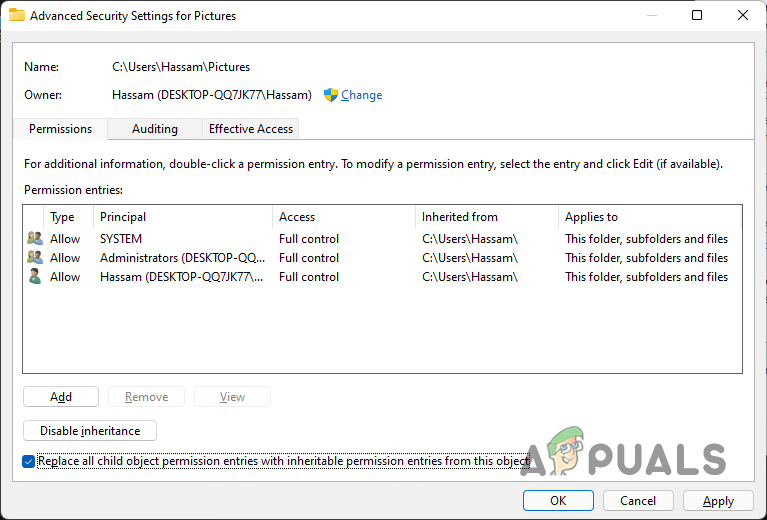
Replacing Permissions of Child Objects - Click Apply and then hit OK.
- Once you have done all of that, the problem should now be gone. Check to see if it still persists.