Fix: “Error loading media File could not be played” on Chrome
Users will encounter the “Error loading media: File could not be played” error when trying to watch a video on a self-hosted video content website. The issue mainly occurs when trying to load a file in a nonsupported format using JW Player. Most of the time, the error is triggered when the JW Player is tasked with loading a .wmv or .mov video that doesn’t use the H264 video codec.
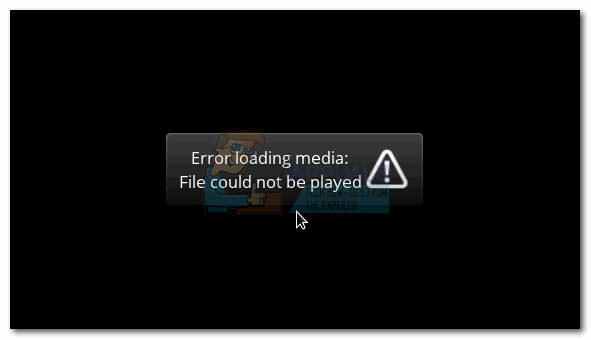
Although the issue is commonly encountered on both desktop and mobile versions of Chrome, the error is not exclusive on this browser – The issue is also known to appear in Firefox and Safari. As it turns out, the issue is either caused by incorrect configuration of the embedded media player or is triggered by certain browser cookies or plugin (extension).
What is JWPlayer?
JW Player is the world’s most popular embeddable media player with 20 billion monthly streams. Because it’s extremely lightweight, works pretty well across all browsers (even outdated versions), and integrates seamlessly with every ad network, it has become the preferred choice for all the major websites that feature self-hosted video content.
Although it’s arguably the most stable media player for embedded videos, an incorrect configuration might force JW player to load a video file that is not supported by the media player. This will trigger the Error loading media: File could not be played error. If the error is a mistake made by the web administrator, the end-user has very few means of fixing the issue.
Fixing the Error loading media File could not be played
If you’re currently struggling with this issue, you should start by determining if it’s a media player problem or if your browser is causing the trouble.
You can do this easily by opening the exact same URL in a different browser. If you encounter the same error, you can probably assume that the problem is beyond your control. The best thing to do in this case is to contact the web administrator of the respective website and ask for an investigation regarding your issue.
In the event that the video plays just fine on a different browser, you’ll need to follow some troubleshooting steps to identify the issue. Below you have a collection of methods that have successfully enabled Chrome users to get past the Error loading media File could not be played error.
If you’re currently struggling with this issue and you blame your Chrome browser for it, troubleshoot using the methods below. Follow each potential solution in order until you find a viable fix.
Note: Keep in mind that depending on the platform, not all methods will be applicable.
Method 1: Update Chrome to the latest version
If you previously determined that the error is only appearing with Chrome, start by making sure that you have the latest version. JW Player regularly updates the list with supported formats, but they might not work properly if you’re using an outdated version of Chrome.
PC users
Normally, Chrome is configured to automatically download and apply the updates in the background whenever you close and reopen the browser. But if you don’t close it for a while, you might have a pending update. Here’s a quick guide to manually updating Chrome on a PC:
- In Chrome, access the action menu (three-dot icon) in the top-right corner.
- Click on Update Google Chrome.
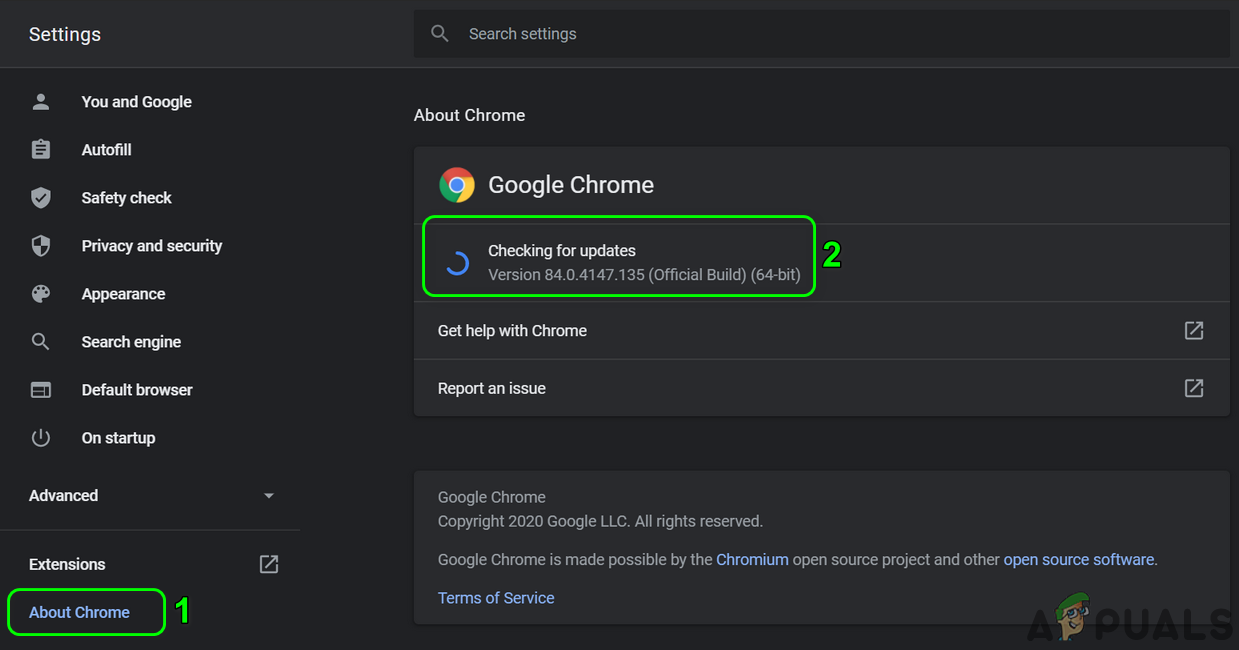
Update Chrome Note: If you don’t see this entry, you’re on the latest version.
- Once the update is successfully downloaded, click the Relaunch button. Chrome will automatically launch with the latest version.
Android users
Similar to how it is on PCs, Chrome should automatically update whenever a new version becomes available on Android. However, this process might be halted by a Google Play Store setting. By default, Play Store is preventing downloading app updates from a mobile data connection. If you haven’t connected to a Wi-Fi network for a while, you might not have the latest version. Here’s how to update Chrome on your Android device:
- Open the Play Store app and tap the action menu (top-left corner).
- Go to My apps & games to see a list of all available updates listed under Updates.
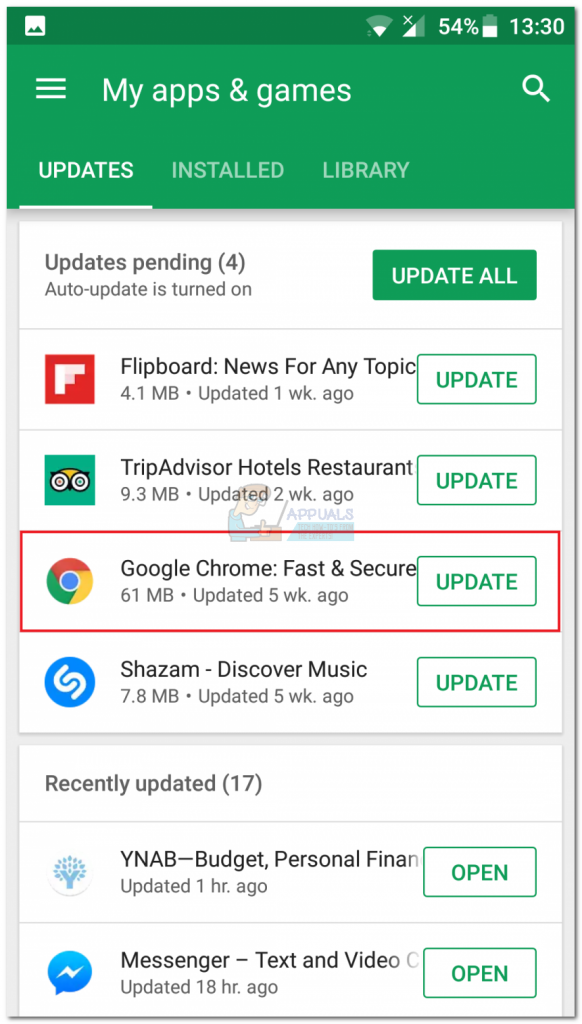
- Look for the Chrome entry and tap the Update button associated with it.
Method 2: Deleting your cache and cookies
Now that you updated to the latest version, let’s see if the issue will be resolved after clearing the browsing data. Depending on the device you’re using, the process is a little different.
PC users
- Open Chrome and access the action menu (three-dot icon) in the top-right corner.
- Go to More tools > Clear browsing data.
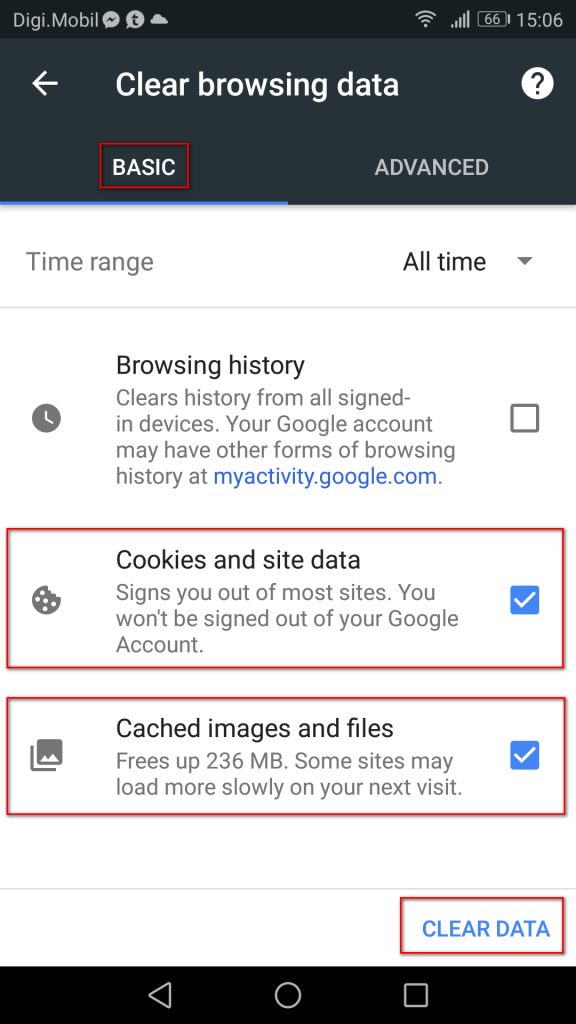
- Select the Basic tab and use the drop-down menu near Time range to select All time.
- Check the box next to Cookies and other site data and the one next to Cached images and files. Hit Clear Data to delete your Chrome’s cookies cached files.
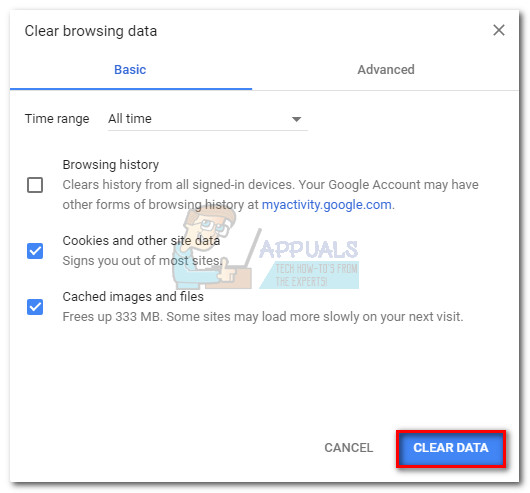
- Once the process is complete, restart Chrome and see if the issue is resolved.
Android users
- Launch Chrome on your Android device and tap the action menu (top-right) corner.
- Go to Settings and tap on Privacy.
- Scroll all the way down and tap on Clear Browsing Data.
- Select the Basic tab and set the Time Range to All-time using the drop-down menu. Check the boxes associated with Cookies and site data and Cached images and files. Then, hit Clear data to delete them.
Method 3: Disabling Chrome Extensions (PC only)
Chrome Extensions are known to cause the “Error loading media: File could not be played” error on Chrome. This is even more likely if you’re using extensions to protect your online surfing.
Luckily, there’s a quick way to find out if extensions are triggering the issue. Just open Chrome in Incognito Mode. To do this, click on the action menu (top-right corner) and select New Incognito window. Besides allowing you to browse more privately, Incognito Mode disables all your extensions by default (unless you allow them manually).
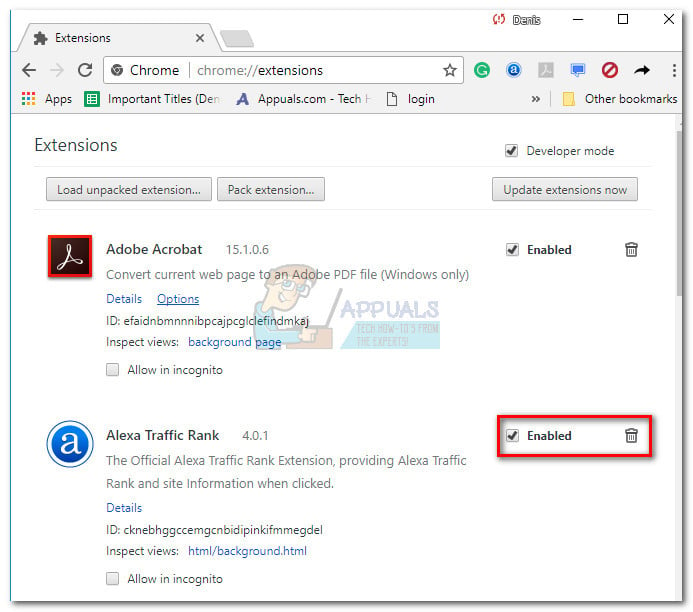
While in incognito mode, open the URL that is displaying the “Error loading media: File could not be played”. If the video displays just fine in Incognito Mode, there’s a high chance that an extension is interfering with the playback of the video. In this case, paste “chrome://extensions” in Chrome’s omnibar. This will take you to a page where you can oversee all your extensions. Use this page to systematically disable your extensions by unchecking the Enabled box. After each disabled extension, check if you’re able to play the video. Once you’ve identified the culprit, remove the extension by clicking the trash icon.
Method 4: Reset Chrome settings to default (PC only)
If you’ve come this far without a result, there’s one final thing you can do. While this will most likely remove any setting or extension that is causing the problem, it can also create some problems.
When you reset your Chrome settings, most of the settings will be changed to the default state including site data, cookies, extensions or themes. Only your custom fonts, bookmarks, and saved passwords will be preserved.
Here’s a quick guide to reset your Chrome browser settings to default:
- Open Chrome and click the action menu (three-dot icon) in the top-right corner.
- Go to Settings and click on Advanced to expand the drop-down menu.

- Scroll all the way down and to the Reset section and click on it. You’ll need to confirm again, then wait for Chrome to reinitialize.
Method 5: Disabling Hardware Acceleration
In some cases, the hardware acceleration feature of the Chrome browser has been known to cause issues with playing media online. Therefore, in this step, we will be disabling hardware acceleration from settings. For that:
- Open Chrome and launch a new tab.
- Click on the “Three dots” in the top right corner and select “Settings”.
- Scroll down and click on the “Advanced” dropdown.
- Under the “System” heading, click on the “Use Hardware Acceleration When Available” toggle to turn it off.

Clicking on the “Use Hardware Acceleration Feature When Available” toggle to turn it off - Check to see if the issue persists.
Once Chrome is back to the default state, the issue should be removed. If you’re still encountering the issue after following every method above, the problem is beyond your control and you’ll have to wait for the web administrator to fix it.