How to Fix Error Code 310 in Steam
Some Steam users are seeing the error code -310 when trying o access the Store or when trying to launch Steam VR. This problem is not specific to a particular Windows version since it’s reported to occur on Windows 7, Windows 8.1, and Windows 10.

After investigating this particular issue thoroughly, it turns out that there are several different causes that might end up causing this particular error code. Here’s a shortlist of potential culprits that might cause this problem:
- Corrupted built-in web browser cache – As it turns out, one of the most frequent instances that will produce this error is corruption among the built-in browser of Steam. If this scenario is applicable, you should be able to fix the problem by using the settings menu of Steam to clean the built-in cookie & cache.
- Corrupted 3rd party browser cache – If you’re facing this problem when trying to access Steam’s store via a 3rd party browser, you’ll be able to fix the problem by deleting the cache and cookies of your browser.
- Missing Steam VR Beta dependency – In case you’re seeing this error while trying to use SteamVR, chances are your Steam installation is missing a VR dependency that’s only installed if you’re part of the BETA program. In case this scenario is applicable, you should be able to fix the problem by opting into the SteamVR beta program.
- There’s a network-wide restriction that affects Steam – If you’re connected to a restricted network (school, work, hotel, or public network), you’re most likely seeing this error due to a restriction imposed by your network administrator. In this case, you might be able to bypass the restrictions by using a VPN app to make it seem like you’re accessing the Steam client from a different location.
- Problem with the built-in store – It’s also possible to encounter this problem when there’s an ongoing problem with the built-in Store component. In this case, you might be able to bypass the error code by using the web browser version o the Stire from a 3rd party browser.
- Inconsistent date & timezone – As it turns out, Steam might decide to reject your connection due to security reasons if your date & time doesn’t match the values respected by the server. If this scenario is applicable, you should be able to fix the problem by adjusting the time zone from the Windows menu.
Now that you know all the potential culprits, here are the instructions that will help you fix the issue:
Method 1: Cleaning the Web Browser cache in Steam
One of the more frequent culprits that are known to cause this problem is badly cached data by the built-in browser of Steam. If this scenario is applicable, you should be able to fix the problem by accessing the Steam Web Browser settings and deleting the browser cache and cookies in order to fix the problem.
This method was confirmed to be successful by a lot of affected users that were seeing the -310 error code when opening Steam’s Store.
If you’re seeing this error code due to corrupted cached data, follow the instructions below to clear your browser data from Steam’s menu:
- Start by opening Steam and sign-in with the same account that you’re encountering issues when opening Steam’s Store.
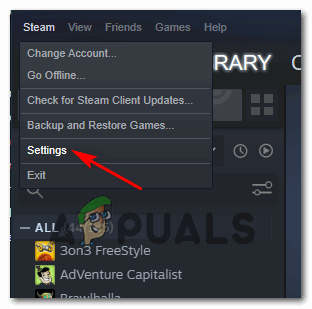
- Once you get to the main dashboard, go ahead and click on Steam from the ribbon bar at the top, then click on Settings from the context menu that just appeared.
Accessing Steam’s Settings Menu - Once you’re finally inside the Settings menu, go ahead and select Web Browser Cache from the vertical menu on the left.
- Next, move over to the right-hand side and click on Delete Browser Cache,
- After the web browser cache has been cleared, go ahead and click on Delete All Browser Cookies and click Ok to confirm the operation.

Clearing Steam’s web browser cache and cookies - After the operation is complete, reboot your computer and launch Steam once the next startup is complete and see if the problem is now fixed.
In case you’re still encountering the -310 error when opening the Store component or Steam VR, move down to the next potential fix below.
Method 2: Cleaning Steam’s Cookies & Cache from 3rd-party browser
In case you’re using the Steam store with a 3rd party browser, cleaning the built-in cookie cache (method above) will not make a difference since the corrupted cookies are stored by a different browser.
If this scenario looks like it could be applicable, you can fix the problem by performing a browser-wide cookie cleanup or by targeting only the cookies specific to Steam (it’s up to you).
But keep in mind that depending on the browser that you’re using, the instructions for cleaning your browser cookies and cache will be different. To make things easier for you, we’ve put together a guide that will show you how to clean your browser cache and cookies on the most popular browsers.
After you successfully manage to clean your browser cookies, open Steam again, and repeat the action that was previously causing the -310 error code and see if the problem is now fixed.
In case the same problem is still occurring, move down to the next potential fix below.
Method 3: Opt-in to Steam VR Beta
As it turns out, if you’re seeing this error while trying to use Steam VR or an associated component, chances are you are missing a key dependency that the action you’re trying to take requires.
Several affected users have reported that they managed to fix the issue by accessing the BETA tab in your Steam settings menu and enrolling in SteamVR Beta – This operation was confirmed to be successful for a lot of users that we’re encountering the -310 error when trying to use functionality that’s currently exclusive to BETA members.
If this scenario is applicable, you should be able to fix the problem by opting-in to SteamVR Beta using the Account tab of the Settings menu.
Here’s a quick guide on opting-in to SteamVR Beta:
- Open Steam and sign in with your account.
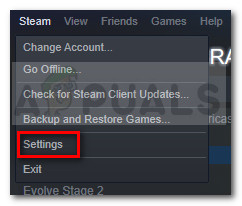
- Once you have successfully signed in, click on Steam from the ribbon bar at the top, then click on Settings from the context menu that just appeared.
Go to Steam and click on Settings - Once you’re inside the Settings menu of Steam, click on Account from the vertical menu on the left, then click on the Change button associated with Beta participation.
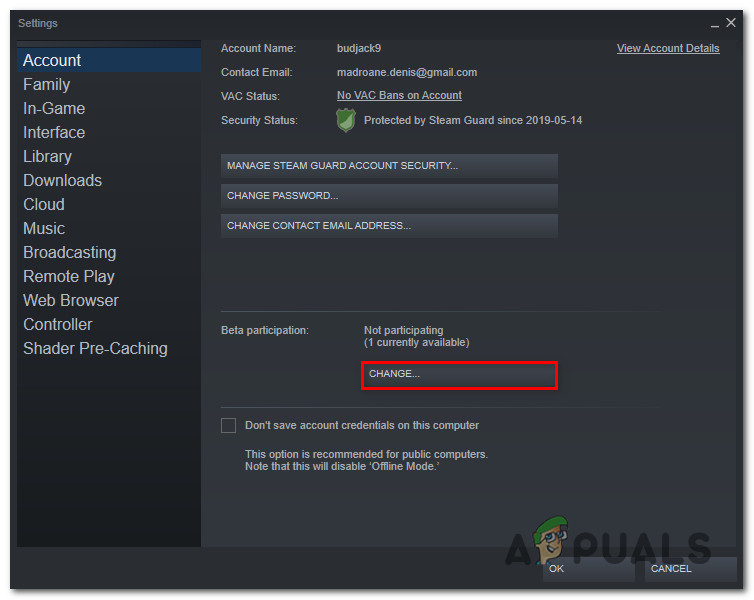
Accessing the beta participation menu - Next, expand the drop-down menu associated with Beta Partici[nation and select Beta – SteamVR Beta Update before saving the change.
- Click Ok to save the changes, then wait for the Steam client to download the Beta update before attempting to repeat the action that was previously causing the -310 error code.
In case the same problem is still appearing, move down to the next potential fix below.
Method 4: Using a VPN app
As it turns out, you can also expect to encounter thee -310 error code in instances where you’re currently connected to a filtered network that is effectively blocking connections belonging to Steam, Origin, Battle.net, and other gaming platforms like this.
This is typically enforced by network administrators on platforms school, work, hotel, or other public networks for reasons of protecting the limited available bandwidth.
If his scenario is applicable, you should be able to bypass the restriction by using a VPN client to make it seem like you’re accessing Steam from a different location than you actually are.
In case you don’t know which VPN client to use, we made a list of VPN clients which include a free plan:
Once you successfully manage to install and configure your VPN, open Steam again and repeat the action that was previously causing the problem to see if the issue is finally resolved.
In case the same -310 error code is still occurring, move down to the next potential fix below
Method 5: Using the Web version of the Steam Store
If none of the methods above have worked for you and you’re getting tired of troubleshooting different components, you’ll most likely be able to avoid the apparition of the -310 error code by accessing the Steam store directly from your browser instead of relying on the store equivalent that’s build-in into Steam.
Several affected users have confirmed that they finally managed to get around the error by visiting Steam on a 3rd party browser and buying / downloading the game from there. Doing this will force the desktop client of Steam to download the game.
If you want to give this workaround a try, follow the instructions below:
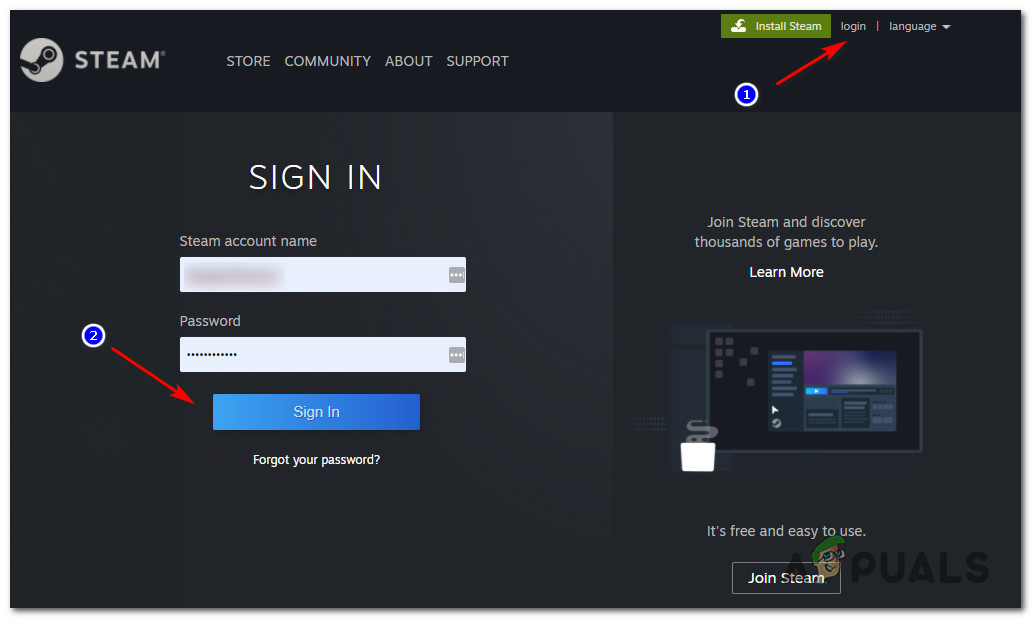
- Open your browser and navigate to the web Store version of Steam. Once inside, click on Login and insert your user credentials before clicking on the Sign In button.
Signing in with your Steam account inside the Web browser version of the Store - Once you have successfully signed into the web version of Steam, click on Play or Buy (depending on what you want to do).
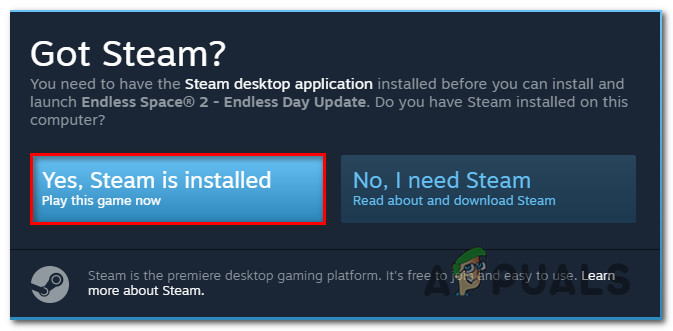
- When prompted by the next action pop-up, click on ‘Yes, I have Steam installed‘ in order to make the action you just undertook to reflect in your local Steam installation.
Reflecting the action on Steam - Wait until the game is installed or opened in Steam and see if you have successfully avoided the apparition of the -310 error.
In case the same problem is still not resolved, move down to the next potential fix below.
Method 6: Adjusting the Time Zone
According to a lot of affected users, you can also expect to see this error code the date & time your Steam client respects is different from what’s actually projected by your Windows installation. If this scenario is applicable, you should be able to fix the problem by modifying the current Date & Time values from your Windows Settings.
As it turns out, Steam might refuse the connection for security reasons if your date & time settings are outdated.
In case this scenario is applicable, follow the instructions below to ensure that your computer is using the correct date & time settings:
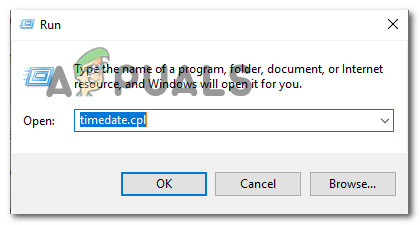
- Open up a Run dialog box by pressing Windows key + R. Next, type ‘timedate.cpl‘ and press Enter to open up the Date and Time window.
Accessing the Time & Date panel via a Run box - Once you’re inside the Date & Time window, select the Date & Time tab and click on Change date and time.
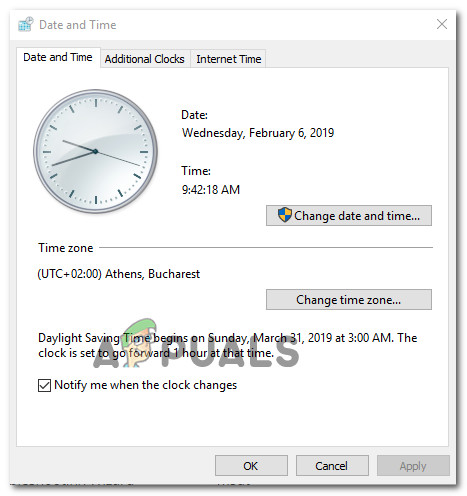
Setting the correct date & time - When prompted by the UAC (User Account Control) window, click on Yes to grant admin access.
- Inside the Date and Time Settings, use the calendar under Date to set the correct date, then use the time box on the left to do the same thing.
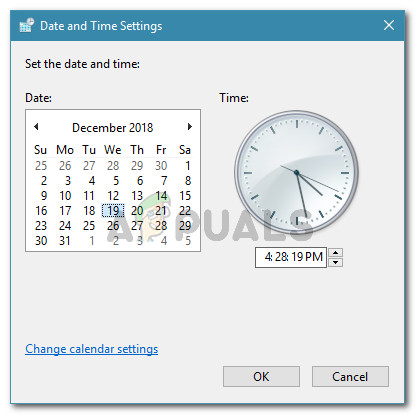
Modifying Time & date - Once both values have been adjusted correctly, save the changes, and restart your computer to see if the issue is fixed at the next startup.