How to Fix Error Code: 0x80072af9 in Windows?
The 0x80072af9 error is typically encountered when a Windows Update fails to install. This particular error hex code signals that “No such host is known”. Most affected users are prevented to update to a superior Windows build because a critical update is failing to install with the 0x80072af9 error code.
However, this error is also reported to occur with feature updates, quality updates and also Microsoft Office updates.
What causes the 0x80072af9 error
After investigating the issue and looking at various user reports, we managed to create a curated list of culprits that are responsible for triggering the 0x80072af9 error:
- Connection interruption between your machine and the WU service – This can happen due to a server problem, network connection failure or a 3rd party interference.
- Tablet mode is turned ON – Apparently, WU tends to malfunction if Tablet Mode is enabled when an update is installing.
- Third party interference – Some external security suites (especially 3rd party firewalls) are overprotective with the connections that they allow to get through. Several 3rd party firewalls are known to create problems for the WU component.
- Broken system entries – System file corruption can also cause the 0x80072af9 error. A refresh or a repair install is usually effective in resolving this particular problem.
How to fix the 0x80072af9 error
If you are trying to install updates via WU and they’re failing with the 0x80072af9 error, this article will help you with some troubleshooting steps. Below you have a curated list of methods that other users have used to resolve the issue and install the failing updates.
Since the methods are ordered by efficiency and simplicity, follow them in order to achieve the best results. Let’s begin!
Method 1: Using the Windows Update troubleshooter
Before you start following one of the more technical methods prevented below, let’s burn through the simple stuff first.
A couple of users have reported that the issue was fixed after they used the built-in troubleshooter to apply repair strategies for Windows Update. This built-in utility will scan WU for any inconsistencies and apply the repair methods capable of resolving the issue automatically.
Here’s a quick guide on using the Windows Update troubleshooter to resolve the 0x80072af9 error:
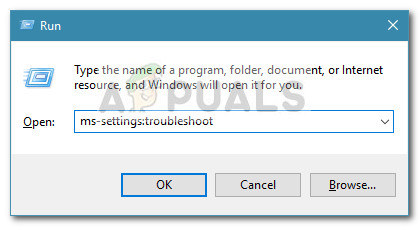
- Press Windows key + R to open up a new Run command. Then, type “ms-settings:troubleshoot” and hit Enter to open the Troubleshooting tab of the Settings app.
- In the Troubleshooting tab, scroll down to the Get up and running section, select Windows Update and click on Run the troubleshooter.
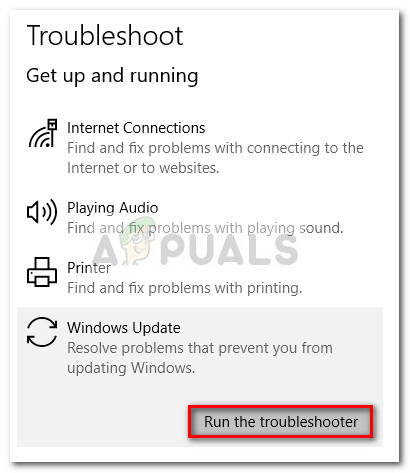
- Wait until the initial scan is complete, then click on Apply this fix if a viable repair strategy is identified.
- Once the repair strategy is applied, close the troubleshooter and restart your computer. At the next startup, try to install the pending update again and see if it installs correctly.
If you’re still seeing the 0x80072af9 error, continue down with the next method below.
Method 2: Using the Windows Update MiniTool
Some users that received the 0x80072af9 error when trying to install Office updates have managed to circumvent the issue by using a 3rd party tool. Windows Update MiniTool (WUMT) was supposedly able to install updates that would normally fail when installing via WU (Windows Update).
Note: This method is only confirmed to work with Office updates. You can use it to try and install a failing hotfix, but there’s no confirmation that it’s going to work.
Follow the guide down below to download the Windows Update MiniTool and use it to install any update that is failing with the 0x80072af9 error:
- Visit this link (here) and click the Download button associated with the Windows Update MiniTool freeware.
- Extract the WUMT archive with a decompression utility like WinRar, WinZip or 7zip.

- Double-click on the executable that has the same OS architecture as your system.
- Once the Windows Update MiniTool is opened, click on the Check for Updates icon to commence the scan.
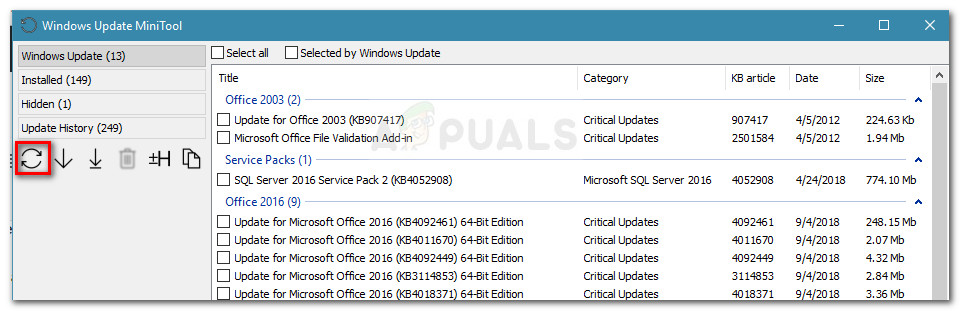 Note: Keep in mind that the Windows Update MiniTool is exponentially slower than the built-in WU. Be patient and don’t close the WUMT window until the search results are returned.
 - Select the update that you want to apply by checking the icon related to it and press the download and install icon.

- The utility will now download the update and install it automatically. Be patient and avoid closing the window until the process is complete.
- You can keep an eye on the bottom section for updates on the status of the update. If the update is installed successfully, restart your computer.
 If the update is still failing with the 0x80072af9 error, continue with the next method below.
Method 3: Install the update in Tablet Mode
Some users have reported that they were finally able to install the pending update without the 0x80072af9 error by enabling Tablet Mode. This might seem like a weird fix, but a lot of users have confirmed that this really works.
Windows Update (WU) is known to malfunction if the user makes the switch to Tablet Mode while an update is installing. However, with this particular issue, Tablet Mode is a way to circumvent the issue and force the update to install.
Here’s a quick guide on enabling Tablet Mode and installing the missing update:
- Click on the notification bar (bottom-right) corner and then click on Tablet Mode.

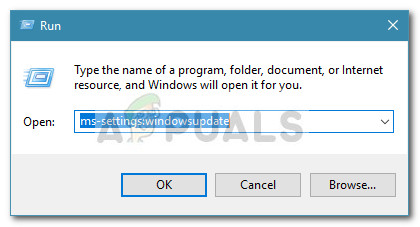
- With Tablet Mode enabled, press Windows key + R to open up a Run window. Then, type “ms-settings:windowsupdate” and press Enter to open the Windows Update menu.
- Click the Check for updates button and follow the on-screen prompts to install the update that was previously failing.
If the update fails with the same error message, disable Tablet Mode and continue with the next method below.
Method 4: Uninstall 3-rd party security suite
If you’re using an external security solution, it might be responsible for the 0x80072af9. Several users have reported that in their case the issue was only resolved after they uninstalled their 3rd party firewall.
This makes sense since WU has a long and painful history with overprotective 3rd party firewalls. Unfortunately, you can’t test if the firewall is to blame by disabling the real-time protection since the rules will remain enforced.
To see whether your 3rd party is causing the interference, uninstall the security suite completely and reboot your computer. At the next startup, attempt to install the pending update again and see if the issue has been resolved.
If the issue is still not resolved, continue down with the next method below.
Method 5: Perform a repair install
If you’ve come this far without a result, it’s almost certain that the issue caused by system file corruption. Since other users have reported standard methods like SFC or DISM scans to be largely ineffective, we recommend that you perform a Repair install and see whether it resolves the issue.
A Repair install will allow you to keep your personal files and applications. This procedure will only touch Windows system files and replace them with fresh copies. To do a Repair install, please follow our complete guide (here).
If the procedure doesn’t resolve the issue, move down to the final method.
Method 6: Refresh your PC
If the first four methods didn’t allow you to fix or at least circumvent the 0x80072af9 error, let’s try performing a PC refresh.
Users in a similar situation have managed to fix the issue entirely by performing a PC refresh. This procedure will not delete any of your personal files or change any settings. However, you will lose any third party applications that you installed.
Luckily, you can easily keep track of what was removed because Windows puts a list of all removed applications on your desktop once the procedure is complete. You can this list to reinstall every removed item.
If you decide to perform a refresh, follow the steps down below:
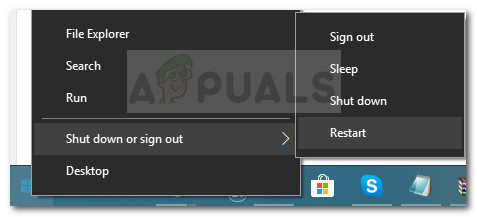
- Hold down the Shift key while right-clicking on the Start icon. From the next menu, select Shutdown or sign out, then click on Restart. Remember to keep the Shift key pressed throughout this entire time.
- The next startup will take you to the WinRE Repair/Recovery Environment. Here, you can select Troubleshoot and then click on Refresh PC.
- Once the procedure is complete, your machine will restart and the issue should be resolved.


