Fix: Error 633 Modem (or other connecting device) is already in use
There is a pretty well-documented network problem with Windows computers which causes users to see an error message containing error code 633 whenever they try to connect to the internet using a modem, Wi-Fi or even a hard-wired Ethernet connection. Reports of this issue go way back to the days of Windows Vista, and the issue has lived through the numerous versions of the Windows Operating System that have been released since, now even affecting Windows 10 users.
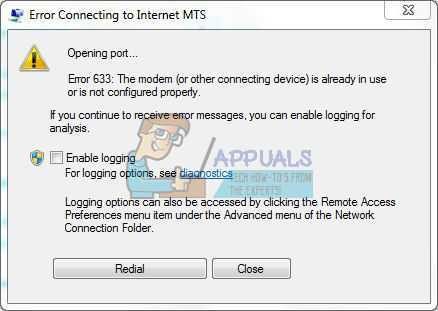
The error message that users affected by this issue see when trying to connect to the internet reads something along the lines of:
“Error 633: The modem (or other connecting device) is already in use or is not configured properly”
In many cases, this issue arises following an occurrence that changes the affected computer’s settings and preferences (such as a Windows update or upgrade). There are quite a few different causes of this problem, with the most common ones being an issue with the drivers of the device being used to connect to the internet or the same TCP port that the device is trying to connect to the internet through being used by another program or device.
If you are experiencing this problem, the first thing you should do is unplug or turn off the internet device you are using, restart your computer, wait for your computer to boot up, plug in or turn on the internet device and try to connect to the internet to see whether or not the problem persists. If the problem persists, the following are the most effective solutions that you can use to try and fix it:
Solution 1: Install any and all irrelevant internet device programs
Many internet modems or other internet devices come with some kind of software that you are required to install on your computer. If you have any such programs or applications installed on your computer (apart from any that are required by the internet modem or device you are currently using), you need to uninstall them. To do so, simply:
- Open the Start Menu.
- Search for “add or remove programs”.
- Click on the search result titled Add or remove programs.
- Locate the programs in question and, one by one, right-click on them, click on Uninstall and go through the uninstallation wizard to uninstall
Once done, restart your computer and check to see whether or not the issue has been resolved.
Solution 2: Disable and then re-enable your network connection
- Right-click on the Network icon in your computer’s notification area, and click on Open Network and Sharing Center in the resulting context menu.
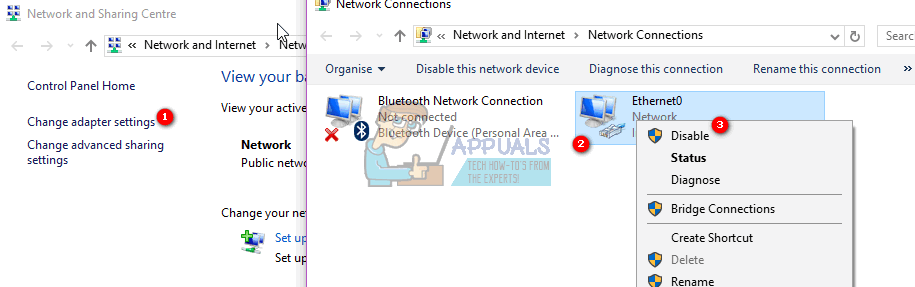
- Click on Change adapter settings in the left pane of the Network and Sharing Center.
- Locate the connection you are using to try and access the internet, right-click on it and click on Disable.
- Once the connection has been disabled, wait for a few minutes, and then right-click on it and click on Enable.
- Wait for the connection to be enabled. Once the connection has been enabled, try accessing the internet and see if you can successfully do so.
Solution 3: Update your network adapter’s drivers
- Press the Windows Logo key + R to open a Run
- Type devmgmt.msc into the Run dialog and press Enter to launch the Device Manager.
- In the Device Manager, double-click on the Network adapters section to expand it.
- Locate the network adapter that your computer is currently using under the Network adapters section, right-click on it and click on Update Driver Software….
- Click on Search automatically for updated driver software, and wait for Windows to conduct the search.
If your computer finds updated drivers for your network adapter, it will automatically download and install them. Once that’s done, you can try accessing the internet and see whether or not the problem has been fixed.
Solution 4: Uninstall (and then reinstall) your network adapter
- Press the Windows Logo key + R to open a Run
- Type devmgmt.msc into the Run dialog and press Enter to launch the Device Manager.
- In the Device Manager, double-click on the Network adapters section to expand it.
- Locate the network adapter that your computer is currently using under the Network adapters section, right-click on it and click on Uninstall.
- Enable the Delete the driver software for this device option by checking the checkbox beside it, and then click on OK.
- Wait for the network adapter to be completely uninstalled.
- Once the network adapter has been uninstalled, click on Action > Scan for hardware changes. When you do so, Windows will automatically reinstall the network adapter and its drivers.
- Once the network adapter and its drivers have been reinstalled, restart the computer and check to see whether or not the issue still persists once it boots up.
Solution 5: Explicitly reserve the TCP port that your internet device uses
If you are experiencing this problem because the TCP port that your internet device is trying to use to connect you to the internet is being used by another device or program, you can simply reserve the specific TCP port for your internet device, prohibiting anything else from using it. To do so, you need to:
- Press the Windows Logo key + R to open a Run
- Type regedit into the Run dialog and press Enter to launch the Registry Editor.
- In the left pane of the Registry Editor, navigate to the following directory:
HKEY_LOCAL_MACHINE > SYSTEM > CurrentControlSet > services > Tcpip
- In the left pane of the Registry Editor, click on the Parameters sub-key found under the Tcpip registry key to have its contents displayed in the right pane.
- In the right pane of the Registry Editor, right-click on an empty space, hover over New and click on Multi-String Value.
- Name the newly created Multi-String Value “ReservedPorts” (without the quotation marks), and press Enter.
- Double-click on the ReservedPorts value to modify
- Replace whatever is in the value’s Value data field with 1723-1723, and click on OK.
- Close the Registry Editor and restart your computer.

As soon as the computer boots up, check to see whether or not the fix worked.
Solution 6: Determine what process is using the TCP port in question and end it
- Open the Start Menu.
- Search for “cmd”.
- Right-click on the search result titled cmd and click on Run as administrator to launch an elevated Command Prompt that has administrative privileges.
- Type netstat –aon into the elevated Command Prompt and press Enter. If the results are large, type netstat -an > C:\nets.txt and Press ENTER. Then open the nets.txt file from C:\ to view the data.
- Go through the output that is displayed once the command has been executed, and identify the process ID (PID) for the program that is using TCP port 1723. If you don’t find any such program, this solution won’t work for you, so simply try another one.
- Type the following into the elevated Command Prompt, replacing PID with the process ID of the program that is using TCP port 1723 on your computer, and press Enter:
taskkill /PID PID /F
- Once the command has been executed, the offending program will be force closed and TCP port 1723 will have been freed up. At this point, close the elevated Command Prompt and restart your computer.
When the computer boots up, the offending program should start using a TCP port other than 1723, leaving TCP port 1723 open for your internet device and effectively fixing this problem for you and restoring your access to the internet.
Solution 7: Perform a System Restore
If all else fails, you still have one last resort – performing a System Restore to a point in time when your computer was not affected by this issue. For this to work, you are going to need a system restore point that was created before your computer fell victim to this issue, but if you have that you should be golden. You should also note that performing a system restore is going to automatically get rid of any programs/updates you installed or data you saved on your computer after the creation of the system restore point you are restoring your computer to. If you do not know how to perform a System Restore on a Windows computer, consult the Restoring the System using System Restore Point section of this guide.
Can I add a number 7 ?
This worked for me (where 1-6 didn’t)
https://answers.microsoft.com/en-us/windows/forum/windows_10-networking/dial-up-error-633-wbuild-15063-1703-creators-pro/2c5b280e-e246-4105-b8e6-58e413d2668e